Imagine you’re waiting to get over your Windows update so that you can sit for your presentation. The update has almost reached its final point when suddenly you get an error message, ‘Windows 10 couldn’t be installed 0XC1900101 – 0x20017’.
Fix this error by removing one module of extra RAM and trying to install Windows 10 again, and also remove the wireless adapter from your PC.

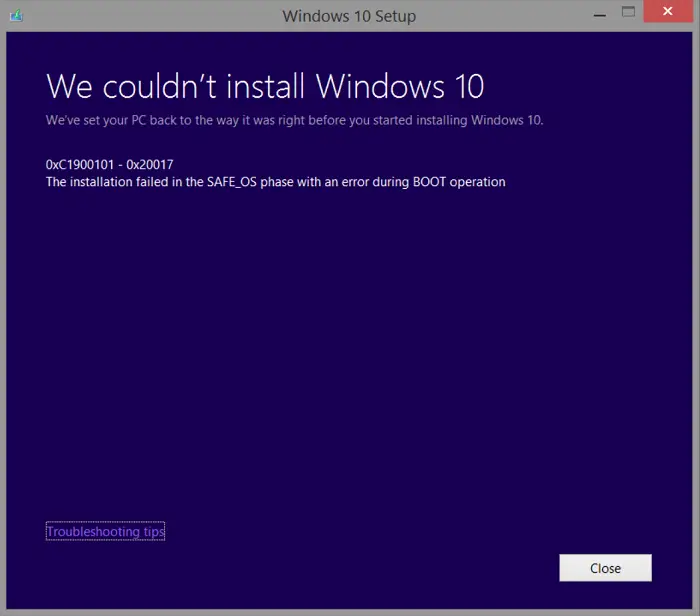
Reasons Behind the Error “C1900101 – 0X20017” The main culprit behind this error is known to be the incorrect BIOS setting. The reason causing this error in some cases might be an external USB device connected to the PC at the time of Windows 10 up-gradation. It is pretty annoying. But do not worry; we have a complete guide to help you know about Windows 10 error 0xc1900101 – 0x20017 and ways to fix it.
What Is Windows 10 Error 0xc1900101-20017?
The error 0xc1900101 – 0x20017 is mainly an issue with the device drivers. This error may occur while updating Windows to its latest version. When the installation process remains incomplete, this message pops up. One “unique” feature of the Windows 10 update error c1900101-20017 occurs when the installation process reaches 99%. Though it is not a crucial issue, many customers have talked about facing this issue.
Causes Of The Error 0xC1900101-0x20017
The installation fails when the OS cannot migrate the driver because it causes an illegal operation during an update. This results in the operating system being rolled back. 0x80070643 is an error that many users of Windows computers have reported. 
Typically, drivers or disk encryption software that isn’t from Microsoft can cause SafeOS boot failure. The system verifies that the drivers are working correctly during the SafeOS phase. An insecure operation or missing signatures will have an impact on the stability of the system. So, it is crucial to fix the problem of the Windows 10 update error 0xC1900101-0x20017.
Fix: This Operation Has Been Cancelled Due To Restrictions In Effect On This Computer
Ways To Resolve 0xc1900101 – 0x20017
If you also face this same update error 0xc1900101 – 0x20017, here are some methods to help you resolve it.
Removing Virus Protection Applications
Sometimes anti-virus applications might cause the error 0xc1900101-0x20017 as they tend to interrupt the installation process. Consider reinstalling them till your newest version of Windows is installed.
- Go to the Control Panel.
- Next, select Program, then uninstall a program
- Now select the application to be deleted
- Uninstall by right-clicking on it
- Some guidelines will appear. Follow them
- Restart your computer/laptop and try installing Windows.
See Also: Fix: It Looks Like You Started An Upgrade And Booted From Installation Media
Remove RAM
0xc1900101 0x20017 might be caused due to the presence of extra RAM. So removing one RAM might be helpful.
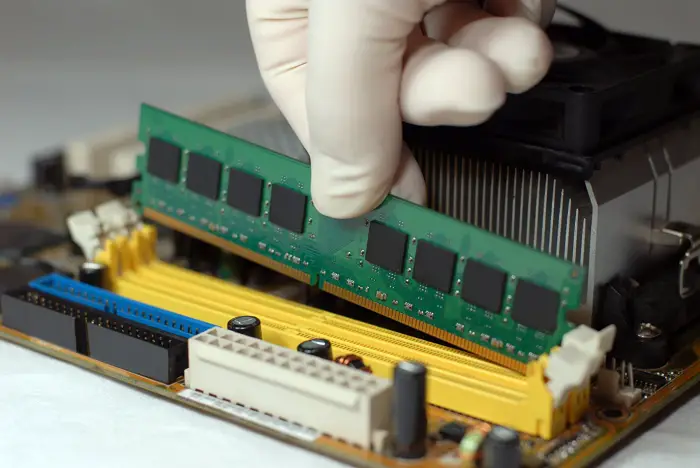
Retry installing Windows to see if the error occurs again. This is a straightforward process and should resolve the issue.
Make Sure Disk Space Is Available
If your computer/laptop does not have sufficient disk storage, then you might face this error. Some criteria are:
- Make sure approx. 20GB free space is available if you are installing the Windows32-bit version
- Make sure approx. 32GB of free space is open if you are installing Windows 64-bit version
In case the criteria don’t match your PC, try performing a Disk Cleanup:
- In the search button in Taskbar, search for Disk CleanupChoose the drive used for installing Windows.
- Choose the fields that need to be removed and select Clean up system files
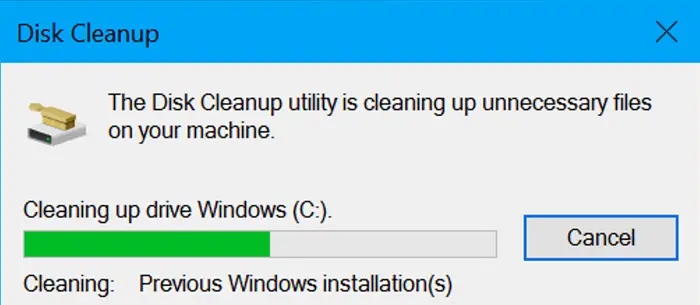
This step might help in resolving 0xc1900101 – 0x20017
Uninstalling The Broadcom Bluetooth
Windows 10 generally doesn’t support the Broadcom drivers. If you use one of those, consider removing them before installing the newest version of Windows. Follow these steps:
- Go to Device Manager.
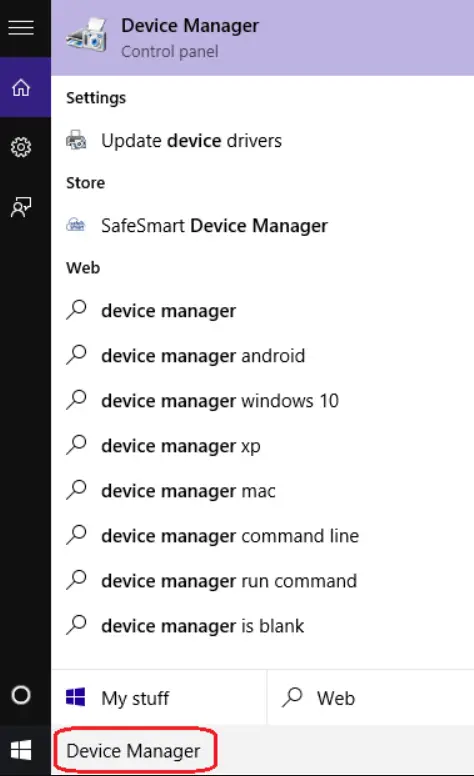
- 2. Locate the driver named “Bluetooth.”
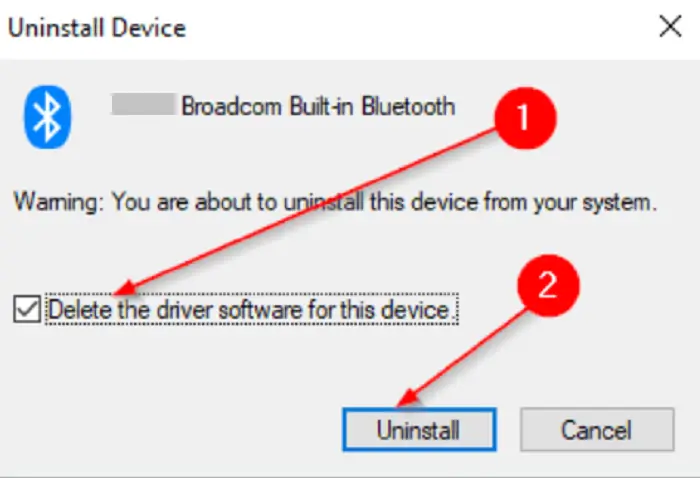 Right-click on that driver and select Uninstall the device
Disabling Wireless From BIOS
If the above method doesn’t work, try disabling wireless from BIOS. Let’s take a look at the steps:
- Restart your computer/laptop.
- While the boot sequence is going on, continue to press F2 or Del button to enter into BIOS
- When you enter BIOS, locate Advanced Tab.
- Choose the wireless option.
- Internal Bluetooth and Internal WLAN will be available in the next step.
- Press enter and choose Disable from the number of options that appear
- To exit BIOS, press Esc. Make sure to save the changes you have made.
Note that this step might slightly differ depending on the version of BIOS that you are using.
See Also: How To Resolve Can’t Create A HomeGroup On Windows 10
Creating a Windows Restore Point
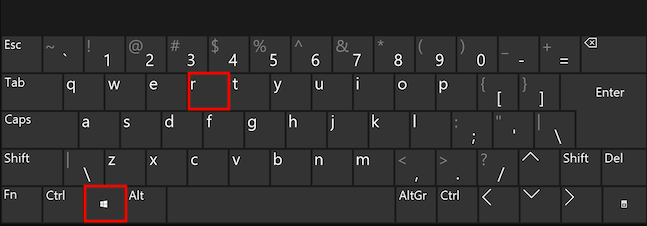
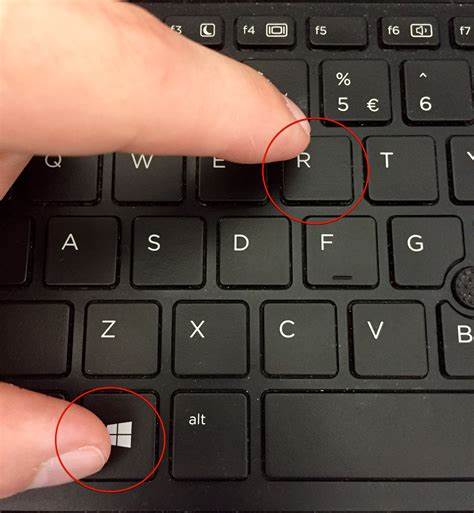
- Press Windows + R keys together.
 A dialog box appears. Type: SystemPropertiesProtection.exe
 - Click on Create and write the name of the restore pointConfirm the process by pressing OK.
See also: How to Reinstall Windows 10 Without Losing Data
Updating The BIOS
This error might occur when the BIOS is not updated to its latest version. In that case, updating the BIOS might be helpful. Make you download the BIOS that is compatible with your motherboard.
Note that this method is a bit risky to do alone. It will be better to use the other methods first and then choose this if nothing else helps.
Changing Your Registry
The 0xc1900101-0x20017 error might occur due to the registry. Changing the registry might be a help in this case.
- Press Windows + R key. A dialog box appears. Changing the registry can sometimes be risky, so export it. Click on File and then export.
- Under export range, select all and enter the File. Store the File and save.
- This will make it for you to go back to the registry’s initial state in case of trouble.
- In the next step, go to HKEY_LOCAL_MACHINE\SOFTWARE\Microsoft\WindowsSelfHost\Applicability.
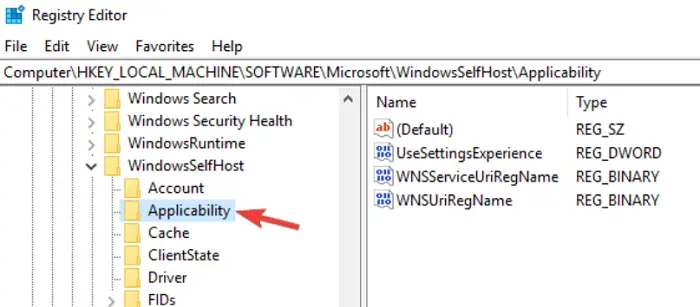
- Here, it would help if you changed some values:
Ring = WIF
RingBackup = WIS or Enabled
EnablePreviewBuilds = 2
BranchName = TH1
UserPreferredBranchName = TH1
Next, close the registry window and restart your PC
FAQs
What does error code 0xc1900101 mean?
The 0xc1900101 error means that the system files are either corrupted or broken. This error code alerts you to revert your PC to a more stable stage before the updates are done.
Why does my Windows 10 installation fail?
A file might have an improper extension, and changing it might resolve the problem. Problems with Boot Manager might also be one of the causes. Try booting in clean boot and running the Installation.
Conclusion
The methods mentioned in this article will be an effective way to solve the error 0xc1900101 – 0x20017. Next time you see ‘Windows 10 couldn’t be installed c1900101-20017’, we hope this article will help you resolve the issue.

Gravit Sinha: Founder of ValidEdge, a problem-solving website, driven by his lifelong passion for fixing issues.