Adobe recently implemented the Adobe genuine software integrity service more rigorously. This service aims to reduce copyright infringement by regularly checking the authenticity of Adobe programs. Therefore, it periodically validates the pre-installed Adobe apps, detects malicious apps, and notifies the offender with the following message: “I’m not using real Adobe software” or a message with a similar tone.
Open Task Manager and find Adobe Genuine Software Integrity Service. Right-click it and open the AdobeGCIClient file. Return to the Task Manager window and right-click it and click the End Task button to delete Adobe.

This repetitive error message is very frustrating to the user, and the next section will explain how to get rid of Adobe’s genuine software integrity service. Read on to disable it on Windows 10 or Mac OS altogether.
How do I disable the Adobe Genuine Software Integrity Service on Windows 10?
There are several ways to disable the Adobe Genuine Software Integrity Service on Windows operating systems. Find them below:
Method 1: Remove AGS Health Service From Service
- You may click the magnifying glass icon next to the Windows start icon, or the window icon may open the search bar (depending on your OS version). Type “Services” in the search box.
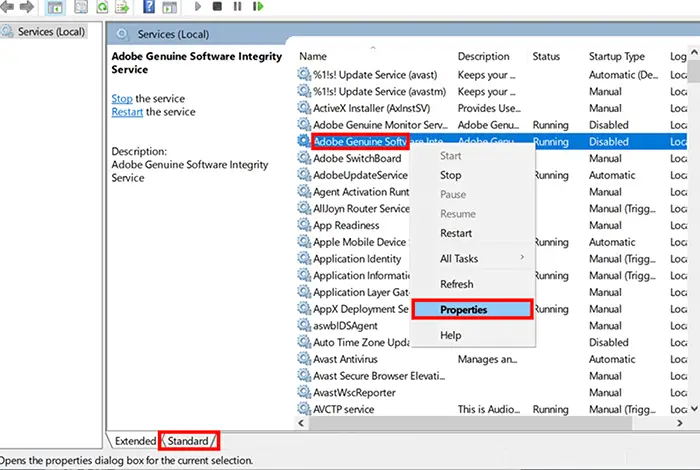
- A window appears showing all available services. Then click the Standard tab at the bottom of the screen.

- An alphabetical list of default services is displayed. Look for “Adobe OriginalSoftwareIntegrityService” in the list. Right-click to open the context menu. Then click Properties in the menu list.
 Go to the General section and click Disable under the Startup Type field. A pop-up window will appear. Click Apply> OK. Restart your system.
Method 2: Disable Adobe Services Using Task Manager
- Start Task Manager in the search bar, and type task manager. Otherwise, you can press Ctrl + Alt + Del to open it.
- Click the Processes tab and locate the Adobe Genuine Software Integrity Service process or .exe file.
- Right-click the file and select Open File Location from the menu. A folder named Adobe GCI Client containing this service will open.
- Right-click on the Adobe Genuine Software Integrity Service process. Leave this folder open and return it to the Task Manager.
- Click Finish Task and delete the open AdobeGCIClient folder.
Restart your computer and see if the problem is resolved. If not, the folder was recreated after the system rebooted. In this case, you must rename the folder and not remove the Adobe Genuine Software Integrity Service.
See Also: How To Change Priority In Task Manager- Windows 10
Method 3: Remove The Adobe Genuine Software Integrity Service Using a Command Prompt
If the above method does not work on your system, try the following steps to disable it.
- Firstly, Go to the Windows search box at the bottom left of the screen.
- Secondly, When the command prompt search results are displayed, type cmd and click Run as administrator.
- Enter the following command in the command console. scdeleteAGSService
- Press Enter.
Enter the Command in the Prompt: Sc delete AAMUpdater
This will disable the Adobe Updater launch utility.
Method 4: Update The Written Account to Get Rid of AGS Integrity Service in Windows 10
As a further step, you’ll update your computer’s written account to verify that Adobe’s basic software, Integrity Service, is disabled. Steps to be followed:
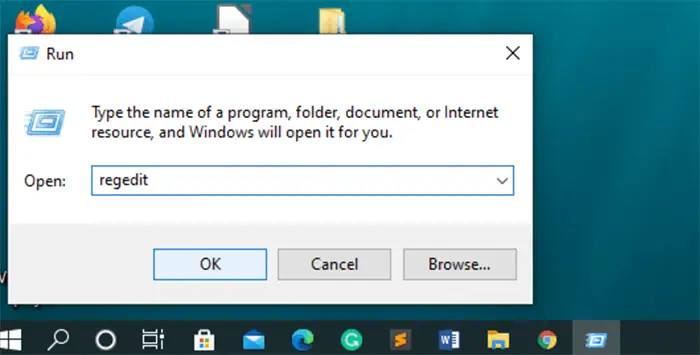
- Firstly, Open it by typewriting. Run within the begin menu search box.
- Secondly, Type regedit within the Run Prompt search box and click OK.
- The written account Editor window opens on the screen. Make a copy of the registered account before creating any changes.
- Then choose the HKEY_CURRENT_USER software package MSWindowsCurrentVersion.
- Then right-click on the UpdateManager possibility.
- Click the Delete button.
After finishing the top steps, renew your system and see if the matter is resolved.
How to Disable Adobe Genuine Software Integrity Service Mac 2024?
Follow the steps to disable ‘sAdobe genuine software integrity service on Mac.
- Firstly, Open the “Finder” app. It is at the left of the screen.
- Secondly, Click Run.
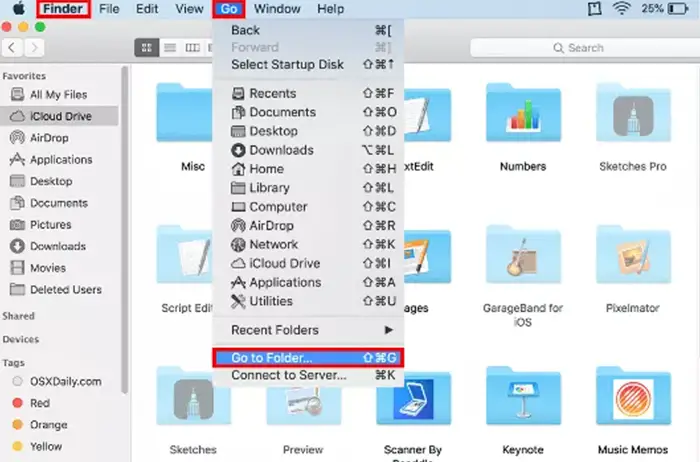
- Now click on that, choose the Visit Folder possibility from the menu, and click on Library.
- You need to open the Library folder. However, it should not be found on the left aspect within the latest updated Mac version. During this case, you would like to open the Finder and sort ~ / Library on the Go tab.
- Click Application Support and choose Adobe> Adobe GCC consumer.
- Delete the AdobeGCCClient folder. Move it to the Trash and delete it from there.
Note: If you can not notice the AdobeGCCClient folder, it implies that you do not have permission to access it. During this case, follow the choice procedure below.
- First, click the correct compartment folder within the folder you wish to delete, click “Get information,” and click “Share and Permission” to alter the permission. Increase.”.
- Once the folder permissions are ever-changing, notice it on the AdobeGCC tab on the Finder tab. Currently, open the AdobgcCsservice folder and remove all that is in enclose mode but don’t delete the folder.
How to Remove Adobe Genuine Software Verification Failure Mac?
Follow the steps to clear and remove ‘sAdobe genuine software verification failure, Mac.
Firstly, you will see the “Go” option in the top navigation bar. Pick it and click the “Go to Folder” option. Pick Application Support>Adobe>AdobeGCCClient from the folders that appear. Delete the “AdobeGCCClient” folder and erase it from the trash.
See Also: Fix: Mac Won’t Start In Safe Mode? [Complete Guide]
FAQs
What is Adobe's Genuine Software Integrity Service?
Adobe's genuine software integrity service is a building block. Sometimes, it causes sudden spikes in your PC to verify the legitimacy of Adobe software. It ensures that you are using the up-to-date Adobe products.
How to disable Adobe's genuine software integrity service?
In general, you can disable Adobe Genuine software integrity service by doing the following: To begin, open the task manager by pressing Ctrl+Shift+Esc. Then look for ‘Adobe Genuine software integrity service’ in the list of cycles. Right-click on it and choose End task. Finally, you have it disabled.
Will disabling Adobe's genuine software integrity service influence my Adobe software?
No, disabling Adobe's genuine software integrity service does not affect the utility of your software. However, it's important to remember that using disabled software is illegal.
What are the expected outcomes of disabling Adobe's Genuine software integrity service?
Disabling the software integrity service may provide temporary relief from its warnings. It is critical to understand that doing so is against Adobe's support. Adobe may restrict access to specific highlights if it detects that you use disabled software.
Conclusion
In conclusion, you’ve got the Adobe Simple software integrity service remover method with the guide on top. You’ll receive recurrent notifications from this service because you are an exploitation associate of a previous or non-genuine Adobe app.
Following the above steps correctly, not see the pop-up error message “Your Adobe software package isn’t real.” Also, don’t install the app from suspicious or insecure websites. The system could also be in danger.
You can always find me playing the piano or playing FIFA when I’m not binge-watching TV Series with pizzas. Fountainhead of TechWhoop.