Services are a critical part of Windows, but some service-linked issues can arise anytime! Failing to connect to Windows service is one of them!! The preeminent reason for this error is when Windows is inadequate to start or connect to desired Windows services to perform system operations.
The Windows Event Log service, Windows font cache service, System Event Notification service, or any different service can generate this error of Failed to connect to Windows service. A clean boot can also help to check if other Microsoft services cause the issue. You can’t determine the service was generating this issue, so troubleshooting will surely bank on trying to solve the possible issues.

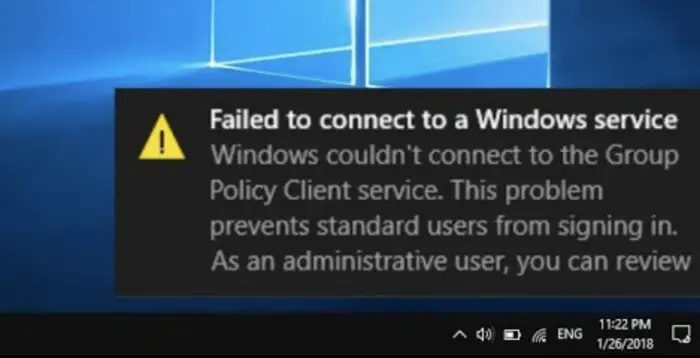
Users have described the error message in their system, which occurs in the notification panel that displays Failed to connect to a Windows service. The possible cause for this error is when a system crashes after the process of rebooting during the time of Windows updates. After the crash, the system restarts, an unexpected shutdown occurs, and the message Failed to connect to Windows service appears.
Causes & Prevention Of Windows Failed To Connect To Windows Service
The “Failed to Connect to Windows Service” error message indicates a problem connecting to a Windows service, a program, or a process running in the background on a Windows operating system.
This can prevent the service from functioning properly and other programs or features from working correctly.
The specific cause of the error message can vary, but common causes include issues with the Windows Update service, problems with the network connection, or issues with the user account. Additionally, malware or corrupted system files may also cause this error.
You can take several steps to prevent the “Failed to Connect to Windows Service” error message from appearing: Keep your Windows operating system updated by regularly checking for and installing updates. This can help prevent issues with the Windows Update service, which can cause the error message to appear.
- If there are any issues, check your router and modem and reset them if necessary.
- Keep your computer clean by regularly running anti-malware scans to detect and remove any malware or viruses that may be causing the error message to appear.
- Use sound and updated antivirus software.
- Regularly perform disk cleanup, disk check, and disk error checking.
- Create a system restore point and back up your important files regularly; this will help restore your system to a previous working state if the error occurs.
- Check your user account and ensure you have the necessary permissions to access the service or feature causing the error message.
By following these tips, you can help prevent the “Failed to Connect to Windows Service” error message from appearing and ensure that your Windows operating system and all of its features are working correctly.
See Also: {Solved} 4 Ways to Fix Steam Content File Locked Error
How To Fix Failed To Connect To Windows Service
If you are going through this issue of Failed to connect to Windows service, then you should first restore and repair Windows service components, and if it doesn’t work, then follow the below given other options to solve this issue.
Create registry values and registry keys manually
Before doing this process of registry configuration, always remember to back up your data and then follow these steps: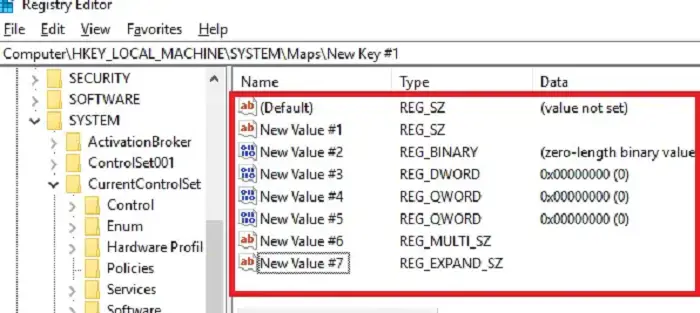
1. First, press the Windows logo and type “regedit.” On “regedit,” right-click and select “Run as administrator.” Then select “Yes” to confirm.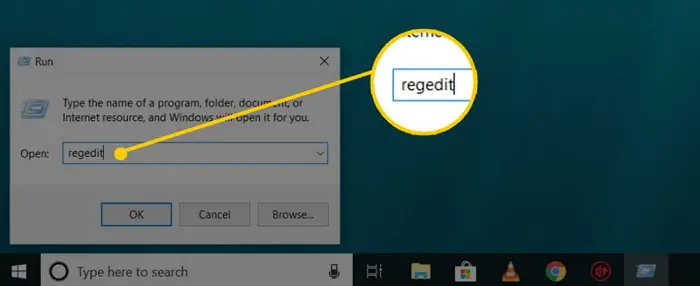
2. Next, choose “File” and type the file name, then select “save.”
3. Navigate to the location of your file, and on the right side of it, you will see different types of data. Choose “netsvcs” from that data. 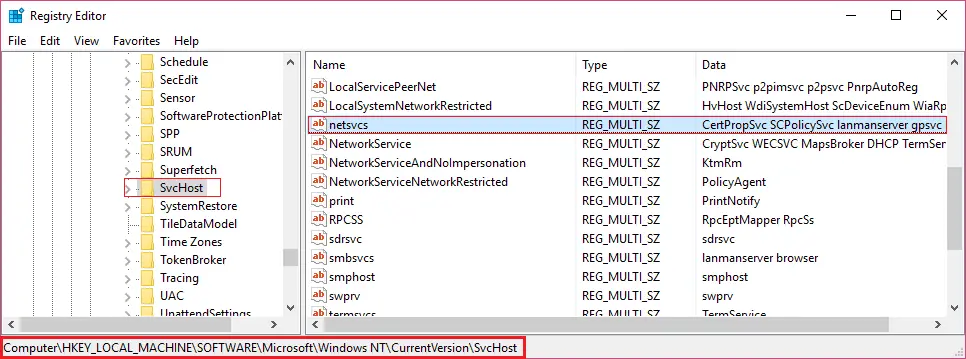
4. Right-click “netsvcs” and then select “modify.” You have to add “gpvsc”, as it was missing. So, click any one value data and hit “Enter” to type “gpvsc.”
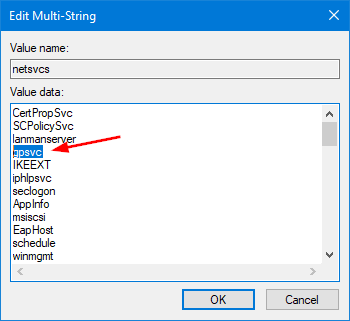
5. Select “OK” and then right-click on “Svchost” and select “New and key.” Last, check whether it is running correctly or not.
Disable Fast Startup
1. First, choose the “start button” and proceed to the “control panel.” Select “power options” in the view of small icons.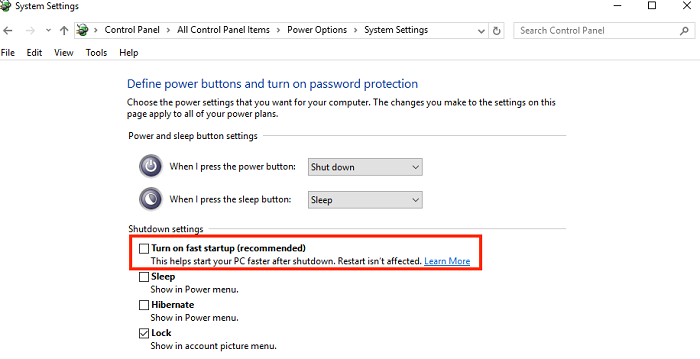
2. On the left-hand side, select “Choose what the power button does.”
3. Then click “change settings that are currently unavailable.” Scroll down and disable the “turn on fast startup.” Check this out to fix Fallout 4 Crash on startup.
4. Finally, choose “save changes” and exit.
Moreover, this method can also help you to recover any random Windows Restart Error.
Use the “netsh winsock” reset command
1. First, hold the “Windows key” along with “X” and select “command prompt.” Then, write the command “netsh winsock reset.”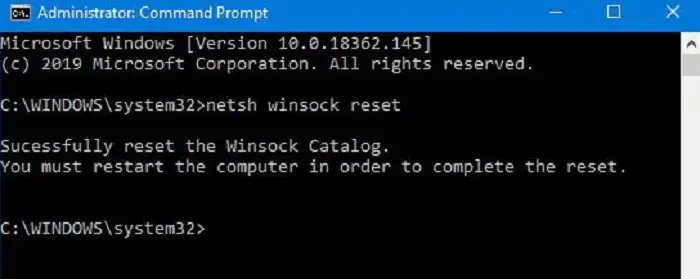
2. Close the command prompt window and, finally, restart your system to check the issue.
Stop Windows font cache service
1. First, hold the “Windows key” along with “R,” then write “services.msc” and hit Enter. But before you move ahead, check for any Hard Disk Problems in your PC.
2. Within the services window, then select the “Windows font cache service.”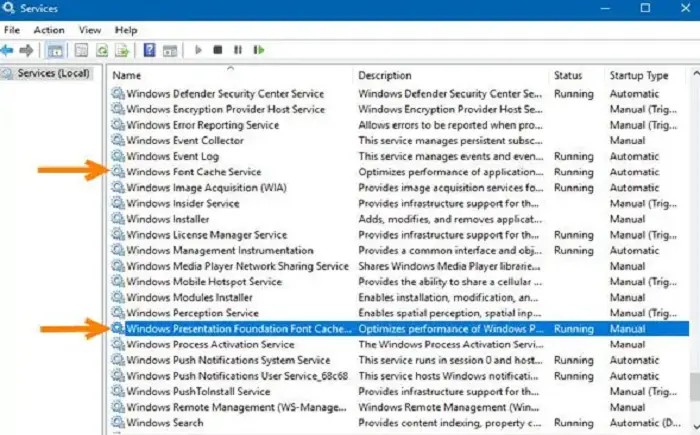
3. Right-click the “Windows font cache service” and choose “stop.” Minimize the service window and again select the “Windows key” and “R.”
4. Then type “%localappdata%” and tap enter. Delete all the “Font cache DAT files.” Now, open the services window and right-click on “Windows font cache service.”
5. Finally, choose “start.” Last, restart your system.
See Also: 10 Ways to Fix System Service Exception Error in Windows 10
Go to Safe mode
1. Within the “start” button, choose the “power” button. Select “Restart” while holding the “Shift key.”
2. While your system restarts, you will see three options on your screen. After that, select Troubleshoot>>Advanced options>>Startup settings and restart.
3. After your system restarts, you will see different options. Hold “F5” to enter “Safe mode with networking.”
4. After you choose the “Safe mode,” you can restart your system to resolve the issue or others like Windows 10 Slow Shutdown Error.
Disable user account control
1. At First, press the “Windows key” along with “S” and write “User accounts.” You will see a list of options in which you have to choose “User accounts.”
2. When it opens, choose “Change User Account Control settings.”
3. Then, scroll down to choose “Never notify.” Finally, select “OK.”
See Also: 5 Ways to Delete System Error Memory Dump Files
Clean boot your system
1. At First, press the “Windows key” along with “R.” Type “msconfig” and hit on “System Configuration.” Within the “General tab”, select “Selective Startup.”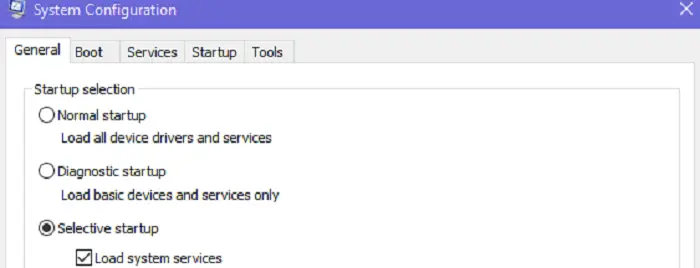
2. Then check to make sure that the “load startup items” is unchecked.
3. Go to the “Services tab” and enable the box that displays “Hide all Microsoft services.”
4. Al Last, select “Disable all,” which disables all the remaining services. Finally, restart your system to check the issue.
Delete the Windows Logs file
1. Go to the folder- C:\Windows\System32\winevt\. Rename the Logs folder. If you cannot rename the log folders, stop the “Windows Event Logs Service.”
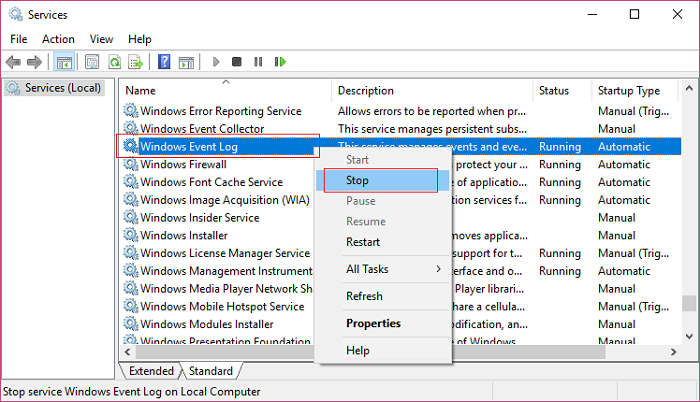
2. To stop this service, press the “Windows key” along with “R” and write “services.msc” to find the Windows Event Logs.
3. Right-click the “Windows Event Logs Service” and choose “Stop.”
4. Minimize this window and try to rename the folder. If, again, you are unable to rename, then delete everything present in the Logs folder. Now, open the “Services window” and start the “Windows Event Logs Service.”
Disconnect your earphones before you shut down your system
This is a distinct solution, but some people recommend that it works. And, if it works for you, you must disconnect your earphones every time while turning off your system.
Perform System Restore
When no method is useful in resolving the Failed to connect to Windows service, perform the “System Restore.” It will surely help you to get rid of this issue.
See Also: 3 Ways to Fix Windows Update 0x80070422 Error
FAQs
Why has Windows 10 failed to connect to windows service?
This could result from a corrupt file in the Windows update folder or a problem with the update service. In many cases, the quickest fixes for these issues involve restarting the Windows Update components and making minor registry adjustments to add a registry entry that turns updates on automatically.
What is the Windows could not connect to windows service error?
This error message indicates a problem with the Windows Management Instrumentation (WMI) service, which manages and provides access to various system information and configurations.
What causes the Failed to connect to Windows service error?
Common causes include not being connected to windows service, the WMI service not running, problems with the WMI repository, incorrect configuration of the WMI service, issues with the WMI provider, and insufficient permissions for the user account to access the WMI service.
How can I troubleshoot the Unable to connect to windows service error?
Troubleshooting steps include restarting the WMI service, rebuilding the WMI repository, checking for and fixing any WMI-related errors, ensuring that the user account has sufficient permissions, and checking for and removing any malware or virus that may be affecting the WMI service.
Is there any specific software that causes this error?
This error can be caused by various software issues, such as malware, viruses, or third-party software interacting with the WMI service.
Conclusion
We hope by the end of this guide. You solved the frustrating error Failed to Connect to Windows Service.
See Also: 8 Ways to Fix the Default Gateway is Not Available

Gravit Sinha: Founder of ValidEdge, a problem-solving website, driven by his lifelong passion for fixing issues.