One proven way to boost the performance of any process on your system is to change it to high priority, increasing the number of resources assigned to it. The task manager on your device helps you to do just that. Changing priority is easy, but you can avoid serious system issues cautiously. This guide will help you with all possible methods for changing Priorities in Task Manager– Windows 10.
Increase or decrease the priority of any process is to do so via the task manager:

-
- ctrl+alt+delete.
- click on more details at the bottom.
- Choose the criteria given on top to change the basis of their selection.
- Go to its details tab.
- Right-click on the process and go to set priority.
- Change the focus , confirm it in the dialog box, and exit.
So, without further delay, let’s look into the various methods to set priority Windows 10.
See Also: SmartByte Network Service- 6 Ways To Get Rid Of It
How to Change Priority in Task Manager- Windows 10
Before learning the process, it is essential to know priority levels and their effects.
Many methods are running simultaneously on your device for it to perform optimally. These processes are allocated resources based on their requirements. If these are to be changed, different levels are set in Windows. These are-
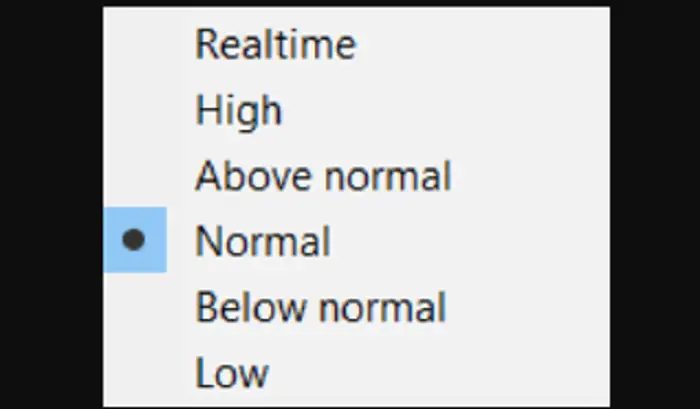
- Low– at this level, the resources are minimal and are available to the program after completing the current task.
- Below normal– processes with no time constraints generally run on this level. The unimportant tasks can be set to this level, giving them resources below average.
- Average– the default level set by Windows. All the processes function on this level based on their needs.
- Above Normal– this level can work for processes requiring a slight resource upgrade.
- High-system processes should run on this level only; make sure you don’t use it for user apps.
- Realtime is the topmost level that gives processes resources to run and function in Realtime. Only hardware interfacing programs should run on this level.
Note- Ensure you only average and above normal levels for everyday processes.
Now that we have understood the different levels let’s see how to change the priority of a process in Windows 10. You can change the focus by
See Also: How To Disable Adobe Genuine Software Integrity Service?
Task Manager
The easiest way to increase or decrease any process’s priority is via the task manager. To do this,
- Start the task manager by right-clicking on the taskbar, or if the taskbar is frozen then with the shortcut of ctrl+alt+delete.
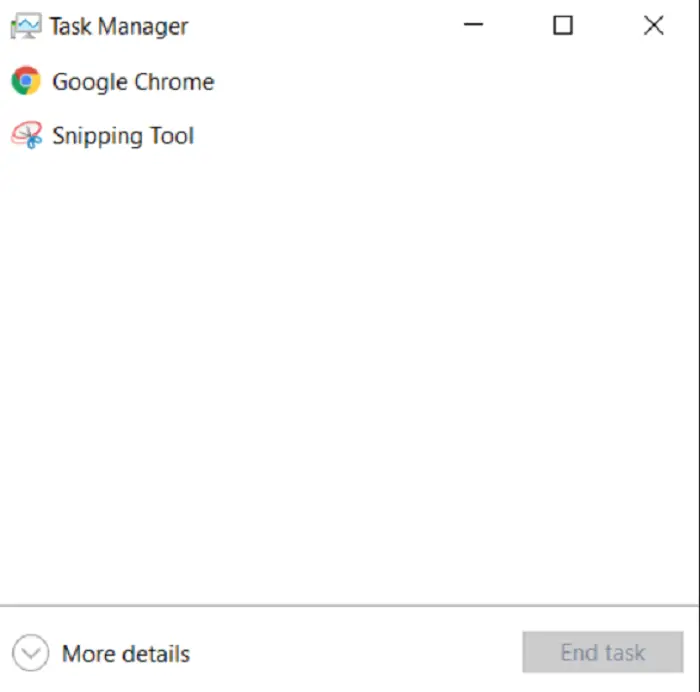
- If a smaller window opens with just the running apps, click on more details at the bottom.
- Now, you can see all the various processes running in the open window. You can choose the criteria given on top to change the basis of what they are sorted on.
- Now, look for the process name for which you want to change the priority and go to its details tab.

- When the window opens, you can see all the various processes working for the program’s

- Right-click on the process and go to establish priority.

- Change the focus to your needs, confirm it in the dialog box, and exit.
You have changed the process’s priority for now, but every time you restart or log in, the program’s priority will return to its default.
Windows Command Prompt
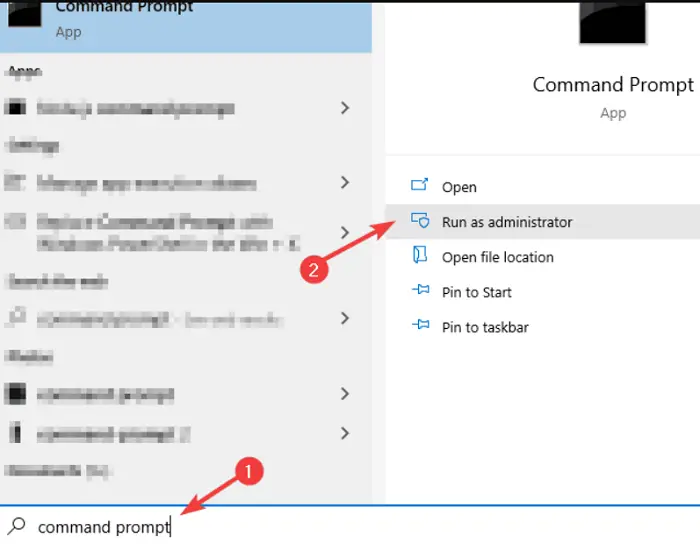
Are you wondering how to increase the priority of a process in Windows 10? If you can’t access the task manager, alternatively, you can run the command prompt by pressing the Windows key, or if the key doesn’t work, then by opening the start menu. Run it as administrator and type start “/priority level “C:\Program location\name of program\file type.”
This will run the program at the mentioned priority level.
Using PowerShell
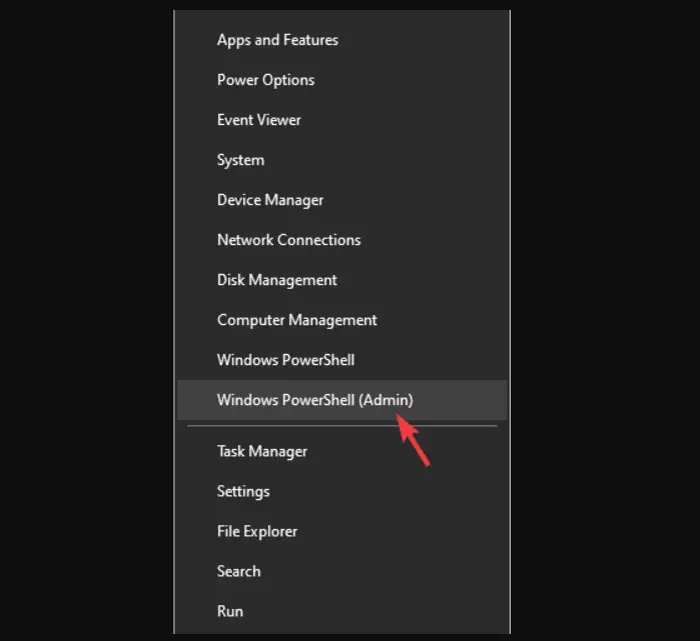
Alternatively, you can also use the PowerShell tool. From the start menu option, or if the start menu doesn’t respond, use Windows key+ X, and open Windows PowerShell (Admin).
Simply type Get-WmiObject Win32_process -filter ‘name = “file name”‘ | foreach-object { $_.SetPriority(code for priority) } in the window to change the priority. The codes for different priorities are
- Realtime 256
- High 128
- Above normal 32768
- Normal 32
- Below normal 16384
- Low 64
FAQs
How to set process priority Windows 10?
The easiest way to set priority in Windows is by using the task manager. To know the complete steps on How to change Priority in Task Manager- Windows 10, follow the above guide.
Should users change the priority of a process?
All the processes running on your device are set to a specific priority depending on the requirements. Changing all the priorities will result in system conflict, and hence it is not recommended to change them unless required, and that too only to above normal.
What are the effects of changing the Priority of a Task?
Whenever you change the priority of any given process, its position in the processing queue changes. The higher the priority, the more allotment of CPU memory and time. If the process doesnt require so many resources then it errors can occur by changing its priority.
Conclusion
So, the next time you want to boost any process, follow our detailed guide on How to change Priority in Task Manager- Windows 10. Keep in mind all the essential points mentioned above to avoid low memory on your system or system errors. Enjoy a smoother flow of processes and never worry about how to set a program to high-priority windows 10.

Gravit Sinha: Founder of ValidEdge, a problem-solving website, driven by his lifelong passion for fixing issues.