The installed drivers for an NVIDIA GPU come fully packed with several weighty software such as the NVIDIA GeForce Experience and NVIDIA Control Panel. To Optimize the NVIDIA Control Panel, this article is for you.
Though you may find that on the interface, the GeForce Experience tends to be more prominent, and by learning how to Optimize the NVIDIA Control Panel you will be more happy with the experience. However, the non-descript NVIDIA Control Panel, with its assortment of checkboxes, sliders, and drop-down menus, is what lets you fine-tune all your in-game graphics.

I’ll be giving you a walkthrough of the 3D Settings section on the NVIDIA Control Panel. It is to show you how you can use your Control panel for smooth optimum performance with these simple tweaks. Gaming could be made to look dramatically better and run smoother on your PC — Control Panel to pay attention to.
Basics on how to Optimize the NVIDIA Control Panel
Before exploring the NVIDIA Control Panel, it’s best to ensure that the latest or most compatible version is what is installed on your PC so you don’t encounter an “NVIDIA GeForce experience something went wrong” error message on your PC when launching the software. Once this has been checked, you can open the NVIDIA Control Panel in several ways.
You could right-click on your PC and select “NVIDIA Control Panel” from the context menu or open from inside the Window’s Control Panel under the Personalization screen. Or, you could type “NVIDIA” in the Start Menu to search, and it’ll pop right up.
3D Settings: Manage 3D Settings
The 3D settings: Manage 3D setting is the central part on the panel, and it comes with many options. These option settings each have an evident effect on the speed and quality for gaming. I’ll be listing some of the options below:
Ambient Occlusion
To Optimize the NVIDIA Control Panel, This option is essential in improving your gaming outlook on you. It improves the shadow detail and lighting effects by changing how shadowing appears when an object blocks the ambient light.

This is just to ensure you check out the “Performance” option where the “Quality” proves too much for your GPU or simply turn it off; it doesn’t work for you. Learn how to resolve the NVIDIA control panel not opening an issue here.
Anisotropic Filtering
To Optimize the NVIDIA Control, this texture filtering is also excellent for image quality, simply adjust your settings to the maximum 16X value for optimum results.
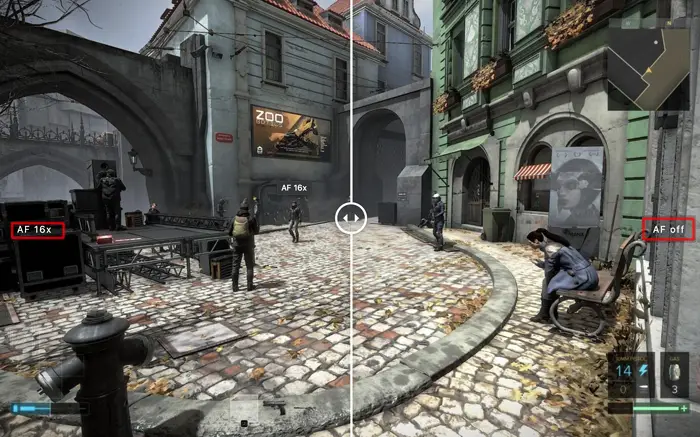
It is pretty easy on the graphics card and gives the highest quality.
Anti-aliasing – FXAA
To Optimize the NVIDIA Control Panel, you need to blur out jagged lines and get a smoother image on rigs, then this low-end, resource-friendly version of anti-aliasing does the trick.
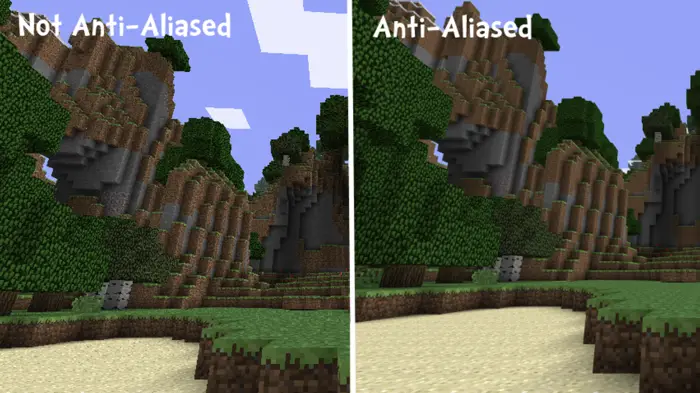
This won’t be necessary if your GPU can handle higher anti-aliasing settings. Note that in some games, iRacing.com, there is little or no visible difference when this is turned on.
Anti-aliasing – Mode
To Optimize the NVIDIA Control Panel, you can set this to override the application setting and let NVIDIA give you a more well-rounded gaming experience across all games. 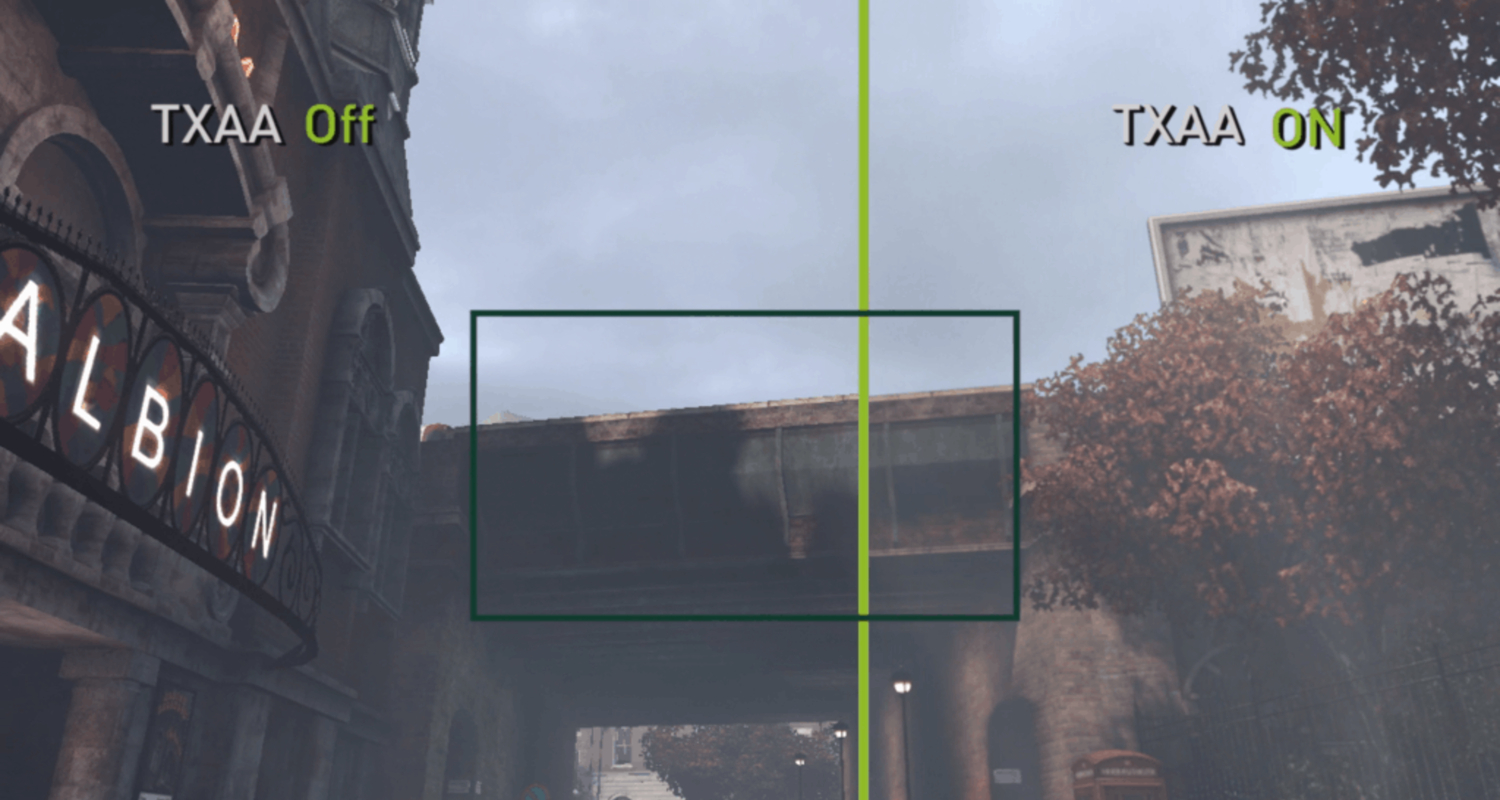 This option also implements pixel-smoothing image anti-aliasing, allowing you to turn it off entirely or enhance a game’s built-in settings with a mix of the software and the driver’s improved anti-aliasing techniques.
Anti-aliasing – Transparency
This setting allows objects of tiny elements, like chain-link fences, trees, and grass. 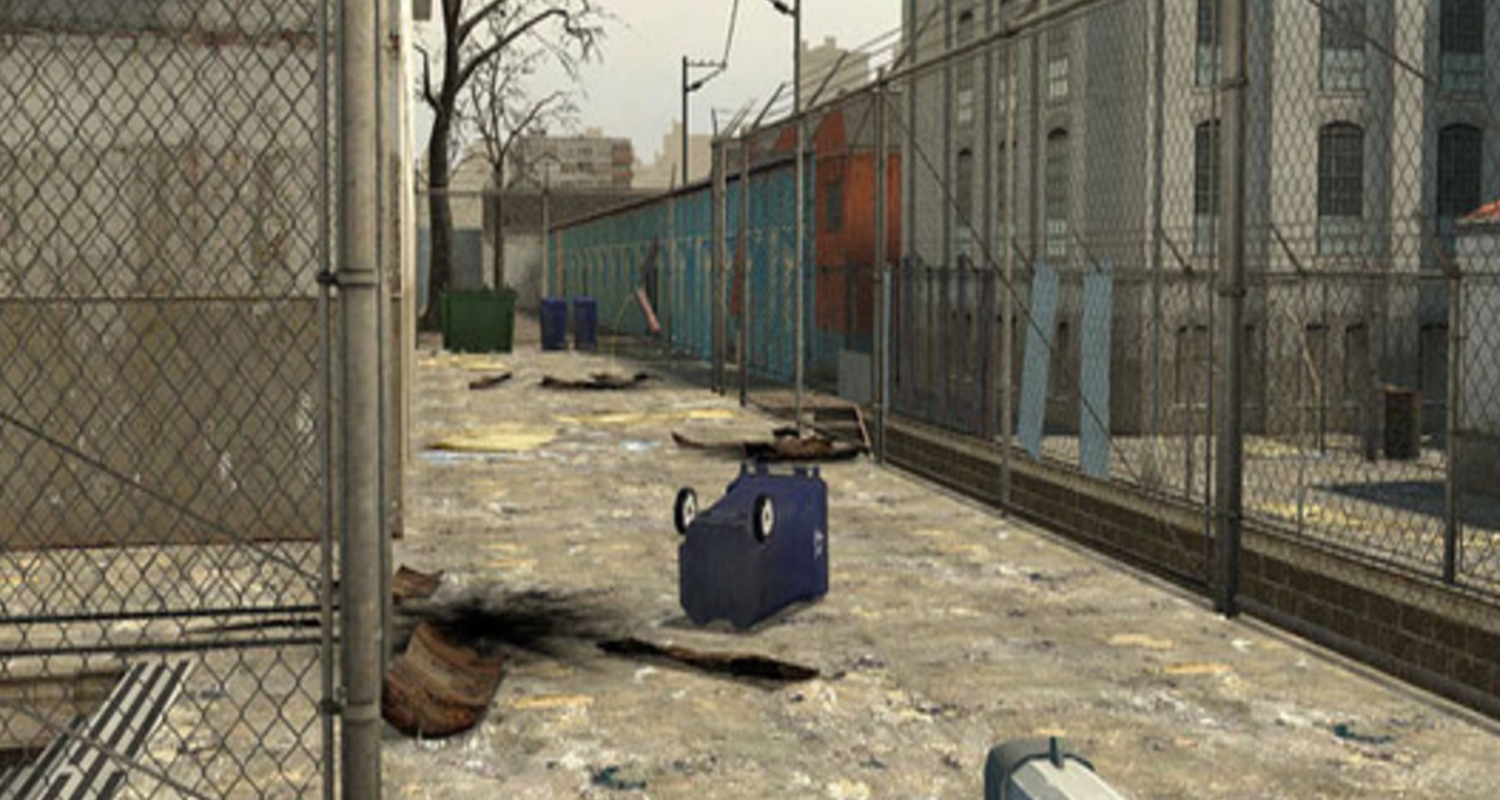 It comes with unique rendering requirements not addressed with standard forms of anti-aliasing to utilize a particular kind of anti-aliasing. Note, however, that an increase in quality level also affects the framerate hit.
DSR – Smoothness
To Optimize the NVIDIA Control Panel, this helps control the smoothness in the downsampling process at the activation of DSR. 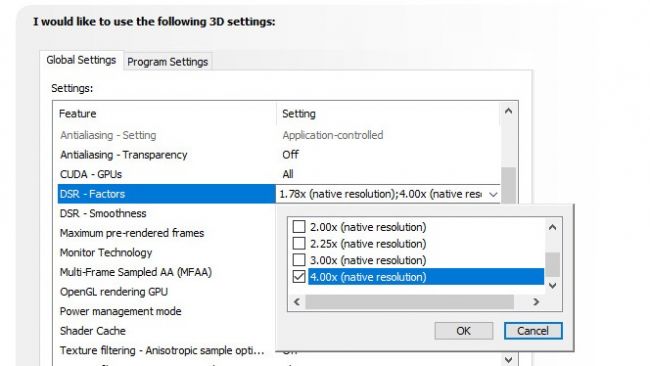 It is best to start at a 33% default level and adjust as needed. A higher level is prone to making images blurry.
Monitor Technology
If you have a G-Sync monitor, ensure it is set to G-Sync. 
Display menus
In the display section, you have a different option you can leave at default mode or make changes to.  You can adjust color settings directly on your monitor. Set up for multiple displays is likewise readily available in Windows.
Change resolution
To Optimize the NVIDIA Control Panel, create custom resolutions and likewise overclock monitor without third-party software. Simply click “Customize” to get to the modifying area to set your screen’s custom settings.  Adjusting the refresh rate here is much easier than in Windows’s default display settings.
Set up G-Sync menu
If you place your games in Windows mode, enable G-Sync on the “Enable G-Sync for windowed and full-screen mode.” 
If the Nvidia Control Panel doesn’t seem to be running, Press the Win key and type “services.msc” to enable you to open the Services window. Proceed to sort by name and then scroll down to NVIDIA. You can then right-click and restart the NVIDIA Display Container LS service. This helps with NVidia driver crashes too.
FAQs
How do I optimize the Nvidia control panel for performance?
To optimize the Nvidia Control Panel for performance, open it, navigate to Manage 3D Settings, select the Program Settings tab, choose your desired application, and tweak settings like Power Management Mode to Prefer Maximum Performance and Texture Filtering Quality to High Performance.
How do you optimize the Nvidia control panel for gaming?
For gaming optimization in the Nvidia Control Panel, adjust settings under Manage 3D Settings. Customize options like Texture Filtering Quality to High Performance, Maximum Pre-rendered Frames to 1, and Vertical Sync to Fast or Off for smoother gameplay.
How do I increase my FPS on the Nvidia control panel?
To boost FPS via the Nvidia Control Panel, configure settings in Manage 3D Settings. Focus on Power Management Mode set to Prefer Maximum Performance and Vertical Sync turned off to reduce input lag and improve frame rates
How do I optimize my GPU performance?
To optimize GPU performance, ensure it's running at the right temperature and update drivers regularly. Adjust settings in your GPU control panel, prioritize cooling, and manage background processes to free up resources for demanding tasks.
Conclusion
I hope these tips open up a more enjoyable gaming experience with the aid of Optimize the NVIDIA Control Panel. Happy gaming!
See also: How to Optimize Your Projector Settings for Gaming?

Gravit Sinha: Founder of ValidEdge, a problem-solving website, driven by his lifelong passion for fixing issues.