Wake on LAN is a convenient and powerful network protocol that wakes a computer from low-power states or sleeps. It uses a unique signal over the local network or internet called the magic pocket. Like many features that make computers more convenient, Wake on LAN can also pose security risks. It enables computers to be powered up remotely when they should only be powered up locally.
So, we need to learn to turn off wake on LAN in Windows 10 to prevent pour system from risks. Select the “Power Management” tab> Click the “Allow this device to wake the computer” (remove the check from the box)> Click the “Advanced” tab, go to the “Property” box> click the “WakeOnLAN From Poweroff” or “Wake from Shutdown” selections if available>Click “Disable” in the “Value” box.

This feature works when an ethernet adapter detects a magic pocket. It’s like a remote button that powers your computer on and off. Generally, with this feature, you can keep a connection to your computer and access files and applications while minimizing power use. When you are not using the device, the device can be put to sleep. Fortunately, replacing the LAN cable is not a difficult task. The real trouble comes when you have to test your broken LAN wire to check whether it works. This article will provide a complete guide to turning off wake on LAN in Windows 10 in some easy steps.
See Also: Google Chrome Opening New Tabs By Itself
Why Use Wake On LAN and How Does It Work?
Wake-on-LAN is useful if you remotely access your computer. This protocol provides access to files and folders in a low-power state to lower electricity consumption. It is dependent on two things: network card and motherboard. A wireless or Ethernet card should support its functionality. Since it is set either in the BIOS or the firmware of your network card, there is no need for special software to enable it.
Computers that use wake-on-LAN wait for a “magic packet” containing the MAC address of the network card to wake up. Professional software, routers, and internet-based websites for any platform can send magic packets out. Magic packets usually include information about a network’s subnet. The broadcast address for the network and the MAC address of a network card on the target PC, whether Ethernet or wireless. A problem with your Network Interface Card or NIC leads to the Ethernet not having a valid IP configuration. It is caused due to an invalid IP Address being caught by DHCP. Most motherboard manufacturers offer software functions such as Wake-on-LAN to simplify user configuration.
Steps To Disable Wake On LAN In Windows 10
Below are the methods on how to disable Wake on Lan in Windows 10:
Turn Off Wake on LAN in Network and share the Center
Follow the steps below.
- Open the Control Panel window.

- Go to Control Panel, then select Network and Internet. Then click Network and Sharing Centre.
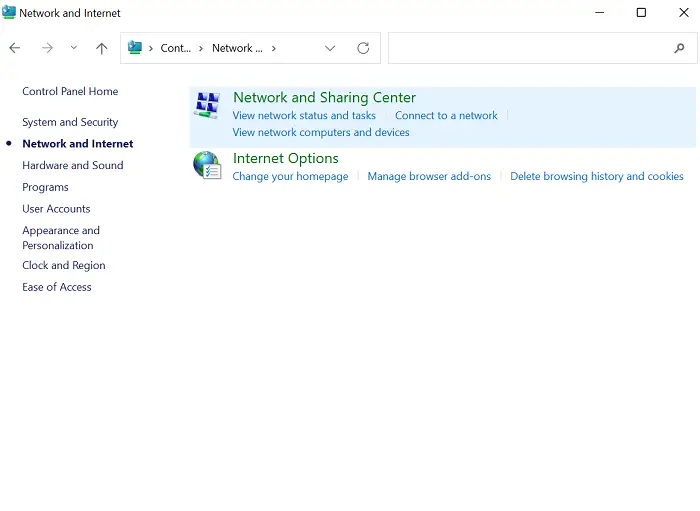
- Click on the Change adapter settings link on the right.
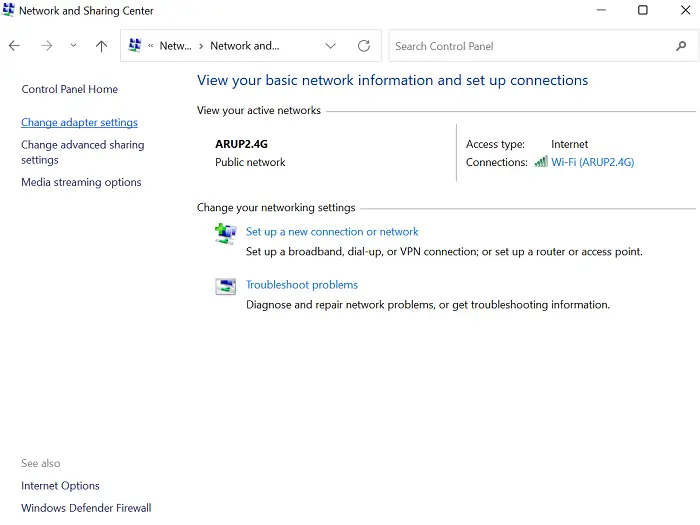
- You can disable the WOL feature by right-clicking the network adapter. Then, select Properties from the menu.
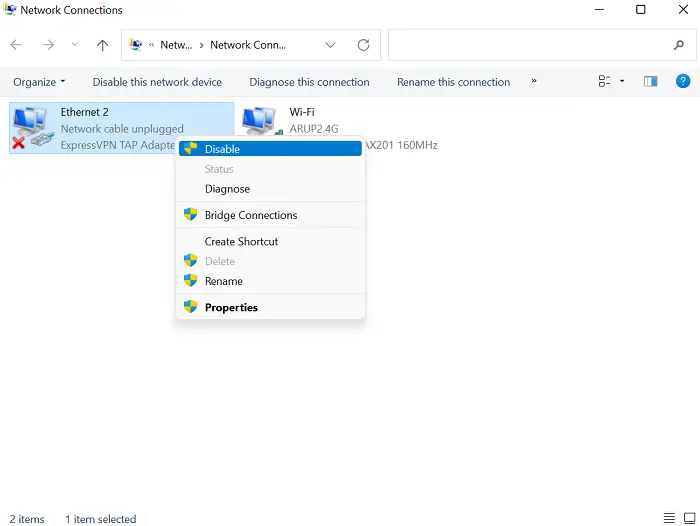
- On the Properties dialog, select the Networking tab and click on the Configure button.
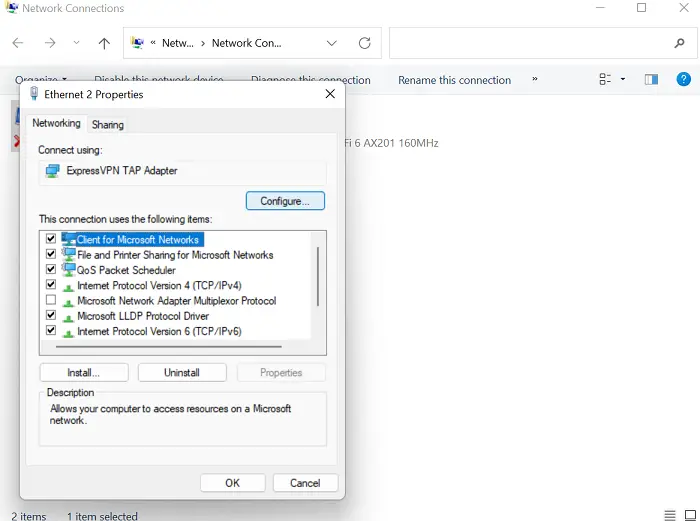
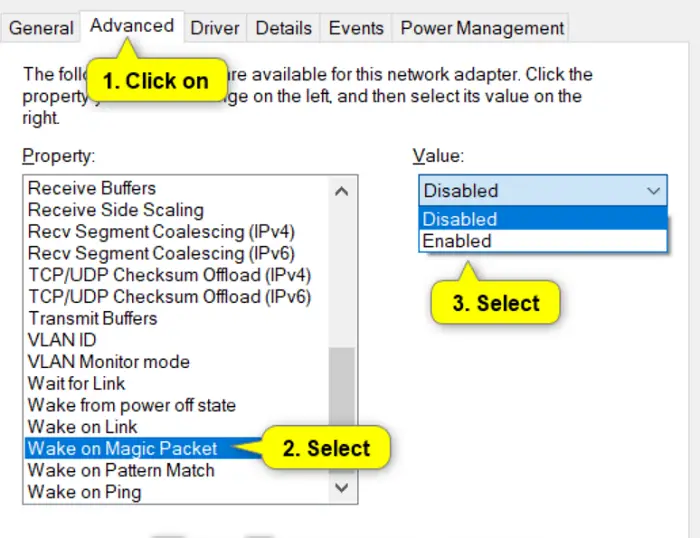
- In the Properties window, click on the Advanced tab. Then, select the Wake on Magic Packet option in the Property pane on the left. In the Value drop-down list, select Disabled.
- In the properties dialog, click on the Power Management tab. Uncheck the option ‘Only allow a magic packet to wake the computer.’
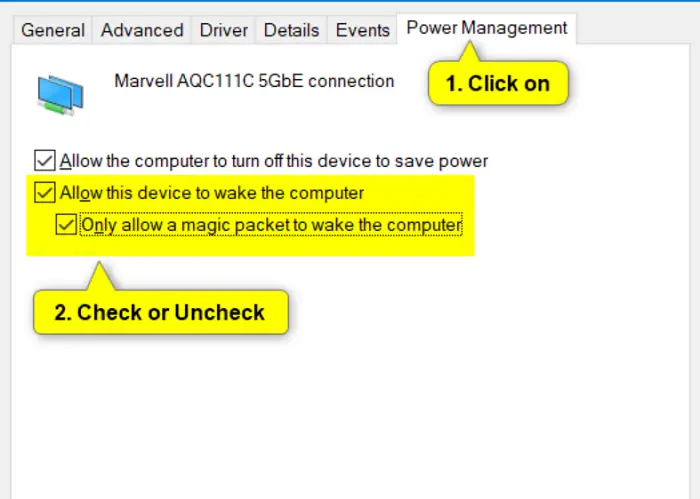
Remove the check mark from the box next to ‘Allow this device to wake the computer.’ Finally, select OK.
You can follow these steps to disable wake on LAN.
Turn Off Wake On LAN In Device Manager
Follow the steps below to turn off WOL.
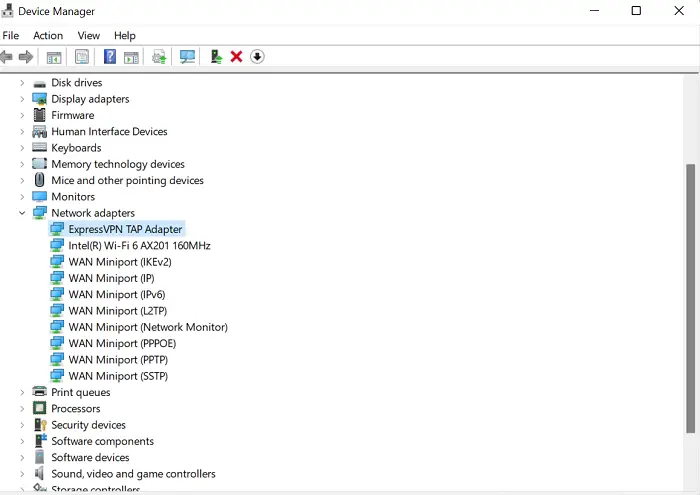
- Open Device Manager.
- In Device Manager, expand open Network adapters. Then, double click on the network adapter you want to disable WOL for. It will open its properties page.
- In the Properties dialog, click on the Advanced tab. Then, select Wake on Magic Packet in the left Property pane. In the Value drop menu, select Disabled.
- In the properties dialog, click on the Power Management tab. Uncheck the option ‘Only allow a magic packet to wake the computer.’ Remove the check mark from the box next to ‘Allow this device to wake the computer.’
Finally, select OK.
These steps will allow you to turn off the wake on LAN in Windows 10.
See Also: {Solved} 6 Ways To Fix Network Adapter Missing Issue
Turn Off Wake On LAN In Motherboard BIOS Or UEFI
Just follow the steps below.
Boot to BIOS or UEFI. Disable the Power On By PCI-E or Wake-on-LAN type power management setting. After finishing, save the changes and EXIT.
Following these steps will let you turn off the hardware support for wake on LAN.
Disable Wake On LAN For LAN driver
You need to follow the steps below to disable WOL.
- Open Device Manager. Select Network adapters. Then, select the LAN device by clicking on it.
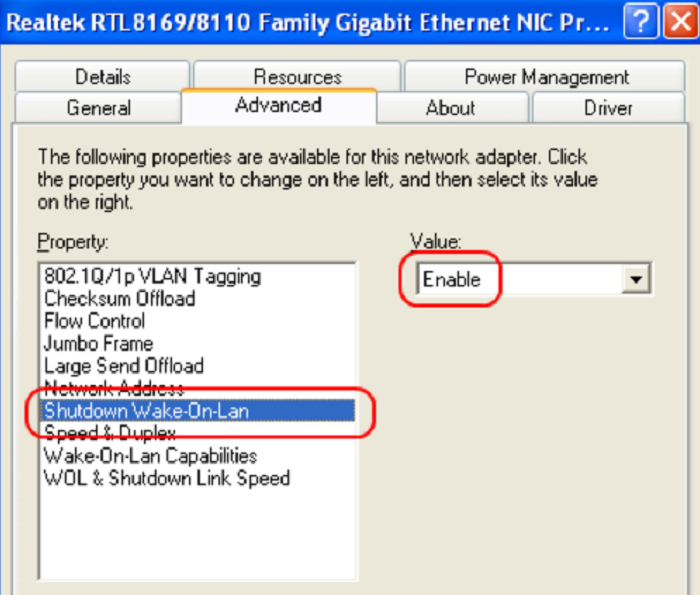
- After that, select the Advanced tab. Then, select Shutdown Wake-On-Lan and disable it. Select the Power Management tab. Remove the check mark from the box next to ‘Allow this device to wake the computer.’
Save the changes.
Reason for disabling wake on LAN in laptops
If someone wants to access your laptop while it is sleeping and you are away, the WOL signal will bring those computers out from sleeping mode to begin standard functionality. It brings the signal from the remote source to whoever wants to access your computer.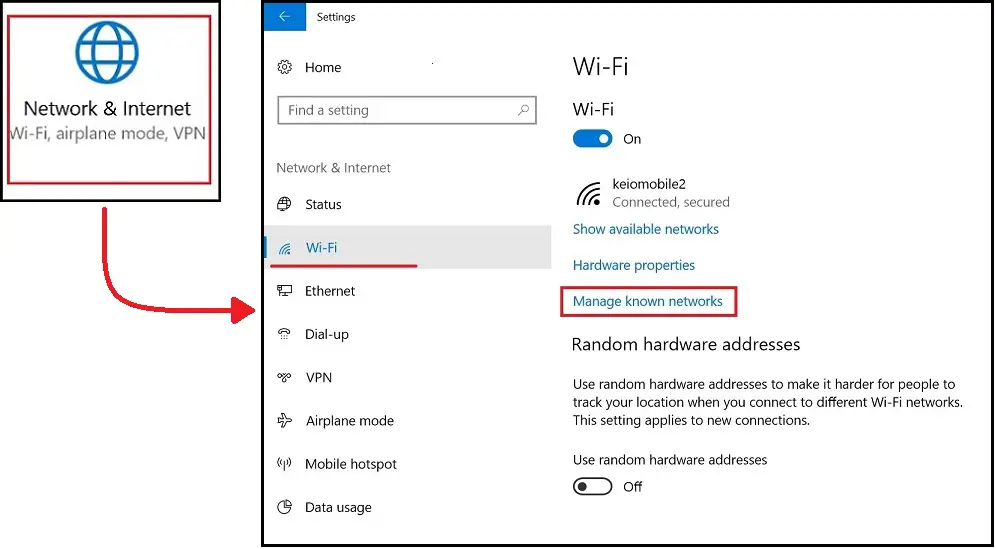 You can conjointly use WOL for private use if you wish to access your pc from a foreign pc. Your computer should be continuously connected to the LAN, WAN, and MANs via Ethernet or Wireless to accept remote access. Read this article if you have encountered Your Connection is Not Private error while using the Internet.
Without the above needs, activating Wake on LAN does not make sense. While your computer listens for packets, some power is fed to your network card. It will lead to your laptop’s battery draining faster, so you should remember to turn this off when you need some extra power. This is why wake on LAN is typically disabled on laptops.
FAQs
How do I stop my LAN from waking up on my computer?
Answer- To stop LAN from waking up the computer, follow these steps: In the Start menu, look for Device Manager. Then, click on the Ethernet or Wi-Fi adapter and the Power Management tab in its properties. It allows the device to wake up the computer, and it's done.
How do I enable LAN wakeup in Windows 10?
Answer- This is how you can enable LAN wakeup in Windows 10: In the Device Manager, click on Select Network Adapter Click on the LAN device and select Advanced tab Enable the Shutdown Wake-On-Lan Click on the Power Management tab Select the choice that permits the device to wake up the computer. Click save.
Is Wake on LAN enabled by default?
Answer-No, Wake on LAN (WoL) is not enabled by default on most computers. Users typically need to allow WoL to be in their computer's BIOS/UEFI settings and configure it within the operating system. The network adapter must also support WoL, and the device sending the WoL signal should be on the same network.
Does Windows 10 have Wake on LAN?
Answer- Yes, Windows 10 supports Wake on LAN (WoL). To use it, ensure your hardware supports WoL, enable it in your computer's BIOS/UEFI settings, and configure it in Windows 10's network adapter properties. You can send a WoL packet from another device on the same network to wake up your Windows 10 PC remotely.
Conclusion
Wake on LAN is a protocol used in most computers, but disabling it will help you secure files and drain much less battery. This topic has given you a complete guide to turning off wake on LAN in Windows 10 to protect your system and increase battery longevity.
Aloukik Rathore is a Delhi-based entrepreneur, musician, writer, and tech nerd. He has been blogging for about 7 years now.