USB Ports enable USB devices like USB flash drives, SD cards, external hard drives, pen drives, etc., to be connected to a computer to transfer data through digital cables. But when USB Ports stop working, your PC won’t be able to read and detect any of those portable devices. Many readers tell us that “my USB ports are not working” and usually ask for a fix. This leads to users facing the issue of USB Ports not working error, in which USB ports stop recognizing any USB device, whether it be a USB Mouse, Printer, Pen drive, Keyboard, etc.
Restart Your Computer
Restarting your computer might be the first step to resolving the issue that your USB ports are not working.

In this case, the problem lies with the USB ports, not any particular device. But the biggest problem is that this issue can also affect all USB ports not working on a specific system and not just one. Read Further to find out more.
See Also: How To Restore Lost Data From USB Drives Using USB Recovery Software?
Reasons for the Occurrence of USB Ports Not Working
- Obsolete or faulty device drivers
- Issues in the Power Supply of the computer
- USB Ports have been damaged
- Power Management issues
However, it is not easy to always find the exact cause for an error, but these common causes can lead to USB Ports not working error.
How to Fix USB Ports Not Working Error
To solve this, several tried and tested solutions help users get rid of this error. However, different users have different problems, so you need to look for the best possible solution to your problem.
Below is a list of some methods to fix the USB not working in Windows 7, 8, and 10. So without wasting time, you can go on and try them.
Method #1 Uninstall Your USB Controller
To fix the USB Ports not working error, try to reinstall the USB Controller on your system by following the steps:
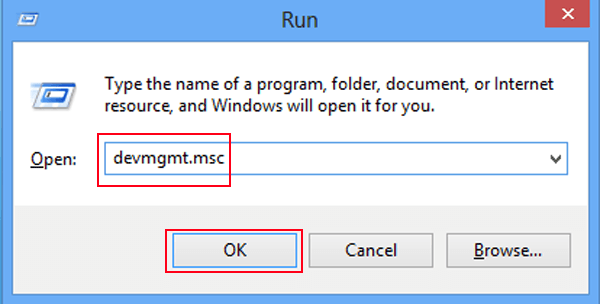
- First, press Window Key+R together to open Run.
2. Then type “devmgmt. msc” and hit OK to open Device Manager.
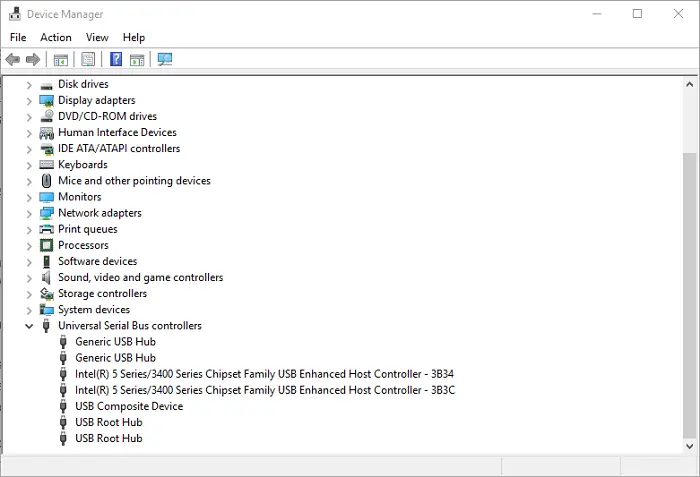
3. Afterwards, look for Universal Serial Bus Controllers and expand them.
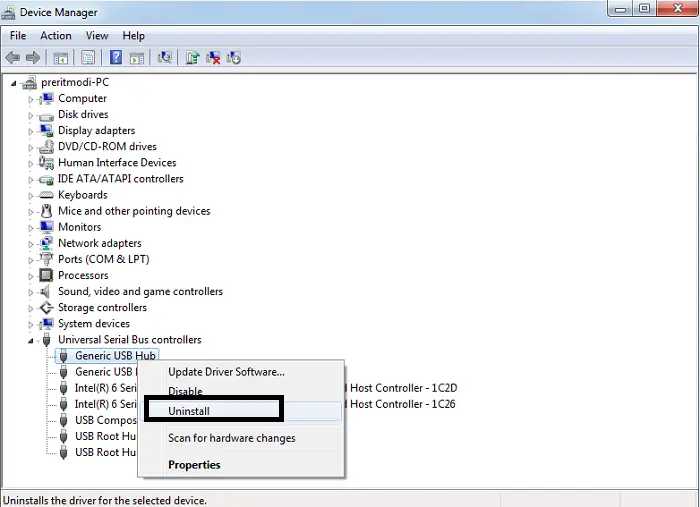
4. After this, right-click on the first driver in the Universal Serial Bus section and press Uninstall. Repeat the same for uninstalling other drivers as well.
5. Then open the Device Manager, click the Action tab & choose Scan for hardware changes. This will enable the USB Port to appear.
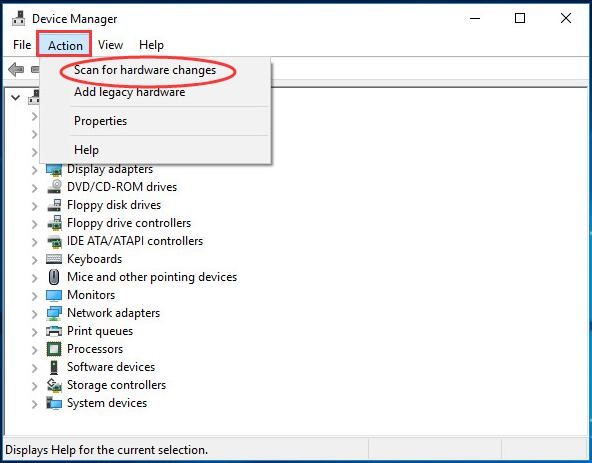
6. Now reconnect those portable devices in your system; they will start showing up, and your PC can detect them now.
7. At last, restart your system.
Method #2 Look Out for Device Drivers
USB Ports not working error can be caused due to driver issues in your system. If your front USB port is not working, try this method. To rectify this problem, DriverEasy can be used. DriverEasy will spontaneously recognize your system’s requirements and find the correct drivers required for the smooth functioning of the operations of your computer system. It helps the users not to face any risk of downloading and installing the wrong driver, which can harm the system. To try this out, follow the steps:
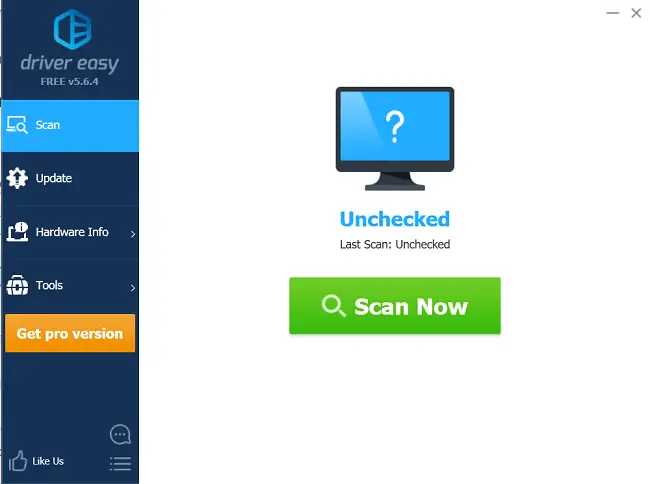
1. At First, download and Install DriverEasy on your computer.

2. Then open Driver Easy and click on the Scan Now button. The scanning process will look out for any problematic drivers in your computer.
3. Next, click on the Update button or Update All, which will automatically download and install the correct drivers suitable for the system.
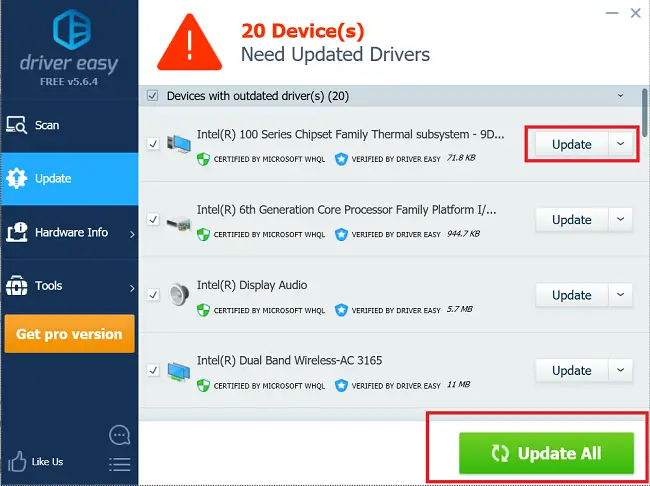
The Pro version of Driver Easy is required to update all the drivers at once, which saves a lot of time by updating the drivers once with just two clicks.
See Also: Fix: “Currently This Hardware Device Is Not Connected To The Computer”
Method #3 Disable USB Selective Suspend Feature
This is a power-saving feature available on all Windows computers. The feature works as a battery saver for the computer by minimizing or suspending the power sent to the USB device. But sometimes, it has been reported that this feature does not enable the USB device to get detected. And as a result, USB Ports not working error appears. There may be chances your laptop USB ports are not working error might pop up. So to rectify the mistake in this case, you can disable the USB Suspend Feature using a registry key. To turn off the Selective Suspend Registry key, follow the steps:
1. At First, press the Win+R keys together to open the Run box.
2. Type “devmgmt.msc” in the Search bar and press OK. This will open Device Manager.
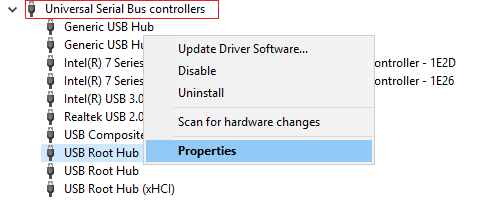
2. Now, expand Universal Serial Bus Controllers from the Device Manager.
3. After that, search for USB Root Hub & right-click on it to select Properties.
4. Then navigate to the Power Management tab & uncheck. Allow the computer to turn off this device to save power.
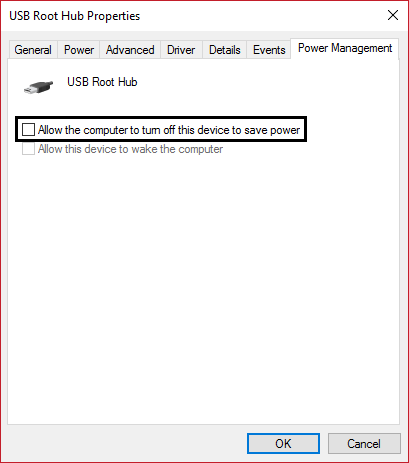
5. Afterwards, click on Apply, followed by OK.
6. Then repeat steps from 3 to 5 for each USB Root Hub device in the list.
7. Finally, reboot your system to reflect the changes.
This process will turn off the Selective Suspend feature and allow the power to enter the USB Ports, which will remove the USB Ports not working error.
Method #4 Use Hardware & DevicesTroubleshooter
USB Ports not working error can fix up by using Troubleshooter. To do this, follow the given steps:
1. At First, click on the Start menu and then type “Troubleshooter” in the Search box.
2. Then press on the result displayed to open Troubleshoot Center.

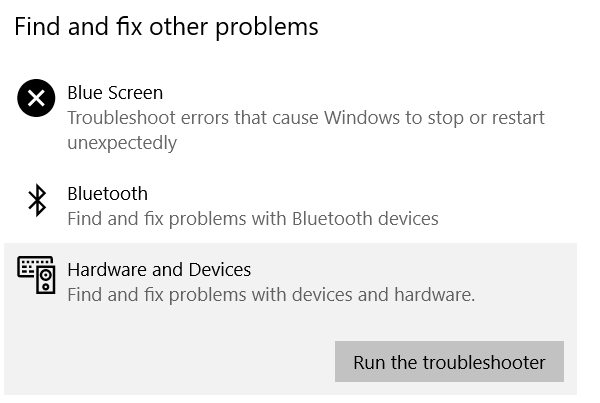
3. Afterwards, find the option Hardware and Devices under Find and fix other problems.
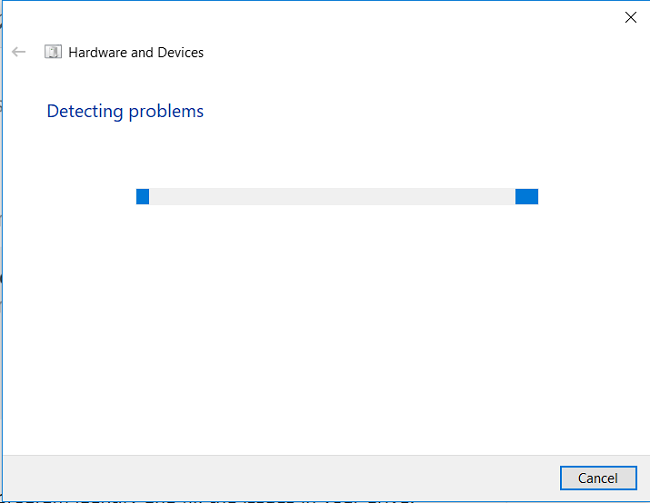
4. Now, click Run the troubleshooter to detect the issues.
5. Then, wait some minutes for the program to identify and fix the issues in your drive.
6. Afterwards, click Apply this fix option and choose Next.
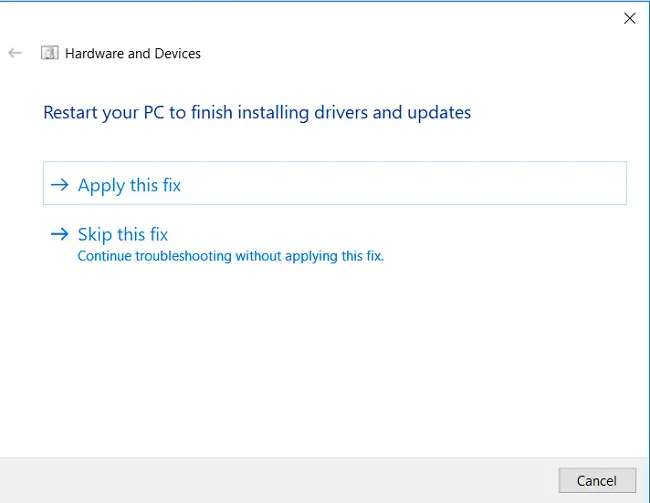
After completing this process, you can get rid of the USB Ports’ not working error, and your USB Ports will start working uninterruptedly, enabling you to save or transfer the data from your USB to the computer system.
Method #5 Check Out the Power Supply in Your Laptop
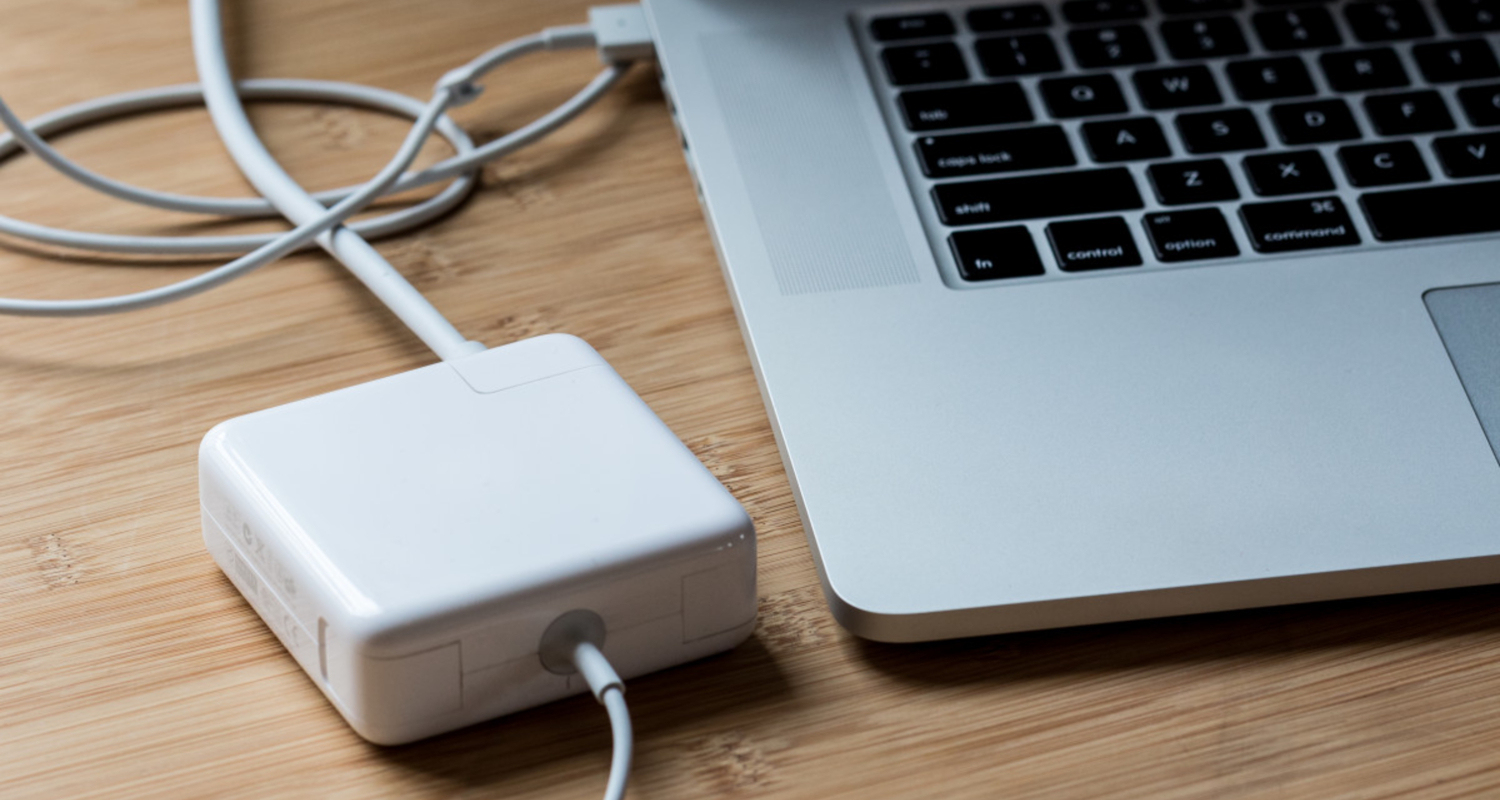
A continuous power supply is essential for USB Ports to work correctly and smoothly. The collection of power varies in a computer system and a laptop, and many times, due to some reasons, the USB Ports fail to get enough power supply to work correctly on a laptop. This issue can be addressed by following the steps:
1. remove your laptop’s charger pin if it is in charging mode.
2. After that, reboot your laptop.
3. Now try to connect the USB device to the USB Port.
4. Finally, put your laptop again on charging mode.
Now the USB Ports will be able to get enough power supply needed to remove the USB Ports not working error, and all the USB devices will start working correctly.
Method #6 Remove the Battery of your Laptop
This is the easiest method to correct the USB Ports not working error. Sometimes, the issues can be fixed with the most straightforward solutions. So if the USB is not working on your laptop, follow the steps:
- First, remove all the USBs connected to your system and shut it down.
- Then remove your laptop’s battery, as many users have tried it, and they succeeded in fixing the problem by removing the battery and pressing the power button for 30 seconds or more to boot the computer.
This method will allow the capacitors to discharge correctly. However, users also recommend leaving the laptop shut down without its battery for the whole night so that the capacitors can discharge fully.
After this, on the next day, you can put your laptop’s battery again in its place and restart your computer. However, this method does not guarantee the removal of the USB Ports not working error.
Method #7 Turn Off Fast Startup on Your Windows Computer
USB Ports not working error can appear due to some settings on your Windows computer. As the error might occur when the Windows are booting too fast, the USB device fails to get detected before the computer system is dismissed due to not getting enough time. In this case, you can fix the USB Ports not working error by turning off the Fast Startup option. To try this, follow the steps:
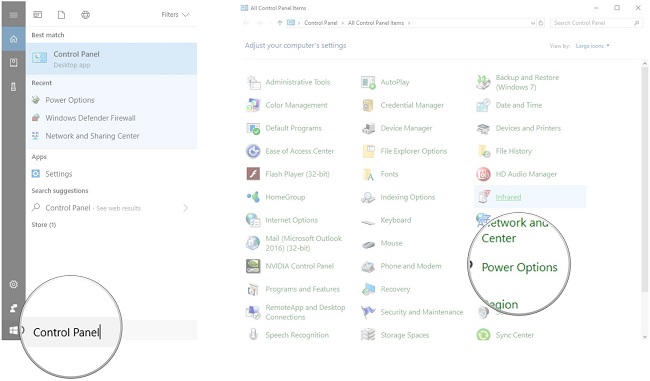
- First, go to Start Menu & search for Control Panel. Now, just hit Enter on your system.
2. Then click on Power Options in the Control Panel.
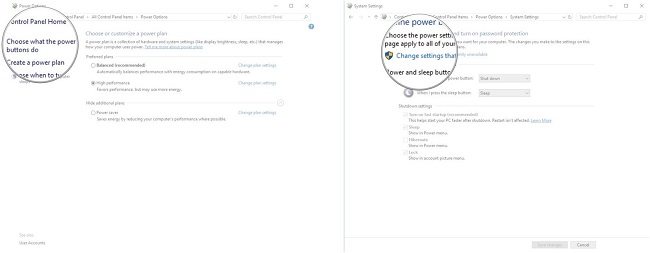
3. Afterwards, click Choose what the power button does and then click on Change setting that is currently unavailable.
4. Now, uncheck Turn on fast startup (recommended) under the Shutdown settings of your PC.
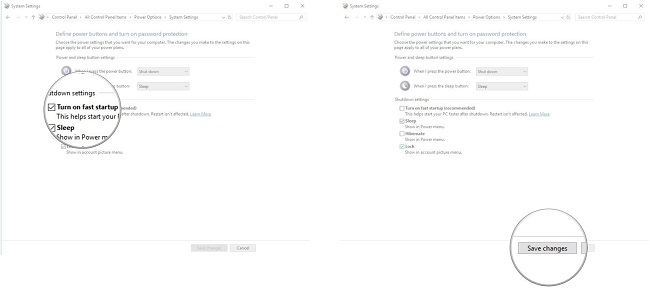
5. After that, click on Save Changes to reflect the changes.
Method #8 Uninstall Hidden devices
By default, the device manager in your system does not show all the devices installed and available in your system. It only shows the devices that are at present connected to your computer. The devices installed by you earlier but are currently not in use will still be hidden but won’t be shown by the device manager.
These remote USB devices can create issues with the current ones, thereby leading to the USB Ports not working error. However, you can see these hidden devices in the Device Manager window.
So to uninstall hidden devices, follow the steps:
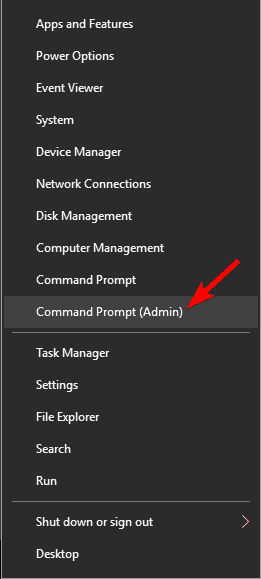
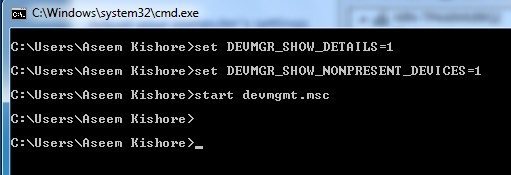
1. At First, press Windows Key+X together & select Command Prompt (Admin) from the menu.
2. Now, type the commands in the Command Prompt.
set DEVMGR_SHOW_DETAILS=1
set DEVMGR_SHOW_NONPRESENT_DEVICES=1
start devmgmt.msc
3. Navigate to View>>Show hidden devices in Device Manager once it opens.
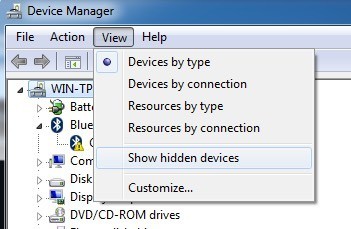
4. After that, expand Imaging devices, Unknown devices, and Universal Serial Bus Controllers.
5. A list will appear, and if it contains anything which says the unknown device, right-click on it and Uninstall.
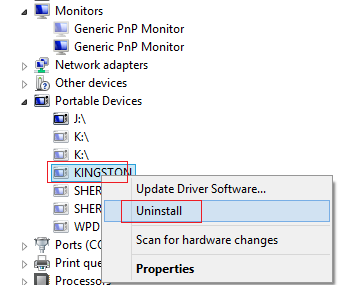
In this way, removing the earlier devices will make the newer ones work efficiently, thus releasing the USB Ports not working error.
Method #9 Modify Your Registry
Many times users have gotten rid of the USB Ports not working error by making a few changes in their registry. So if you are also amongst those whose USB ports are not working, try this method by following the steps:
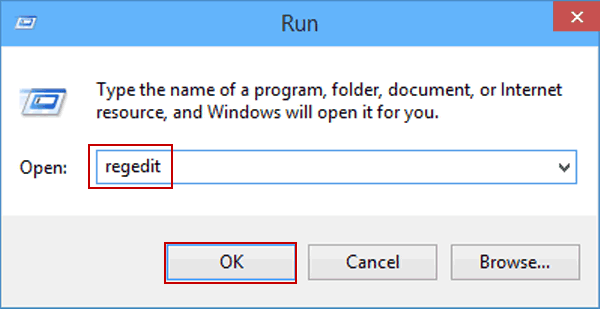
1. Press Window + R on your keyboard and type “regedit.” Hit OK.
NOTE: – It’s always recommended to back up your registry as it can cause severe issues for modifying the registry incorrectly.
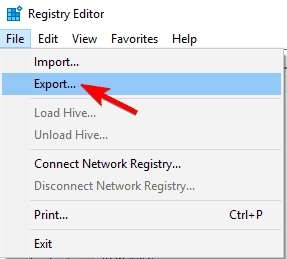
2. To do the same, navigate to File>Export.
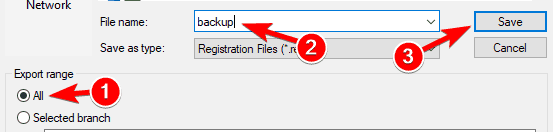
3. Set the export range as All and choose your desired location. Click on Save.
4. After that, go to HKEY_LOCAL_MACHINESYSTEMCurrentControlSetControlClass{4d36e965-e325-11ce-bfc1-08002be10318}.
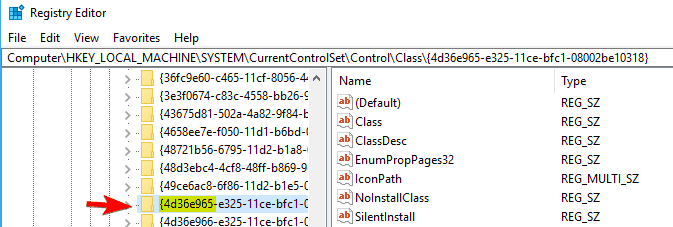
NOTE: – The file’s name might differ on your system, but it should start with 4d36e965.
5. Locate UpperFilter & RightFilter from the right pane & delete them.
6. Now, reboot your PC.
Method #10 Use a Different USB Port
The USB Ports not working error could occur due to a particular USB Port which might stop working due to physical damage. Generally, computers and laptops have multiple USB Ports, so you can unplug your USB device from a particular port to try it on another one. If the USB device starts working in the other port, the earlier one could have got damaged or loosened up and must be fixed by a professional to be used again.
Method #11 Install the Latest System Updates
Installing the necessary system updates on your computer would solve the issue too. Usually, Windows computers automatically download and install the latest system updates, but still, there are chances of Windows 10 upgrade assistant stuck at 99.
So to install the latest system updates manually, follow the steps:
1. Go to Settings on your PC and choose Update and Security option there.

2. Now click the Check for Updates option on the right pane of your screen, and Windows will look for and download the available updates for you.
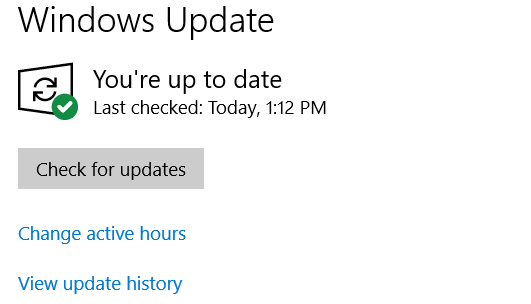
3. After this, install the latest updates in your system and Restart your computer to run them.
Method #12 Physical Damage to the Ports
If, even after trying the methods mentioned above, you cannot fix the issue of the USB Ports not working error, then there are chances that your USB ports might have been damaged physically.  And to fix it, you need to take your laptop or computer system to a Repair shop and then ask them to look at its USB Ports. If the repairer finds them damaged, you can quickly replace them with new USB Ports at affordable prices.
Method #13 Hold Down the Power Button
This is the easiest solution for fixing the USB Ports not working error.  By pressing the power button of your laptop for 30 seconds or more, you will be able to discharge the capacitors from your device that were creating the hindrance for USB devices. After doing this, reboot your device and for the error.
FAQs
My USB ports aren't working; how can I solve that?
Do these actions if your USB ports aren't operating properly: Attempt multiple devices to initially figure out the issue with the USB device or the port itself. Rebooting your computer can fix momentary issues. Verify that your USB drivers are kept up to date. If the issue still exists, it may reflect a hardware problem checked out by a specialist or a new motherboard.
How can I reboot my USB ports?
Observe these instructions to reboot your USB ports: Unplug your computer's USB devices before anything else. To identify the USB controllers on a Mac or Windows computer, go to System Management. After uninstalling the controllers, reboot your computer by clicking (on Windows) or right-clicking (on Mac). Rebooting will cause an automatic reinstallation of the USB controllers. Recheck the USB ports by reconnecting your gadgets.
Why won't my USB port recognize the device?
Several things can cause problems with USB port authentication. Check the device's operation on another system to avoid hardware issues. Inspect the USB port for obstructions or damage before trying another one. Driver updates are advising because outdated or damaged drivers might pose the culprit. If troubles continue, seek expert help for a probable hardware issue.
What should I do if my USB port is broken?
You possess a couple of choices if your USB port is damaged. Beginning by employing a USB hub or another accessible USB port for transient connectivity. Servicing a broken USB port may prove a challenging task that frequently necessitates specialist knowledge. For a long-lasting solution, visit a qualified technician or equipment supplier for replacement or restoration.
Conclusion
So these were several best methods if your USB ports are not working in Windows 7. These were given by various users who have faced the issue of the USB Ports not working error. These methods have been tried and tested a lot of times and are generally workable. I hope you were able to learn how to fix USB ports.
If all USB ports are not working, then users can adopt any of the methods mentioned above according to their requirements and preferences as different users face the same issue but due to various reasons, so make sure to identify the cause of this error first and then go ahead to fix it. However, if none of the methods helps to solve the problem, then the USB Port must have some hardware issue that professionals can address and repair.
See also: {Solved} 5 Ways to Fix USB Device Descriptor Failed Error.

Gravit Sinha: Founder of ValidEdge, a problem-solving website, driven by his lifelong passion for fixing issues.