WiFi is the standard mode of internet usage on laptops. The newer version of Windows, Windows 10, incurred the problem of WiFi Keeps Disconnecting very frequently. The network disconnection issues due to hardware failures or incompatibility on older laptops are justified.
Seven Ways to Fix WiFi Keeps Disconnecting Issues in Windows 10:

- Method 1: Update Drivers to the latest version
- Method 2: Change the settings for Power Management
- Method 3: Run Network Adaptor Troubleshooter
- Method 4: Reinstall and Install Driver
- Method 5: Reset the network
- Method 6: Reset TCP/IP packets
- Method 7- Disabling options under WiFi Sense
For a newer laptop, the mentioned problem can be resolved by following numeral methods or solutions to the problem. Read further to find out more.
See also: FIX: Can’t See My Wifi Network on Windows 10 | Quick Guide
How to Fix WiFi Keeps Disconnecting Issue in Windows 10
Various Windows 10 users report such types of network disconnecting matters. The different methods to fix the Internet Keeps Disconnecting error are linked below.
Fix: Windows 10 Won’t Automatically Connect To WiFi
Method 1: Update Drivers to the latest version
Many times, we face the network disconnection hurdle due to un-updated drivers. To resolve it, one must update the respective driver. Follow the given steps to do so:
Fix This: Fix Driver WUDFRd Failed to Load
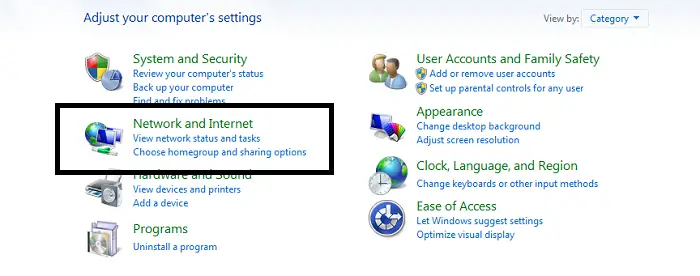
- Step 1- At First, on your Start menu, Search for Control Panel.
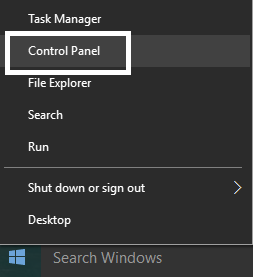
2. Step 2- Different items will be displayed when you open the Control Panel. Among the available options, then search for Device Manager.
3. Step 3 – Open the Device Manager.

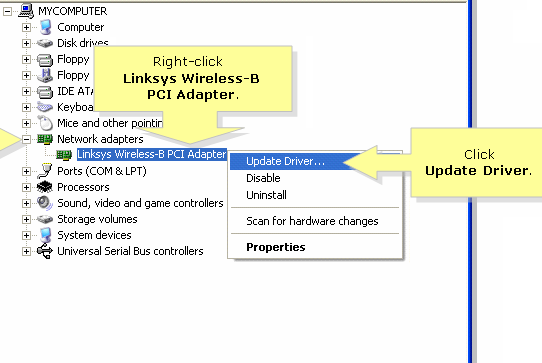
4. Step 4- Then, expand Network Adaptors.

5. Step 5- Click on the WiFi Adaptor and Select Update Driver Software.
6. Step 6- Later, Choose the alternative Search Automatically for updated driver software.
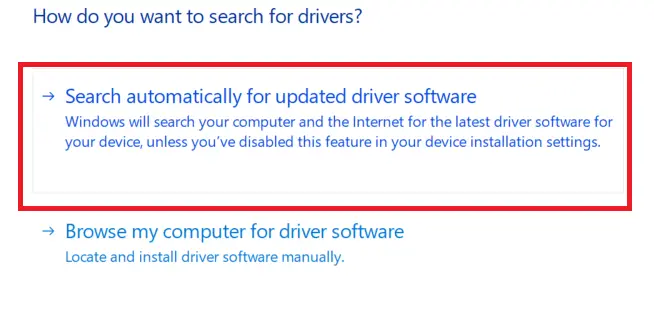
7. Step 7- Follow the instructions prompted on your screen. Have trouble updating your drivers? Here’s the fix to Windows Update Service Not Running.
8. Step 8- After installation, Restart your system.
For better assistance related to drivers, install Driver Easy or Driver Booster software to handle the update and installation of WiFi drivers.
Also, Read –
[Solved] How to Stop Skype from Starting Automatically
6 Ways to Fix Google Chrome has Stopped Working
Method 2: Change the settings for Power Management
Everyone inculcates keeping the system on Power Saver Mode to keep the battery healthy. Full performance can be exhibited while disabling Battery Saver.
At times, the Windows 10 WiFi issue of Keeps Disconnecting can be resolved by changing the Power Management of drivers. The steps can be lined up as follows:
- Degree 1-At First, open the Device Manager as stated in Method 1.
2. Step 2-Double Click on the WiFi Adapter by expanding Network Adaptor.
3. Step 3- Then, Click on the Power Management Tab on the panel displayed on your screen.
4. Step 4- Uncheck. Allow this computer to turn off this device to save power.
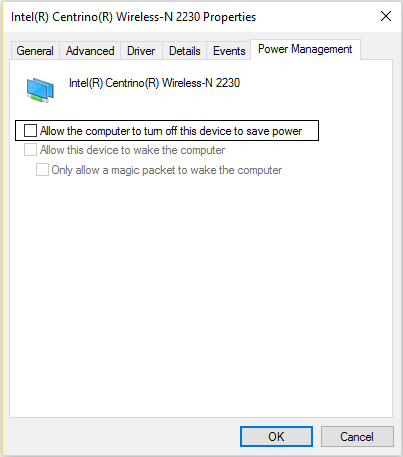
5. Step 5- Finally, click Ok and Restart your device.
Method 3: Run Network Adaptor Troubleshooter
If the problem does not fix, go for the method explained here:
- Step 1- First, Press the Windows logo present on the keyboard.
- Step 2- Then, type Troubleshooting on the search bar.

3. Step 3- On the Troubleshooting panel & click on View All option.
4. Step 4- Click on Network Adaptor.
5. Step 5- Click the Advanced option and Run As Administrator.
6. Step 6-Finally, click Next and follow the instruction. This issue could also be the reason behind Random Windows Restart Error.
Don’t miss out –
5 Ways to Fix NVIDIA Installer Cannot Continue Error
Method 4: Reinstall and Install Driver
Many times WiFi Keeps Disconnecting issues occur due to the presence of corrupted drivers. Go ahead with the steps as instructed-
- Step 1- Open Device Manager as stated above.
2. Step 2- Expand the Network Adaptor option.
3. Step 3- Click on the WiFi Adaptor and select the Uninstall menu.
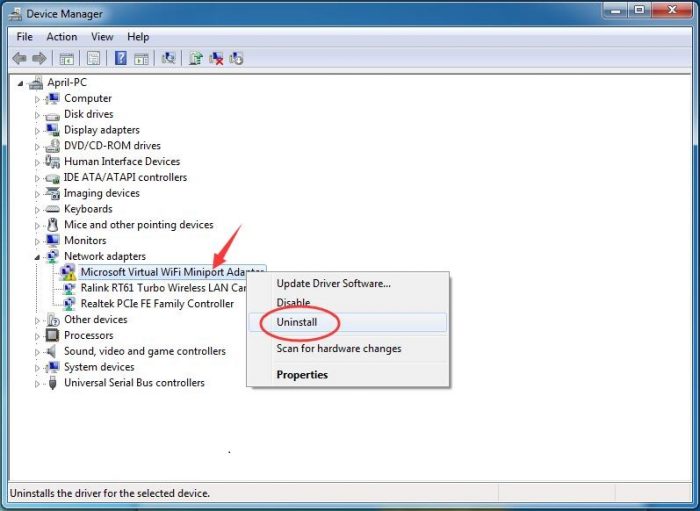
4. Step 4- Restart your system once you uninstall the driver. Using this method, you can also fix other Windows Update Errors like 0x8024a105 or 0x80070422.
Later, install the latest drivers from the manufacturer’s website. If the problem does not resolve, go for updating the drivers.
Don’t miss out –
{Solved} 13 Ways to Fix USB Ports Not Working Error
5 Ways to Fix Critical Structure Corruption Errors in Windows 10
Method 5: Reset the network
Windows 10 is bestowed with Network Reset inbuilt feature. All you can do is follow these simple steps:
- Step 1- Go to Settings, followed by Network and Internet.
2. Step 2- Then move to Network Reset and click Reset Now.
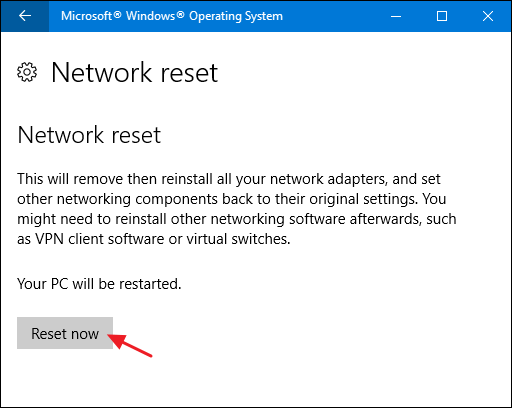
The common internet connectivity issues get resolved through this. It is also helpful to fix WiFi Keeps Disconnecting Problem.
Check Out:
6 Ways to Fix Application Error 0xc0000142 {2023 Updated}
8 Ways to Fix Kernel Security Check Failure in Windows 10
6 Ways To Fix Could Not Connect To Steam Network Error
Method 6: Reset TCP/IP packets
One of the solutions to the matter is to reset the TCP/IP packets by writing a set of commands.
- Step 1- On the Search bar, type Command Prompt and press Enter.
- Step 2- Open the Command Prompt and Run As Administrator. Write the below-given command on the CMD and press Enter.
netsh int tcp set heuristics turned off - Step 3- Enter the second command:
netsh int tcp set global autotuninglevel=disabled - Step 4- Enter the third Command:netsh int tcp set global rss=enabled
- Step 5- Reboot your system.
The TCP/IP packets reset when you receive the OK message.
You may also like –
5 Ways to Fix Windows 10 Taskbar Frozen Error
{Solved} 6 Ways to Fix Network Adapter Missing Issue
Method 7- Disabling options under WiFi Sense
Windows 10 comes with an automatic WiFi Sense attribute. As per the availability of the network and strength, it connects to the available. But at times, it leads to frequent disconnects to the WiFi network.
A possible solution is to change some features inhibited by WiFi Sense. Try to turn off most options under the heading to fix the WiFi Keep Disconnecting problem.
Also Fix: Disable Steam Auto Updates
- Step 1- Open the Start menu and click on Settings.
- Step 2- Open the Network and Internet settings.
3. Step 3- Click on WiFi, followed by the option Manage WiFi Settings.
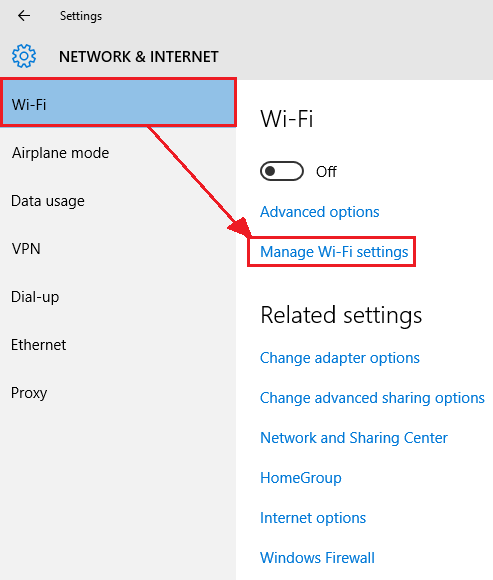
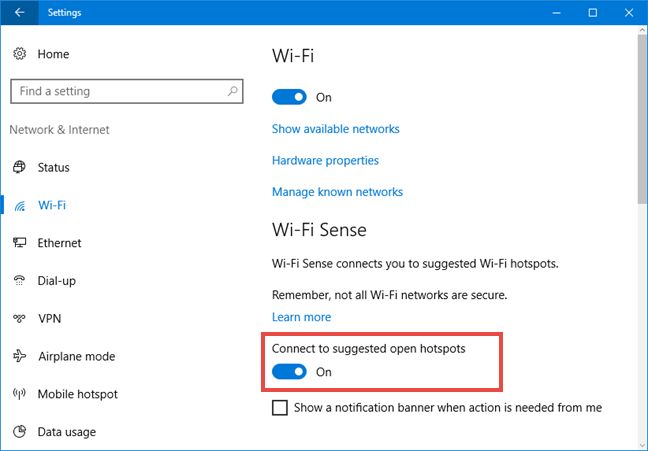
4. Step 4- Navigate below for WiFi Sense.
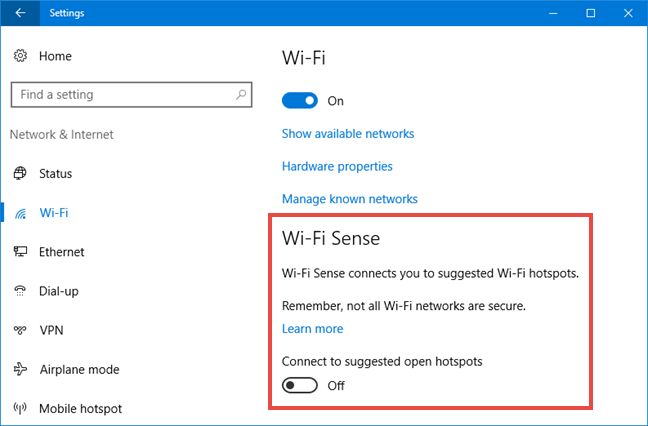
5. Step 5- Disable the features like Connect to suggested open hotspots. Connect to networks shared by my friends under WiFi sense headings.
6. Step 6- Save the changes you made by clicking on Save /Apply button.
Fix these errors too –
3 Ways to Fix Installer Encountered With an Error 0x8024001e
{Solved} 6 Ways to Fix BAD_POOL_CALLER BSOD Error
FAQs
What should I do to strengthen my Wi-Fi connection?
Consider the following suggestions to strengthen your Wi-Fi connection: Put the router in the middle and raise it. minimize the disruption brought on by technology. The firmware of the router might need updating. Utilize the latest modern Wi-Fi standards, such as Wi-Fi 6. Make use of a mesh network or a Wi-Fi range extender. Make smart channel selections. To secure your network, use a strong password.
What causes the frequent on-and-off cycles of my WiFi router?
Your WiFi router may frequently turn on and off due to overheating, outdated firmware, signal interference, or hardware issues. Additional reasons that contribute to this issue include network congestion, electricity limitations, and configuration problems. While investigating and fixing the issue, take into account updating the firmware, reducing interference, keeping a consistent power supply, and positioning the router in a well-ventilated place.
How can I update my Wi-Fi?
The web interface of your Wi-Fi router is easily updated by entering its IP address into a browser. The most recent firmware can acquires from the manufacturer's website, located on the Firmware Update page, and uploaded via the interface. Whenever the update is done, the router is going to restart. Consider making a backup of your present configuration before going back to the factory defaults.
Should I reinstall my router every day?
It is wasteful and unnecessary to install your router from scratch each day. The firmware of a router normally does not need regularly updated because it is made to run continually. Instead of performing regular reinstallations, which could cause needless wear and tear, if you're experiencing connectivity problems, consider troubleshooting through firmware upgrades, modifying settings, or addressing potential sources of interference.
Conclusion
We accept the above-suggested methods to fix the WiFi Keep Disconnecting issue. Microsoft uses these solutions only.
Notably, the internet being an essential element, frequent disconnects lead to irritation and unavoidable work delays. So don’t make compromises and try the above methods to work smoothly.

Gravit Sinha: Founder of ValidEdge, a problem-solving website, driven by his lifelong passion for fixing issues.