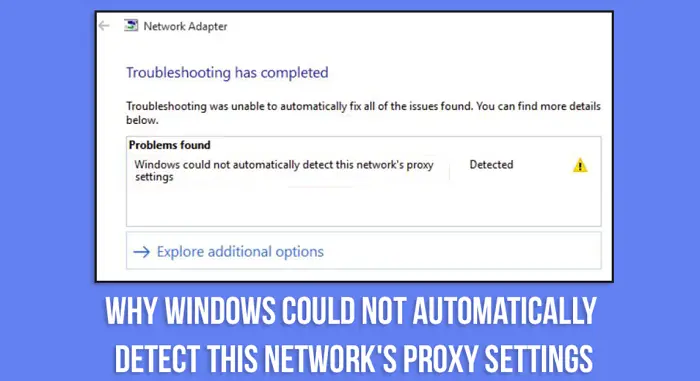
Suppose you have slow internet issues or your network isn’t working with a yellow sign on the Wi-Fi symbol. In that case, you are facing the problem of windows could not automatically detect this network’s proxy settings. It is a common issue and can pop up due to network changes or new installations.

To eradicate this error, try restarting the adapter or updating the OS. If Windows cannot detect proxy persists, then don’t worry. Follow this step-by-step guide to learn various methods to fix the issue. Here is a guide on fixing Windows 10 startup menu.
Keep reading this article to fix Windows easily Could Not Automatically Detect This Network’s Proxy Settings error.
Methods to resolve “Windows Could Not Automatically Detect Proxy Settings.”
The following steps will help you to remove the error windows could not automatically detect this network’s proxy settings no matter the reason and will ensure that it never occurs again. To do this,
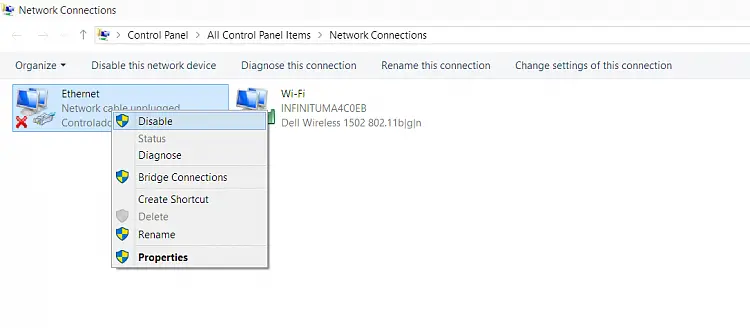
Disable and Enable Network Adapter
The first thing to run is to stop and restart your network adapter settings. To do this,
- In the toolbar, right-tap on the network icon. Go to the open network and internet settings and switch to ethernet. Look for change adapter settings
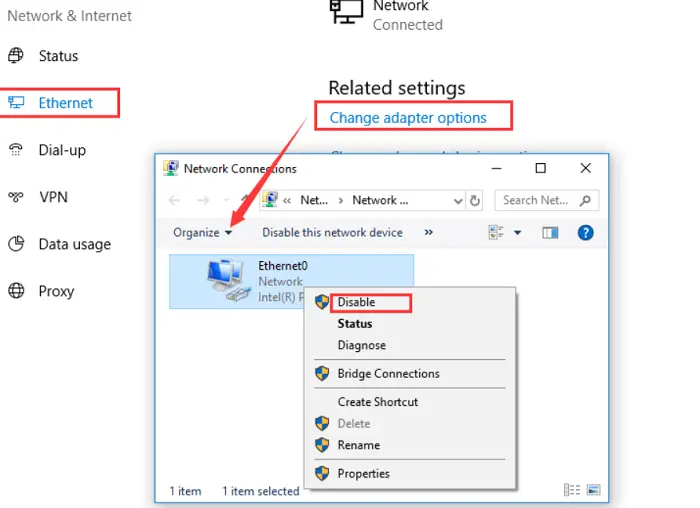
- In the window, look for your network and disable it. Enable it again after a few minutes.
This would resolve the Windows 10 can’t detect proxy settings due to network settings.
Turn on Obtain DNS Server Address Automatically
Try enabling the system to choose the server automatically. To do so,
- In the toolbar, right-tap on the network icon. Go to the properties option and tap on Internet Protocol Version 4 (TCP/IPv4)
- In the window, choose properties and go to the general tab
- Under this, click on the Obtain DNS server address automatically option and press ok.
This will make your system choose the server for you, eradicating the issue.
Ensure Drives for Network Adapter are Proper and Up to date
Sometimes the drivers might be causing the issue to pop up. To verify and fix this,
- From the start menu or if it doesn’t work from the Windows key, go to the device manager
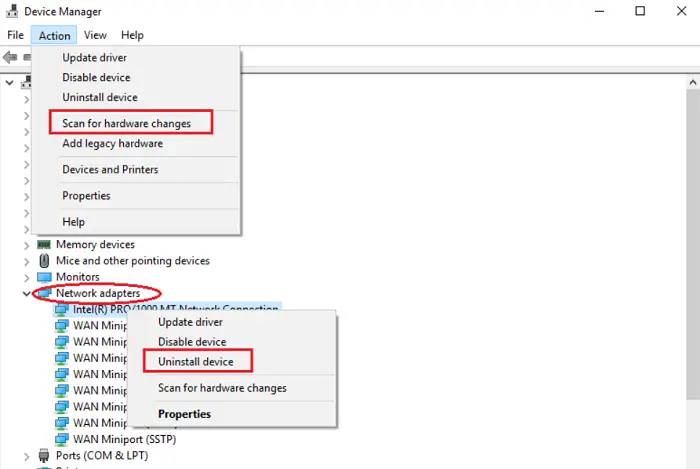
Ensure Drives for Network Adapter are proper and up to date - Tap on network adapters, and in the context menu, press on uninstall the device. Now find the action tab, and in the drop-down, go to scan for hardware changes.
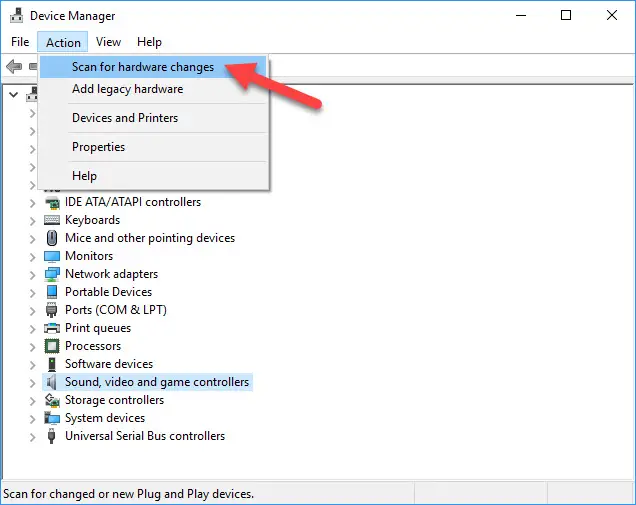
This will install the proper drivers and fix the Windows that could not detect the proxy issue automatically.
Turn off Proxy Server settings.
If your proxy settings are on, then the error can occur too. To remove this,
- Open the Run search bar and type inetcpl.cpl. The internet properties open in which you have to go to the connections tab.
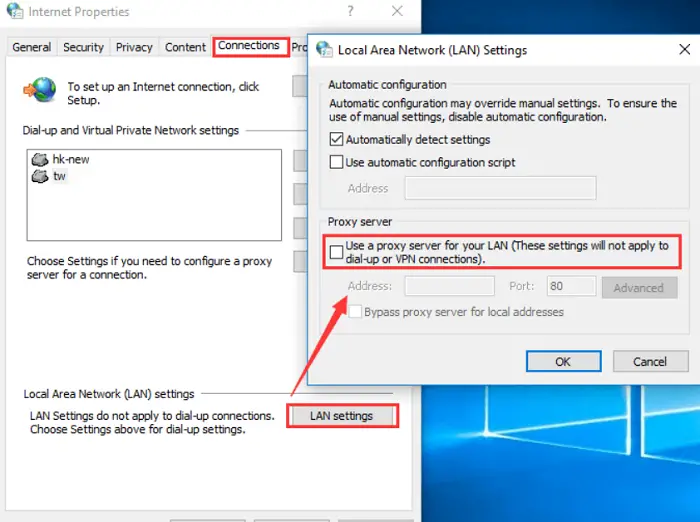
- When you open the Lan settings, a window opens. Turn off. Use a proxy server for your LAN and exit.
This will fix the issue if the settings were causing it.
Change Internet Explorer Settings
Some users were also facing the issue due to internet explorer settings. Try changing them by resetting them. This will delete all your settings too.
- Open the Run search bar and type inetcpl.cpl
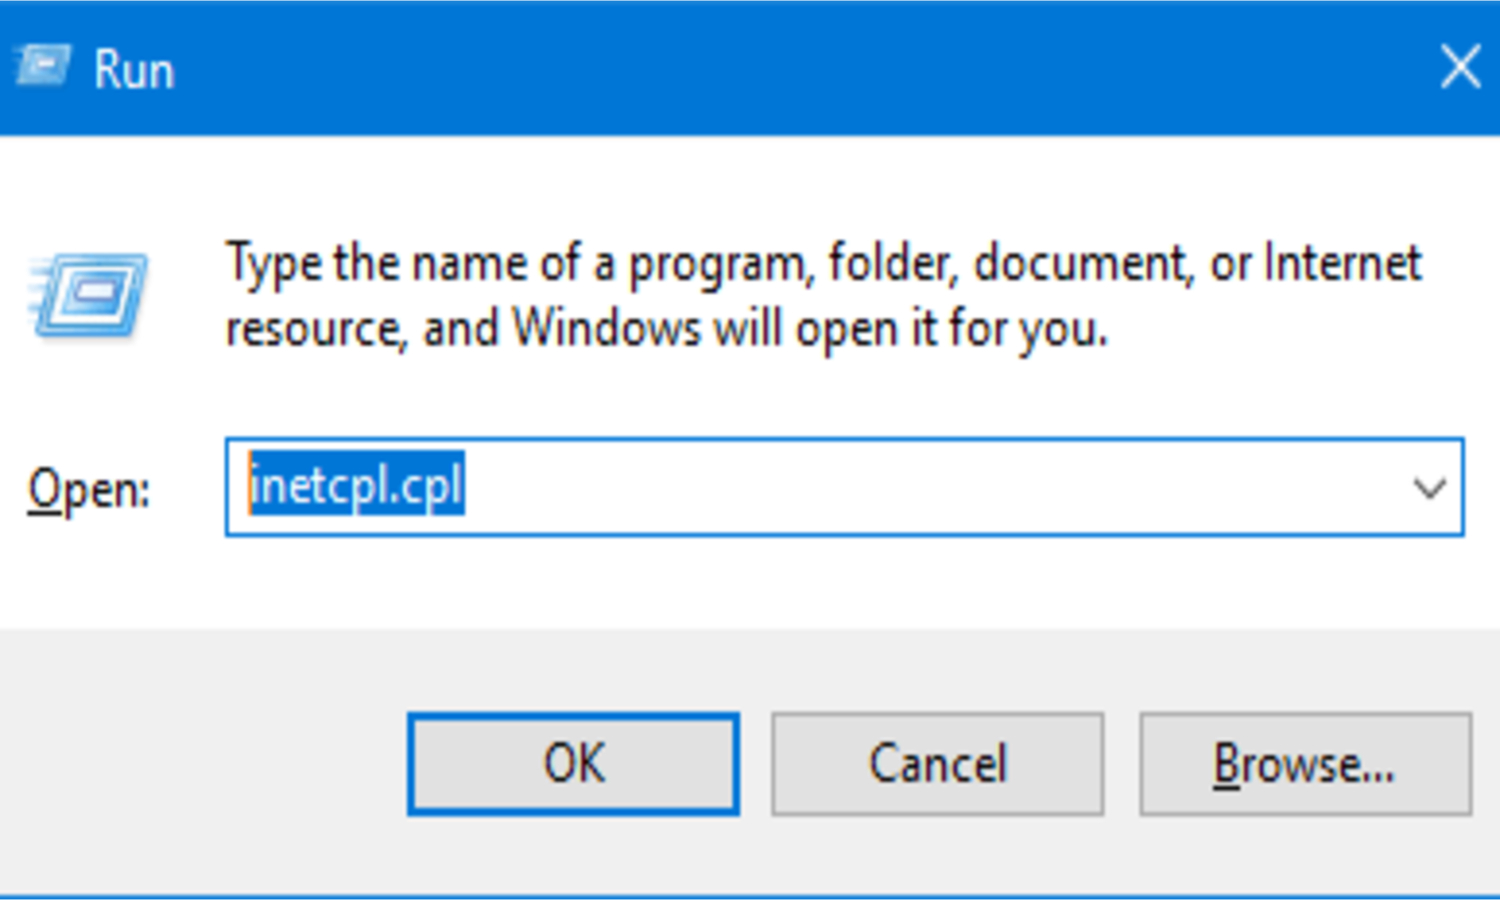
- The internet properties open, so you must go to the advanced tab.
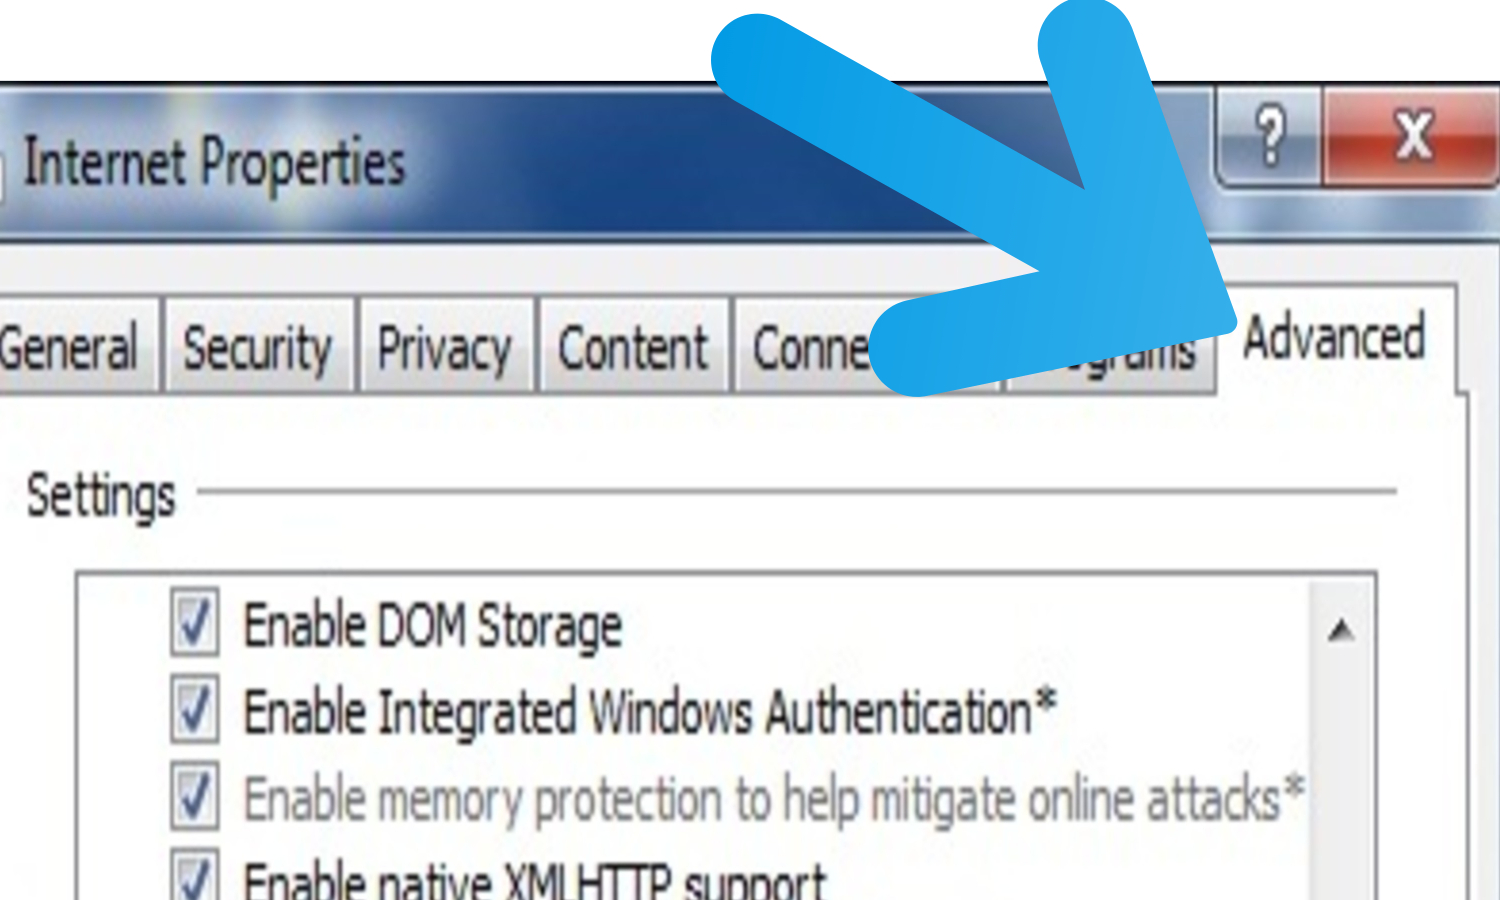
- Find the Reset Internet Explorer setting option and click on reset.
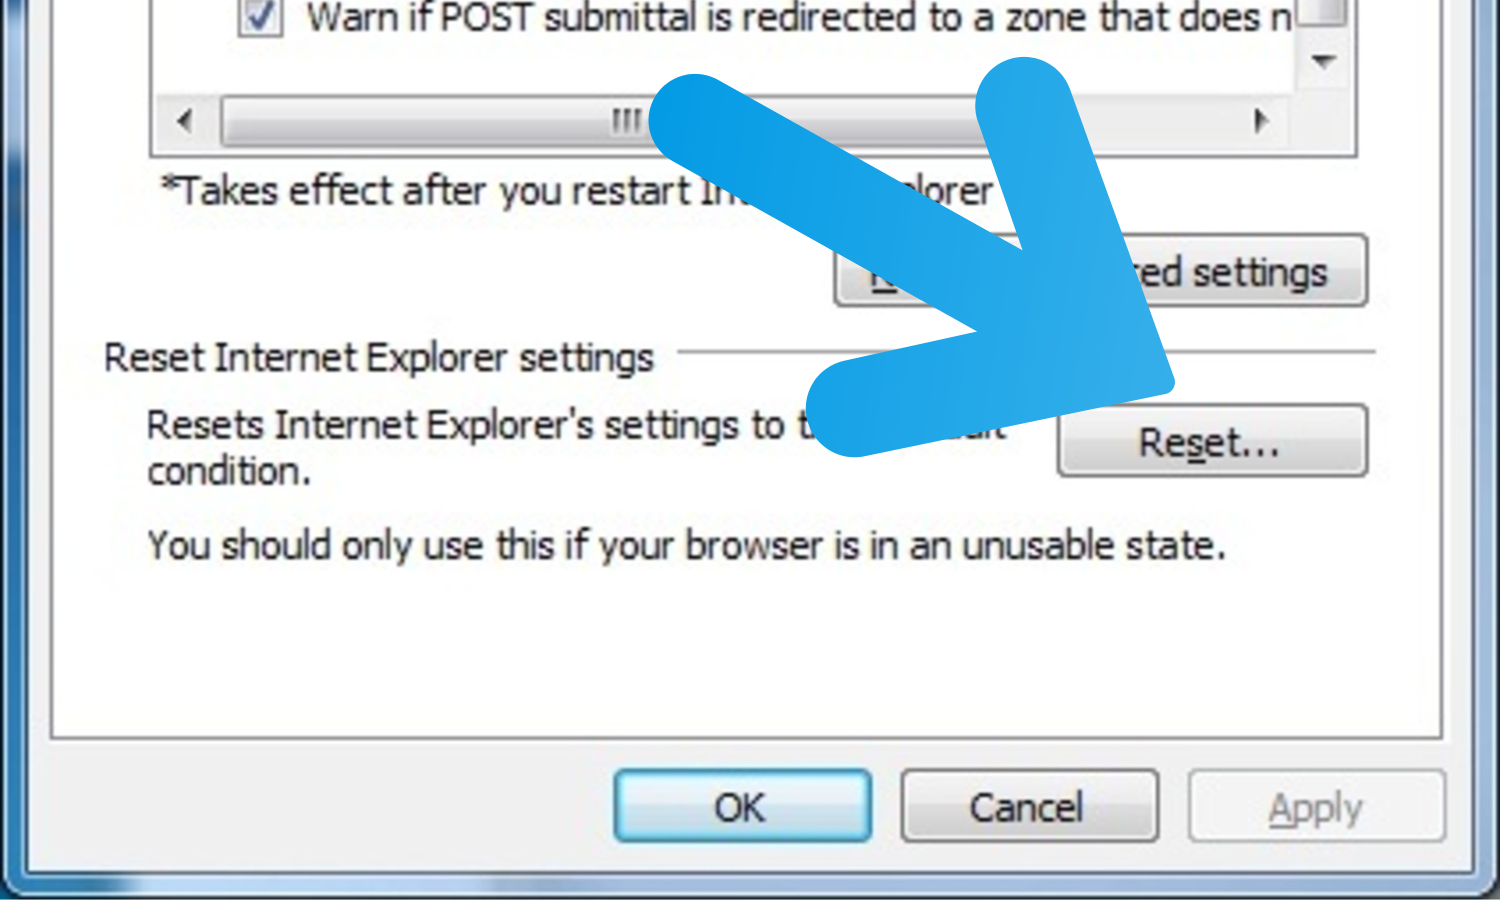
- In the pop-up window, tap on and check to delete all personal settings and reset these.
This will fix the issue caused by faulty settings
Run Network Adapter Trouble-shooter
One of the easiest ways to fix the issue is to run the network adapter troubleshooter. To do this,
- In the start menu, search troubleshooting. In the troubleshooting window, go to the network adapter
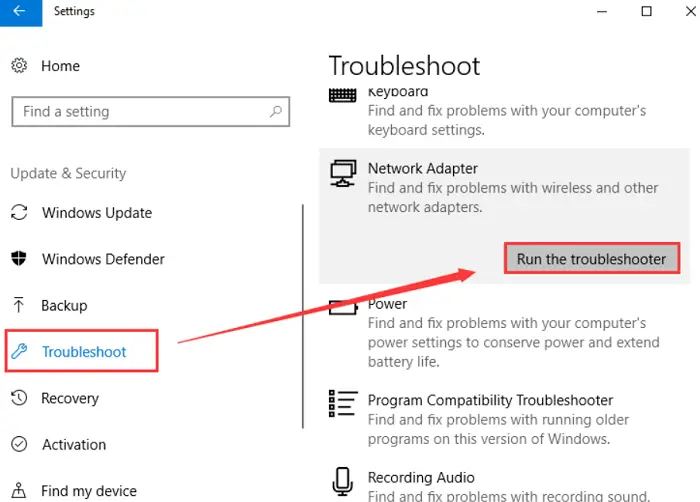
Run Network Adapter Trouble-shooter - Run the troubleshooter by clicking on next
After the troubleshooting, check for the issue Windows could not automatically detect this network’s proxy settings is resolved.
Uninstall Antivirus Software
Third-party antivirus like Avast can hinder the internet and cause the issue.

It is recommended to uninstall these and let windows defender be the only antivirus running.
Reset TCP/IP
Alternatively, you can also use the PowerShell tool. From the start menu option, open Windows PowerShell (Admin).
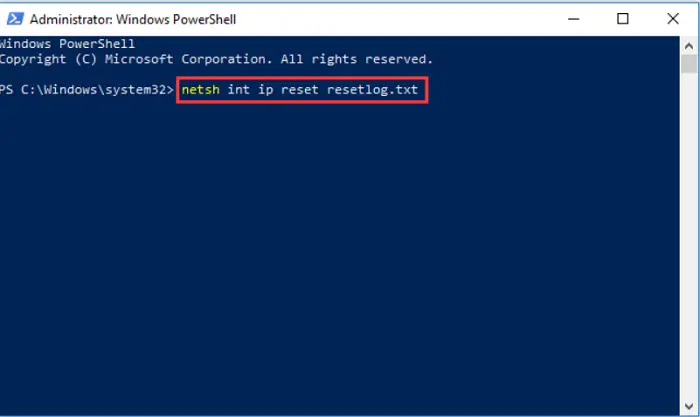
Simply type netsh int ip reset resetlog.txt and let it run. This will reset the tcp/ip and resolve the Windows could not automatically detect this network’s proxy settings issue.
Perform SFC Scan
System file checker or SFC is an in-built file checker that gets hold of all corrupted files in your system. To run this,
- In the start menu, enter “cmd” in the dialog box. Right-click on it and press run the command prompt as administrator.

- Now type sfc/scannow and let it run. Restart your system once the process is done.
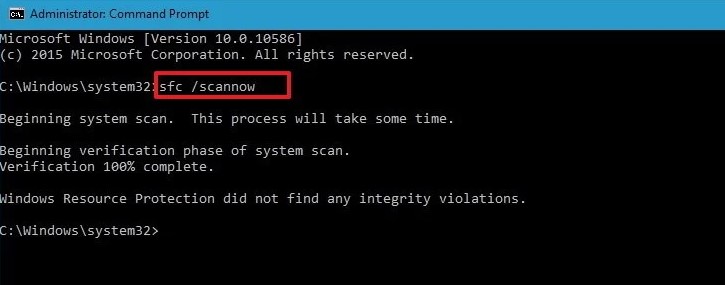
Note– the process is very long, and it is recommended not to interrupt it.
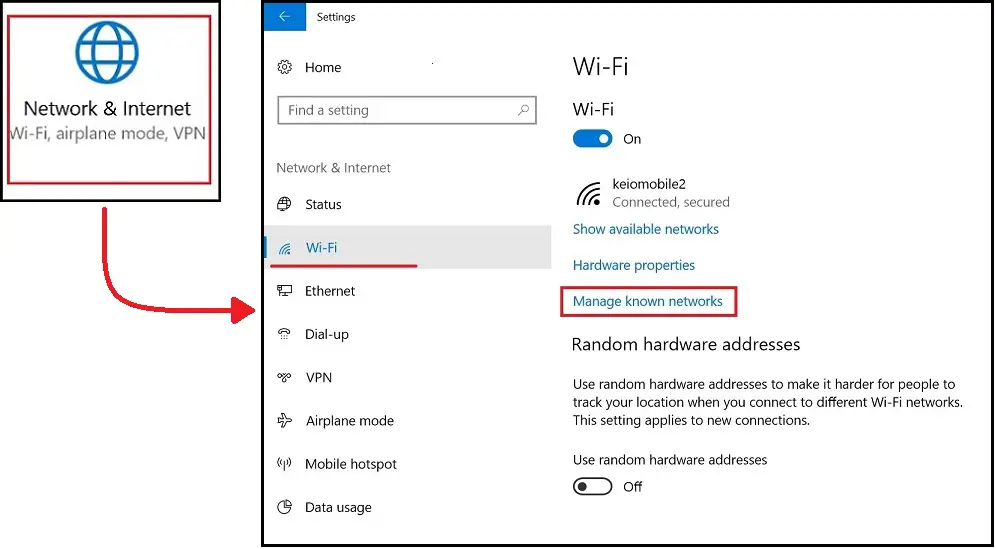
Change Proxy Settings
In significant cases, the system is automatically detecting the settings and causing the error. To correct this,
- Open Settings from the Windows key, or if it doesn’t work, then by the start menu. Tap on the Network & Internet Proxy
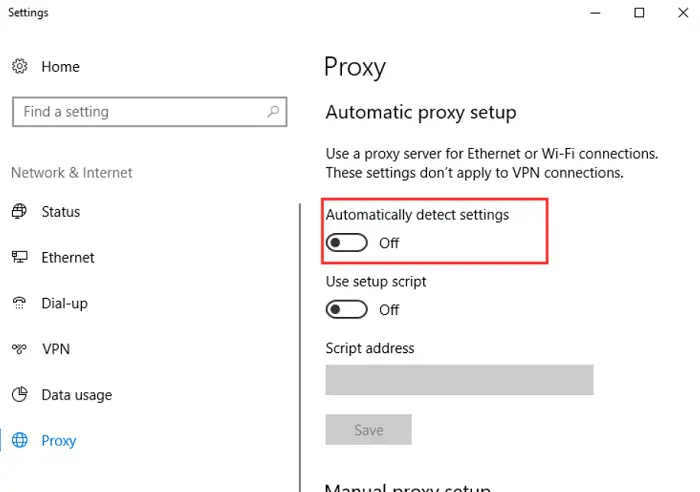
Change Proxy Settings - Now turn off the Automatically detect settings.
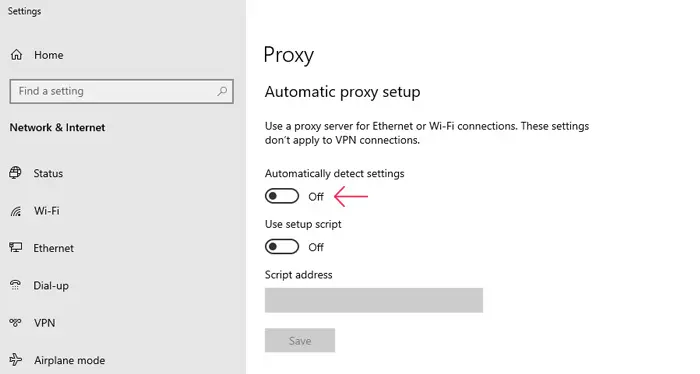
The error won’t occur now.
FAQs
How do I troubleshoot the Wi-Fi not detecting proxies' error?
On the yellow sign on the Wi-Fi name, right-click and select troubleshoot or follow the guide above.
How do I resolve proxy servers not working?
In Windows settings, tap on proxy. Now press Change a Proxy Setting to ensure automatically detect setting is turned on.
Conclusion
With assistance from this guide, we hope you were able to solve the Windows could not automatically detect this network’s proxy settings error. Now get back to enjoying your internet. Happy surfing!
See also: FIX: Can’t See My Wifi Network on Windows 10 | Quick Guide

Mayank Parmar is a journalist covering technology news, but with a strong focus on Microsoft and Windows related stories.