The Windows Update Error 0x800705b4 is a standard error when users attempt to upgrade or update their Windows versions to higher types. In 2016, Windows announced an update to its Windows 10 model. This update was called the “Windows Anniversary Update” and was set to be available to 350 million devices worldwide. 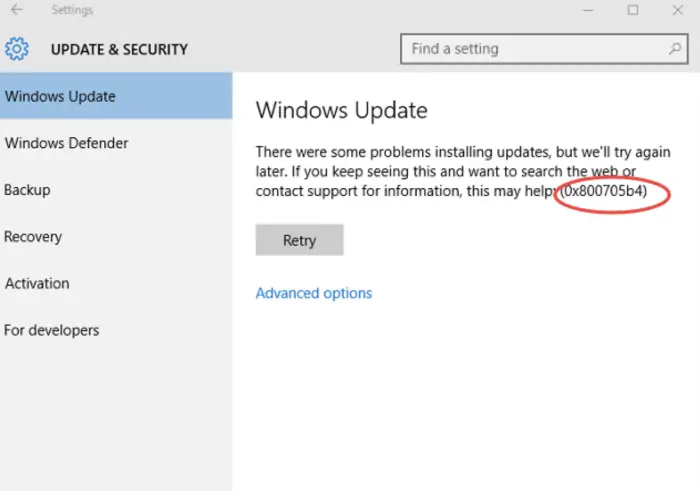
The primary reason the 0x800705b4 error occurs is the functioning of the Windows Defender System when it does not allow to/ is unable to start. What was initially set to be a successful launch turned out to be a bit of a failure when users began encountering numerous errors related to the download. It included the Windows Update Error 0x800705b4. It is caused when the window Defender is incompatible with the third-party protection software.
Other outdated/corrupted systems components, configurations, and third-party software being used also posed a problem when the update was installed. Learn more about this issue in this article.
Also, Fix This: Antimalware Service Executable High CPU Usage
How to Fix Windows Update Error 0x800705b4
Some of the primary ways to fix the error has explored below:
Method 1: Running the Troubleshooter
- First, Locate the Troubleshooting option by searching for Troubleshoot in the Cortana search bar.
 Then select the Troubleshoot option on the pop-up menu.
- Afterward, click the View All option on the left panel.
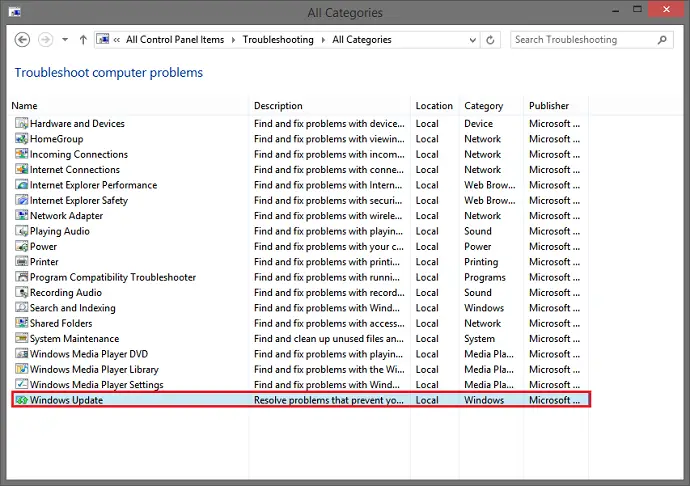
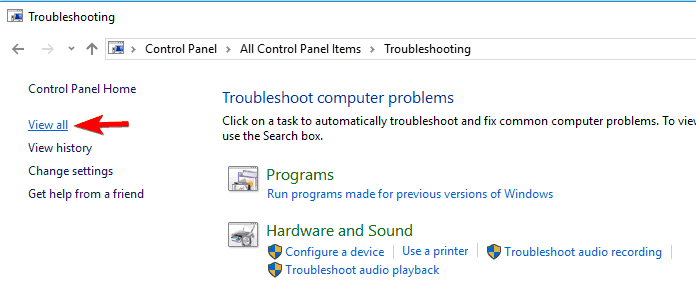 Then click on the Windows Update in the list and select the Advanced option
 Afterward, select the Run as administrator option and then select Next.
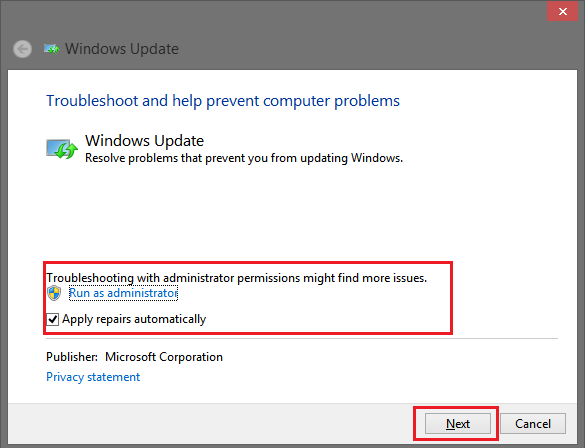 The Troubleshooter should identify the problems, including the 0x800705b4 error, and fix them, allowing the Update to occur uninterrupted.
Check Out: Fix Windows Modules Installer Worker High CPU Usage
Method 2: Starting Windows Defender
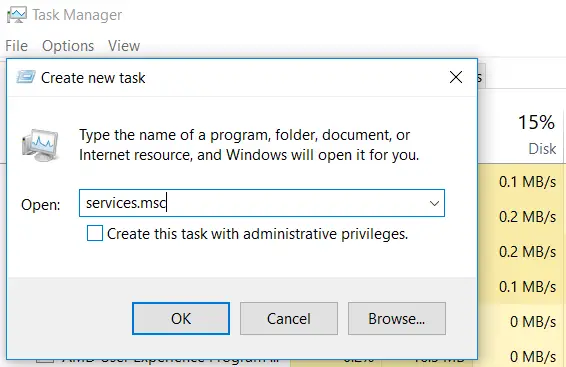
1. At First, Go to the Services option either by clicking on the Windows + R keys together or by typing in Services in Cortana and right-clicking and selecting Run as administrator. In the box that appears, type in services.msc and press Enter.
2. Then in the Window that pops up, locate the Windows Defender option in the services list.
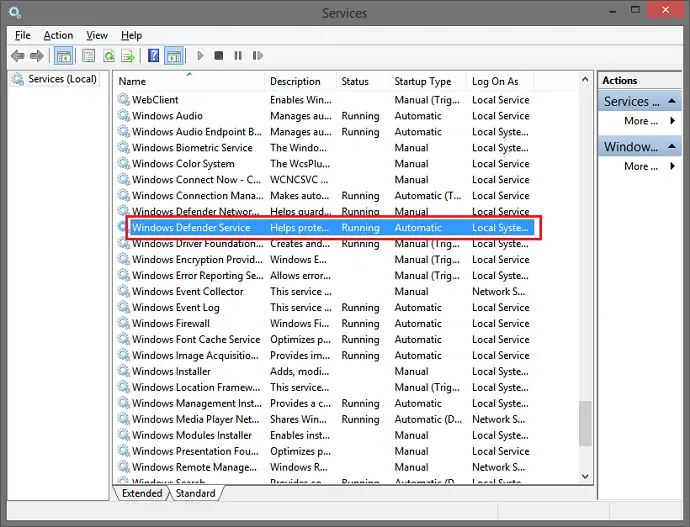
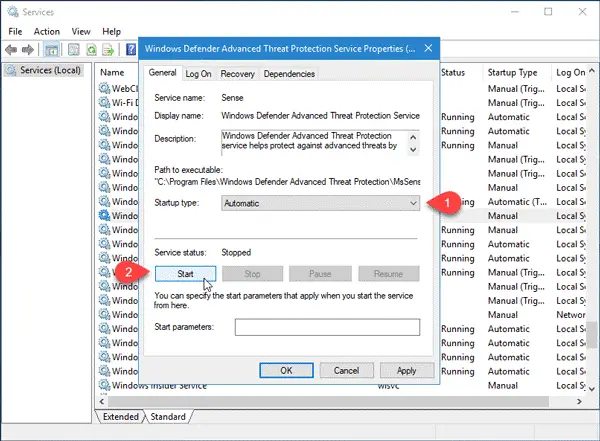
3. Afterward, ensure that the Status column display says Started/Running. If this column is blank, right-click the option and click Start.
4. If an error stating that Windows Defender requires being force-started pops up, go back to the services box and change the Startup Type to Automatic. This option is available in the Properties section, obtained by right-clicking in the column.
Fix This: Fallout 4 Crash on Startup
5. Finally, restart your computer and check for updates.
Method 3: Using the “Background Intelligent Transfer Service” Property
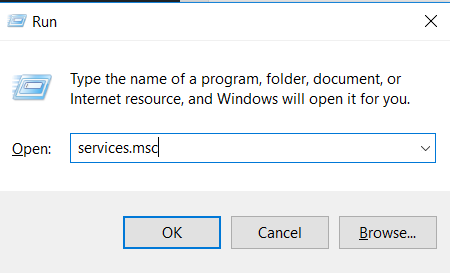
1. At First, Go to the Services option either by clicking on the Windows + R keys together or by typing in Services in Cortana and right-clicking and selecting Run as administrator. In the box that appears, type in services.msc and press Enter.
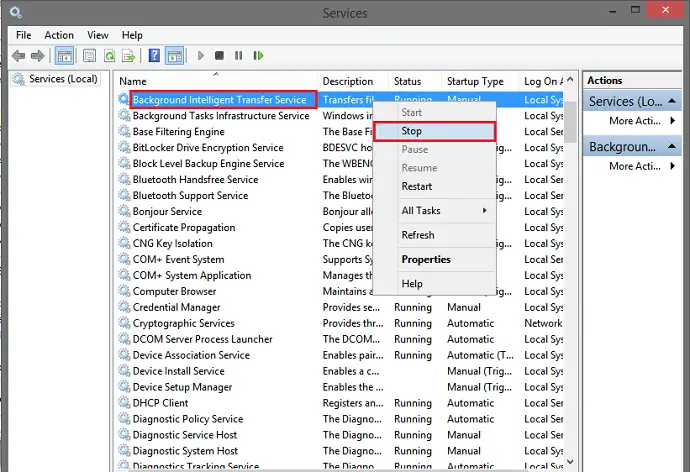
2. Then locate the Background Intelligent Transfer Service option. Right-click on it and click on Stop.
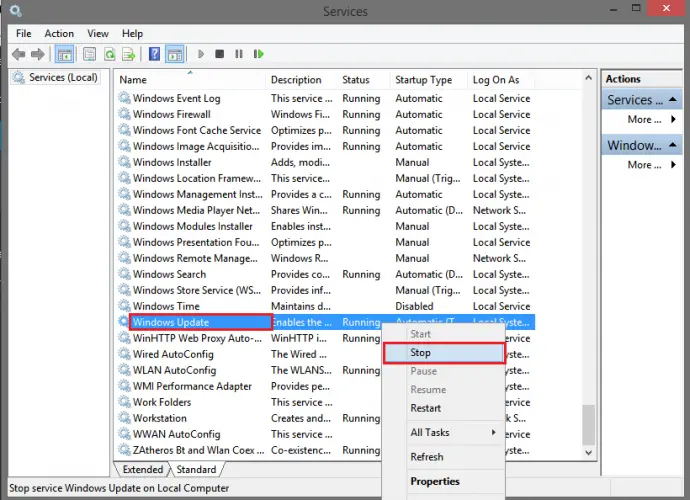
3. Afterward, locate the Windows Update option. Right-click on it and click on Stop.
4. Go to the This PC option and search for Software Distribution. Empty/ Delete all the files in this folder (All the content may not delete. The Primary goal is to delete the folders titled Download and “DeliveryOptimation.”)
Bookmark This: Delete System Error Memory Dump Files
5. Finally, restart your PC.
Method 4: Changing the Settings for the Windows Update Panel
1. At First, Go to the Windows Update Panel either by searching for Check for updates in the Cortana search box or by going to the Settings Menu and selecting the Update and Security option at the bottom.

2. Then in the Windows Update panel, click Advanced options.”
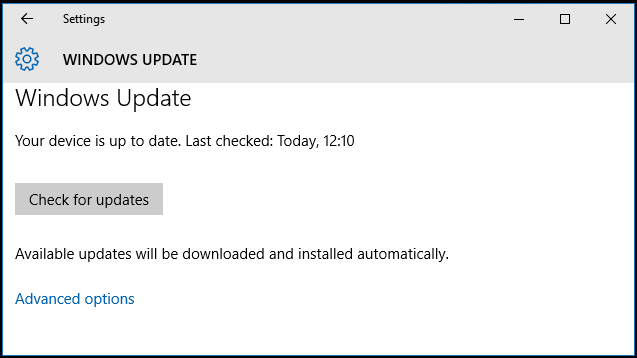
3. Uncheck the option titled Give me updates for other Microsoft products when I update Windows and then Restart your computer.


Gravit Sinha: Founder of ValidEdge, a problem-solving website, driven by his lifelong passion for fixing issues.

