With the increased love for video games, many applications have been designed to ensure smooth running. If you read this article, you must know about Steam, which offers various unique features. It has an extensive collection of games that do not take up a lot of space on your PC. However, Steam users have repeatedly faced the “Steam won’t go online” error. Users have complained that they received these error messages while opening the application.
Solve this by clearing your download cache. Open your Steam client and click Settings>Select Downloads in the Settings panel>Click Clear Download Cache>Change your Internet settings. Open Network and Sharing Center.>Modify your shortcut.

If Steam won’t go online on your PC, probably the problem is with your Internet settings. Even if the internet connection works fine for other applications, steam users have complained of being unable to connect to its server. Hence, this article will discuss this error and its causes and solutions today. Follow this guide when the Steam link says the computer is offline.
See also: 6 Ways To Fix Could Not Connect To Steam Network Error
Reasons For Steam Won’t Go Online
A lot of reasons contribute to Steam won’t go online. Few may be:![]()
- Some bugs in the application itself.
- The Steam server itself might be facing a problem.
- The internet connectivity might not be strong enough.
- The devices connecting the PC to the network might be faulty.
- The files of the Steam app may be incorrect/corrupted.
Solutions For Steam Not Going Online
Given below are the simple steps to quickly solve your Steam issue.
Clearing The Cache
With the software come a lot of unwanted files and cache. While the app is in use, specific unwanted files might also result in Steam not going online. These could be the reason your computer can’t connect to Steam. Note: this step needs the login details of your account.
- Go to settings inside the app.
- Next, move to downloads in the panel at the left
- Here, an option will appear, “clear download cache.”
- Login into the system to complete it.
- Fill in those and check if Steam is working fine.
Delete Folders From Windows Named Temp
The folder named Temp contains the unwanted files. Hence, removing them won’t harm the system.

In the search bar, type %temp%. A list of folders will appear. Delete all these files. (The system deletes only those which are not working). Check for the error.
Changing The Internet Settings
While facing the error, you might receive a message like “Steam won’t connect to the internet” or “Steam link says the computer is offline.” This might be due to internet connectivity issues.
- Go to the network and sharing center.
- Check on the option named “Internet options.”
- Next, go advanced tab and then go to security listings
- Untick the “Enable enhanced protected” mode
- Restart the PC and check if Steam works
See Also: How To Steam Run Game As Admin? | Complete Guide
Change The Name Of The Client Registry.
Before performing this step, close the Steam app completely.
- Go to the Steam directory. Locate client. registry.blob
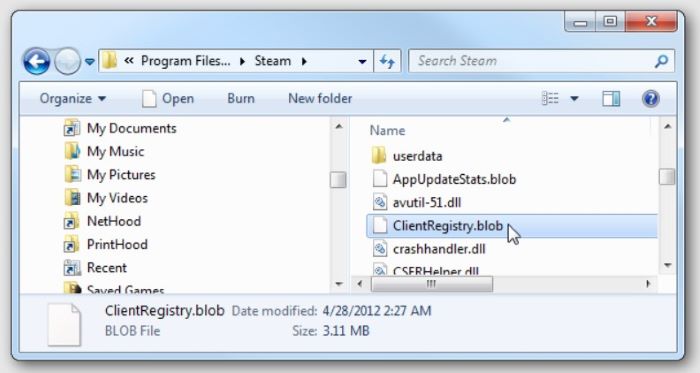
2. Change the name to clientregistryold.blob. Restart the program and see if Steam can’t go online is solved.
Add -tcp At The End Of The Shortcut
Users who faced the same issue found this method to be helpful.
- Make a shortcut to Steam, where the actual application is stored
- Under properties, click on the General tab
- Here, a dialog box named “target” will appear. In the given address, type ‘-tip at the end.
- It will look like “C:\Program Files(x86)\Steam\Steam.exe”-tcp
- When you open Steam, open with a shortcut
Using Steam In Safe Mode With Networking
When you face the “Steam won’t go online, but I have internet” issue, using Steam in safe networking mode is always better. To enable safe mode in Windows 10. Check if this way, the error is solved.
- Navigate to the start menu. Here, select the “power” button
- Then, press the Shift key and select restart using the mouse. A list of choices appears.
- Here, select Troubleshoot.
- Again, a new window appears. Select Advanced options.
- Next, click on startup settings and reboot the PC.
- After the PC starts, a list of critical options appears.
- To use the safe mode with networking, press F5/F6 according to what appears.
Reset Winsock
If you can’t connect to the Steam issue, try this method.

- Write ‘cmd’ in the search barThe command box opens; write ‘netsh Winsock . reset catalog.’
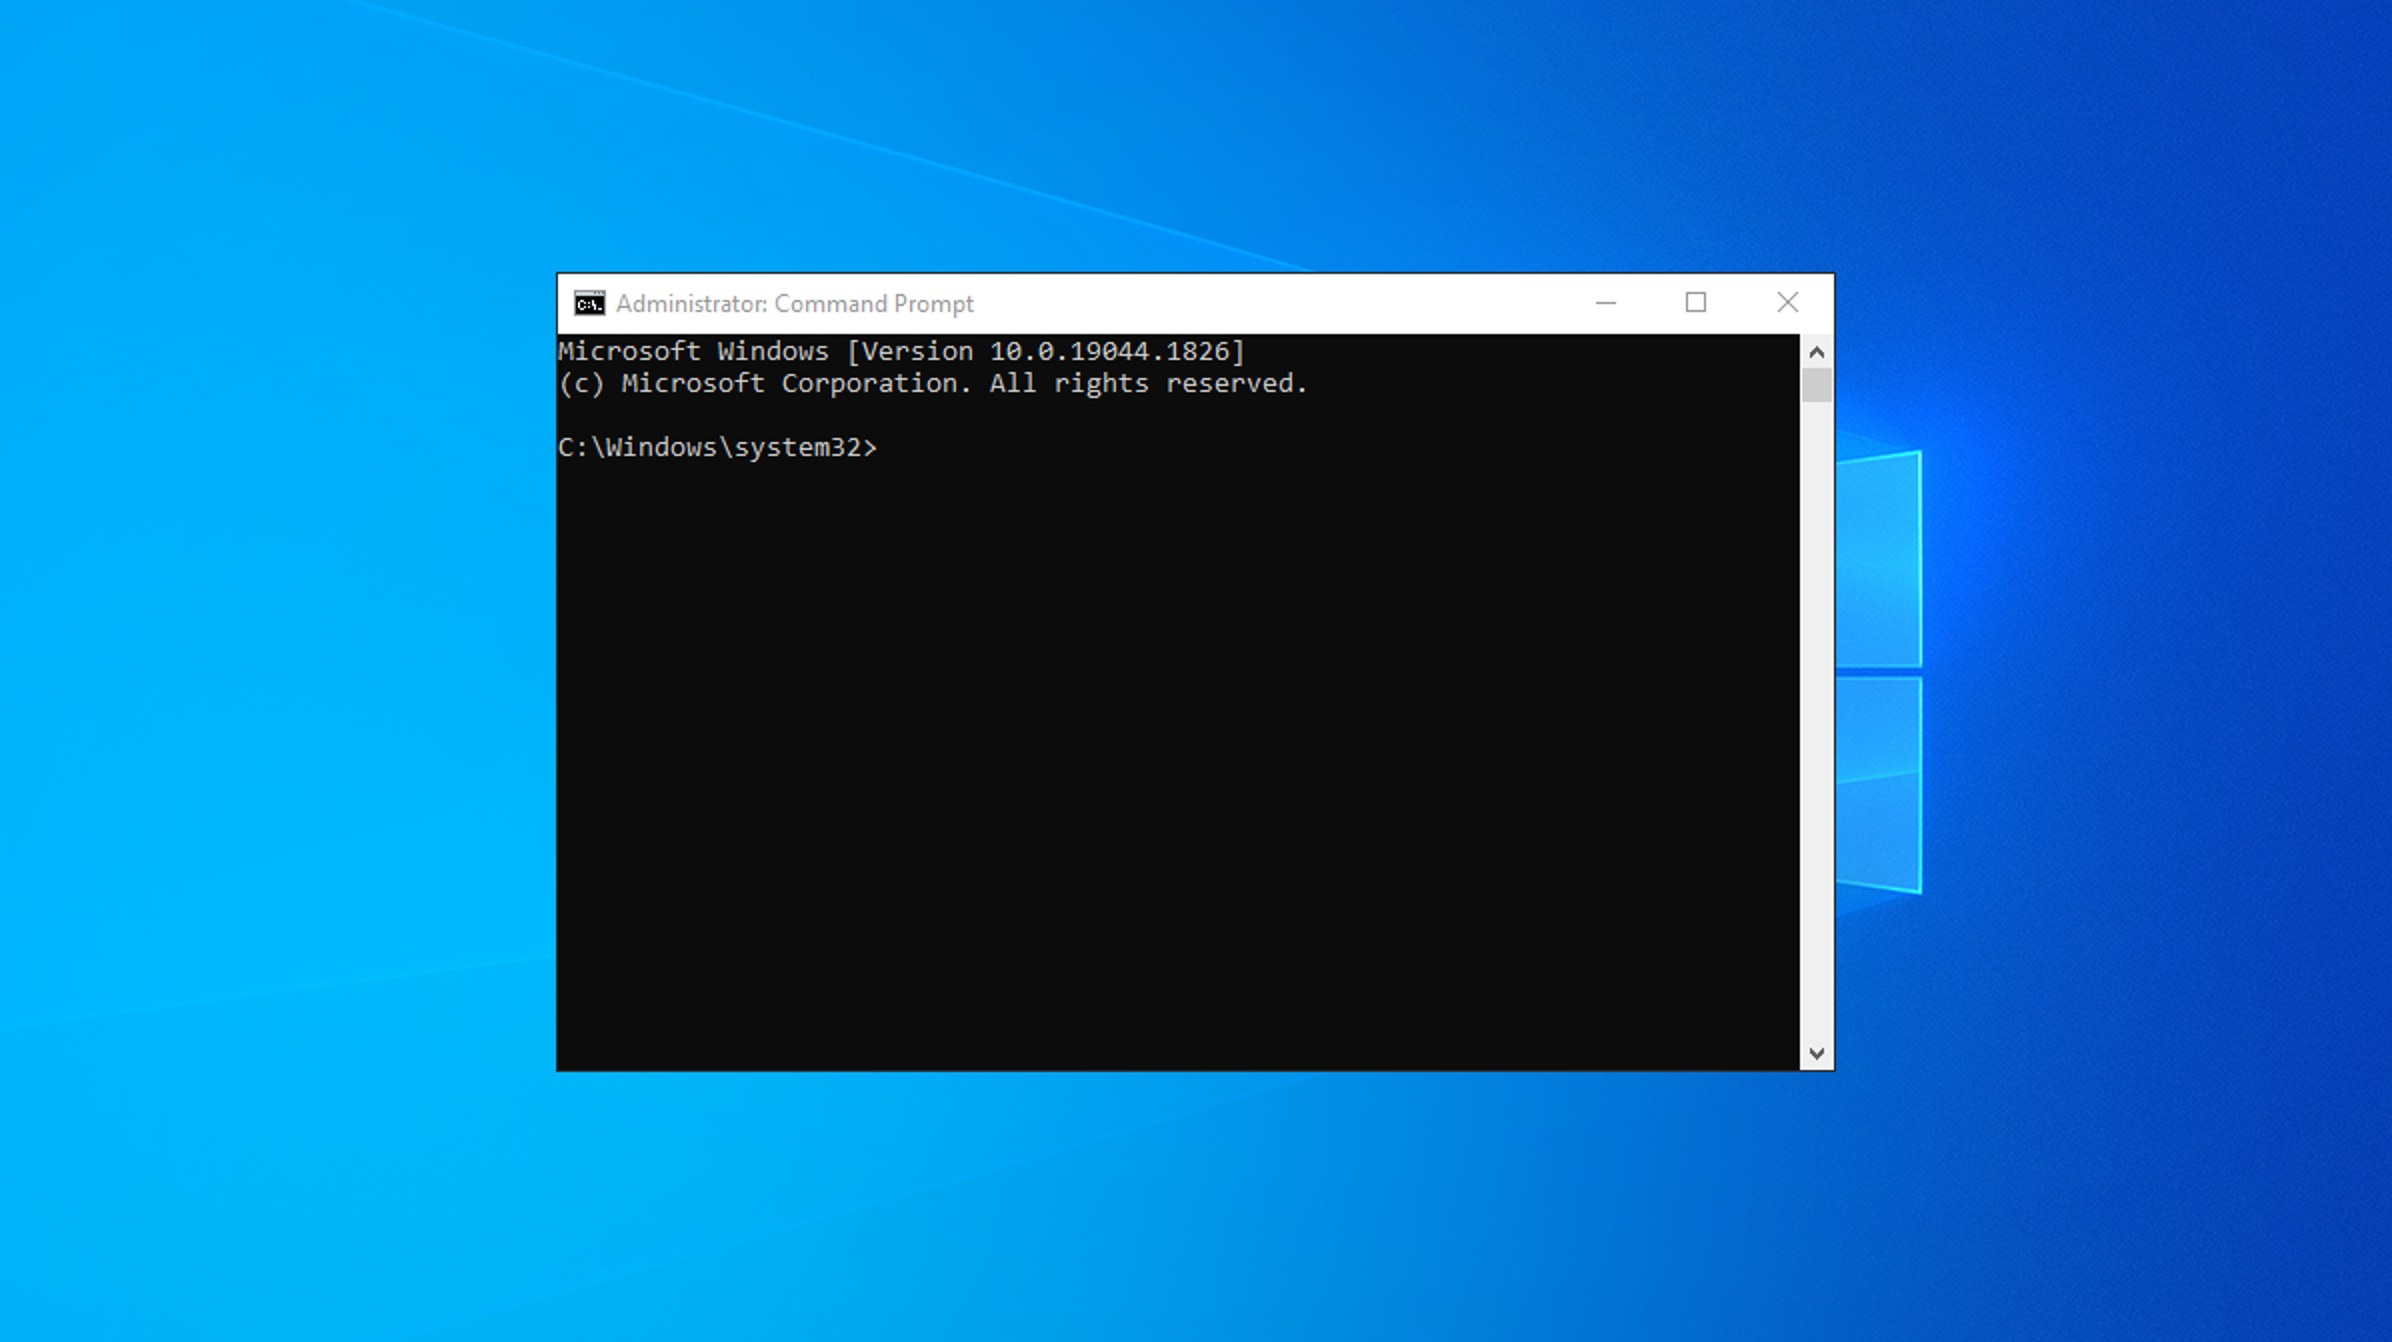
- Next, type’ netsh int ip reset.log’ and execute it. Try using Steam after restarting the PC
Install Steam Again
This method was mainly the last resort when nothing mentioned above works, and a backup needs to be done before performing this method.
- Navigate to C:/Program Files (x86)/Steam
- Then, locate folders named “SteamApps” and “Steam.exe.”
- Later, the files mentioned above should be left out, and others to be deleted.
- Launch Steam after rebooting the PC.
- Lastly, check if the error is solved.
![]()
See also: Steam Game Won’t Launch Issue | 8 Ways To Fix
FAQs
How can I troubleshoot Steam when it fails to connect to the internet?
While Steam isn't going on the web, you can follow a few investigating steps. First, guarantee that your web association is steady and working appropriately. If you're utilizing Wi-Fi, try changing to a wired association. Lastly, Restarting your modem or switch may assist in settling network issues.
What should I do if Steam is not responding or displays a ‘Connection Error’ message?
Restarting the Steam client is a decent beginning stage if Steam is inert or shows an association mistake. Leave the application totally and relaunch it. Contending with different projects or cycles running on your PC might bring it up. Lastly, Try turning off any antivirus or firewall to check whether that settles the issue.
How to check the integrity of my Steam records?
Tainted or missing game documents can keep Steam from going on the web. To confirm the uprightness of your Steam records, open the Steam client and explore the Library segment. Right-click on the game encountering issues, select ‘Properties,’ and go to the ‘Neighborhood Documents’ tab. Click on ‘Confirm Trustworthiness of Game Documents,’Steam will check for errors and redownload any absent or harmed records.
What should I do if changing network settings does not solve the problem?
If changing organization settings doesn't fix the issue, it merits attempting to clear the Steam download store. To begin, Open the Steam client, go to ‘Settings,’and snap on the ‘Downloads’ tab. Under the ‘Unmistakable Download Reserve’ area, click the ‘Reasonable Download Store’ button. Steam will restart, and this activity may determine availability issues and permit Steam to go on the web.
Can I try anything else if the previous steps didn't solve the problem?
On the off chance that you've followed the past advances, Steam actually will not go on the web. Further, You can endeavor a reinstall the Steam client. Start by uninstalling Steam from your PC through the Control Board (Windows) or the Applications envelope (Macintosh). Lastly, A short time later, download and reinstall the most recent rendition of Steam from the authority site.
Conclusion
We hope that this article has been a help to you in fixing the Steam won’t go online error. Now you can enjoy Steam and play your favorite video games with friends and family!
You can always find me playing the piano or playing FIFA when I’m not binge-watching TV Series with pizzas. Fountainhead of TechWhoop.