Skype is awesome. It has blazed global communication by enabling calls and messages to flow worldwide. It has become an essential part of our daily lives. But, it has one particular annoyance. Stop Skype from Starting Automatically is a very common issue. But don’t worry; we have 6 Ways to fix this error. After following one of these ways, you can overcome this problem.
Solve How to Stop Skype from Starting Automatically by the following method: Open System Preferences>Select Users & Groups>Select your username>Go to the Login Items tab>Select Skype.

It tends to remain active in the background on your Windows 10. It ensures that you always remain available for incoming calls and messages. But this puts Skype rather heavily on the CPU.
Fixes to Stop Skype from Starting Automatically
This article deals with techniques to stop Skype from starting automatically in Windows 10.
Method 1: Enabling the option When I Start Windows
1. At First, open the Skype desktop app on your computer. Then click on the Skype shortcut on your desktop. Afterward, click on Skype from the list of applications.
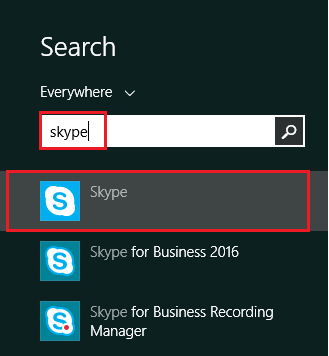
2. If you are not already signed in, sign in to your Skype account.
3. Then click on Tools present in the top menu bar. Then click on Options. It will be shown in the drop-down menu.
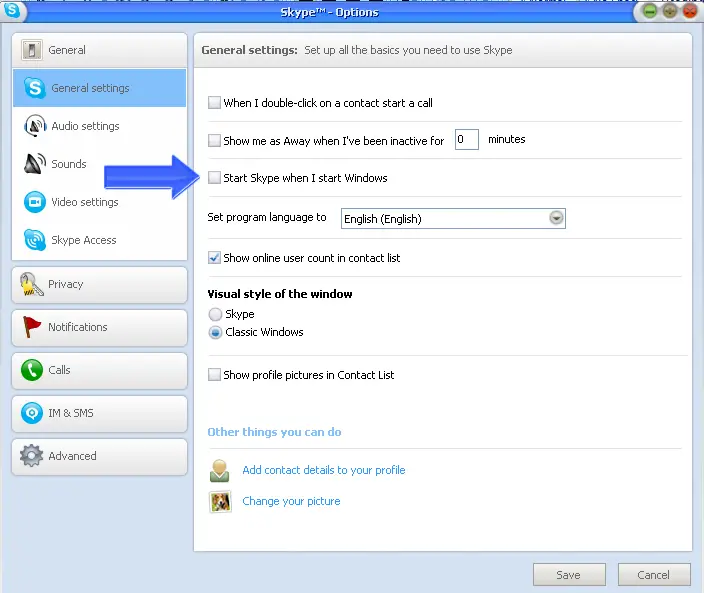
The Options screen will have an option Start Skype when I start Windows. Uncheck it. Afterward, click on Save. This step mostly stops Skype from Starting automatically.
Then find Messaging + Skype. Finally, click on it and then select Uninstall.
This may cause, stop Skype from starting automatically.
Remove Skype using Powershell by following the steps:
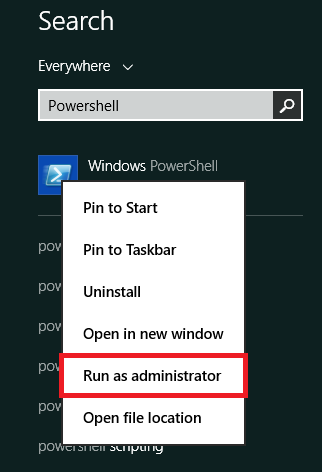
1. At First, press the Windows and S keys together. Then type Powershell in the Search box that is provided. Afterward, right-click and select Run as Administrator.
2. Then press Ctrl + Shift + Enter simultaneously. Confirm the User Account Control Prompt.
Afterwards, type in the following commands:
Get-AppxPackage *messaging* | Remove-AppxPackage
Get-AppxPackage *skypeapp* | Remove-AppxPackage
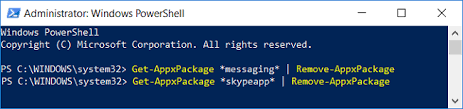
Then press Enter after each command you type.
This method may also help you to eradicate the error, stop skype from starting automatically.
See Also: –
- 10 Ways to Fix DNS_Probe_Finished_No_Internet in Chrome
- 8 Ways to Fix Windows 10 100% Disk Usage in Task Manager
- 10 Ways to Fix Steam Disk Write Error in Windows 10
- What is Vulkan RunTime Libraries? Should You Remove It?
FAQ’s
How to prevent Skype from automatically launching?
In the System Settings window, select Privacy. In the Privacy settings window panel, scroll down in the left side of the menu till you see the App permissions section. Scroll down to Skype beneath Background apps and turn the toggle switch for Skype to Off.
How to stop Skype from popping up on Windows 10?
Disable Automatic Startup. Click Tools, then click Options. Beneath the General Settings section, uncheck the box for Start Skype when I start Windows, and then click Save. This will make sure that Skype starts only when you manually open it yourself. Disable Notifications.
Why is Skype running in the background of Windows 10?
The configuration of Skype forces the Application to remain active and run in the background even when not in use. This will make sure that you are always available to receive incoming calls and messages when your computer is switched on.
Conclusion
These are all the methods you can use to stop skype from starting automatically in Windows 10.
See Also: Fix Skype Not Detecting Webcam With This Simple Guide

Gravit Sinha: Founder of ValidEdge, a problem-solving website, driven by his lifelong passion for fixing issues.