Windows key is an essential part of Windows computers that allows users to perform multiple tasks. Mainly Windows key is used as a shortcut to open the Start menu; besides this, it takes part in other shortcuts such as Win + R and Win + S. There are a significant number of functions performed by the Windows key, which makes it very important for basic as well as advanced level users. But sometimes, users report an error that states the Windows key not working on their Windows 10 computer.
Fix this error by right-clicking on the Windows icon and selecting Windows PowerShell or Update your keyboard’s drivers. Also, try to disable Gaming mode and Check for the Win Lock button on your keyboard or create a new user account.


Due to the multiple uses of the Windows key, it becomes very frustrating for every user to see the failure of the working Windows key.
See Also: Logitech Keyboard Arrows Not Working? Troubleshooting Tips
How to Fix Windows Key Not Working on Windows 10?
However, after proper research, we have come up with some of the best solutions to help you fix the error of the Windows key not working. So check out all of them and choose the one that best suits your preference.
See Also: How To Fix Windows 10 Startup Menu Missing?
Method #1 Change Your Registry
Users have reported that the error Windows key not working can occur due to a problem with your registry. This error can be fixed up simply by modifying the registry in your Windows 10 PC.
But remember that you need to be very careful while modifying your registry; otherwise, you can damage your hard drive or entire PC severely. Your Windows 10 file explorer won’t open if the damage is high in the registry. So, in this case, you can export your registry and use the exported registry files as a backup. Follow the steps to modify your registry:
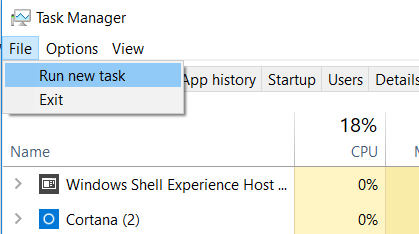
- Open the Task Manager window and navigate to File >> Run new task.
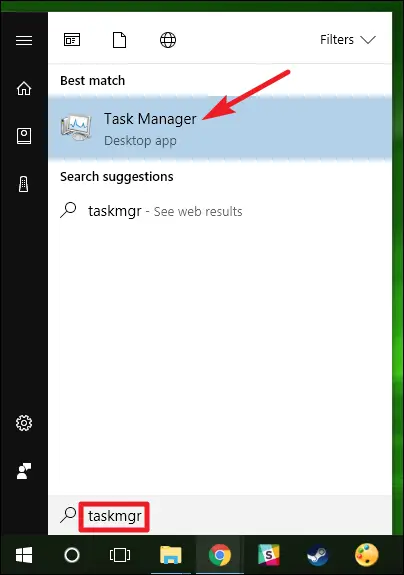
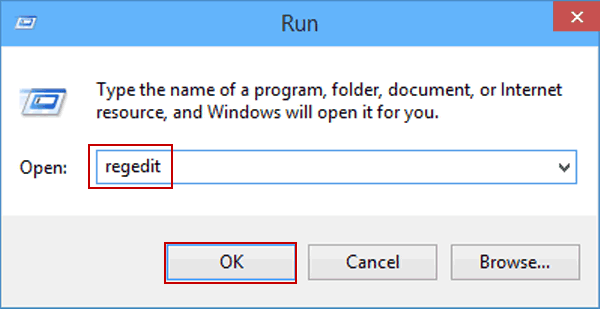
- Type regedit and hit Enter key.
- Go to the left pane and select HKEY_LOCAL_MACHINE\SYSTEM\CurrentControlSet\Control\Keyboard Layout key.
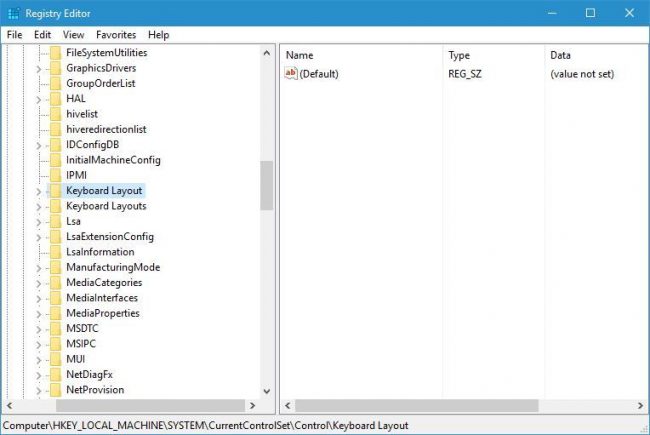 Now expand the Layout key, find the Snapcode Map registry entry, and remove or delete it. At last, exit Registry Editor and restart your computer.
It might not be on your computer if you cannot find the Snapcode Map entry. In that case, you can try another solution to fix the error of the Windows key not working.
See Also: – 10 Ways to Fix Windows 10 Update Error Code 0x8024a105
Method #2 Perform a Malware and Virus Scan
An infectious virus and unwanted malware can cause several hard disk problems and lead to issues with the Windows key. This can altogether disable the Windows key. Always perform a full system scan on your computer to be sure of this cause. Also, you can download and run malware removal tools like Malwarebytes and Windows Defender to check the presence of malicious software in your PC. Follow the steps to scan your system using Windows Defender:
Navigate to Start Menu and click on Settings. Choose Update and Security, and then click on Windows Defender.
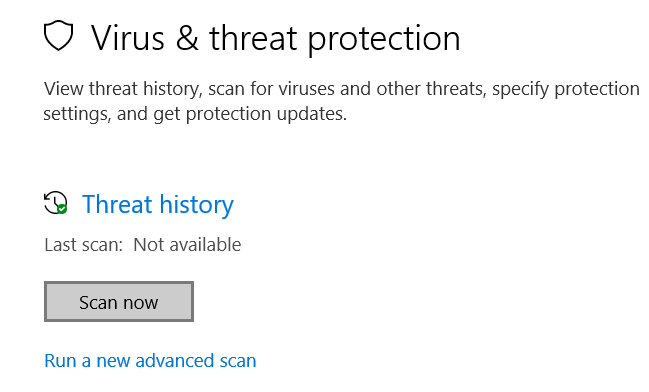
Go to the shield icon located on the left side. Click on Advanced Scan and then choose Full Scan.
After removing the malicious software from your PC, check if the Windows key not working error is resolved.
See Also: How To Fix: “Unfortunately Gboard Has Stopped Working”
Method #3 Disable the Gaming Mode
If you are using a gaming keyboard, you probably have support for Gaming mode on the gaming keyboard. The developers have designed the gaming keyboard to disable some keys during your game-play sessions so they won’t interfere with your game sessions.
For Instance, if you mistakenly press the Windows key while playing the game, it will minimize your game and open the Start menu. It causes problems when you play online games with your friends. Due to this, gaming keyboards support Gaming mode.
So if you are receiving the Windows key not working error in your PC, check if the Gaming mode is turned on. If it is switched on, make sure to turn it off. The switch can be found above the F2 and F3 buttons on your keyboard and contains a joystick image beside it. So use this switch to turn off the Gaming mode on your PC.
There are some keyboards, like Apex M800, which have a hidden Gaming mode, and to disable the Gaming mode; you need to hold the SteelSeries button and then press the Windows key to switch off the Gaming mode. Different keyboards have different ways to disable the Gaming mode, so make sure to have a look at your keyboard’s instruction manual to ensure the proper way of disabling the Gaming mode.
See Also: Should I Delete Windows Setup Files? (10-Step Guide)
Method #4 Check out the Win Lock Button
Some keyboards have a Gaming mode switched on, while others carry a Win Lock button. The win Lock button is developed to disable the Windows key on your keyboard. So check if your keyboard contains the Win Lock button.
The location of this key is fixed near the right Ctrl button on your keyboard, so make sure to look for it. After locating the Win Lock button, press it, and your Windows key will start working again, thus removing the Windows key not working error in your PC.
Method #5 Create a New Account
Sometimes the errors on Windows 10 can be solved by creating a new user account. To remove the Windows key not working error in your PC, follow the steps:
1. Navigate to Settings and then click on Accounts section. Now navigate to Family and other people.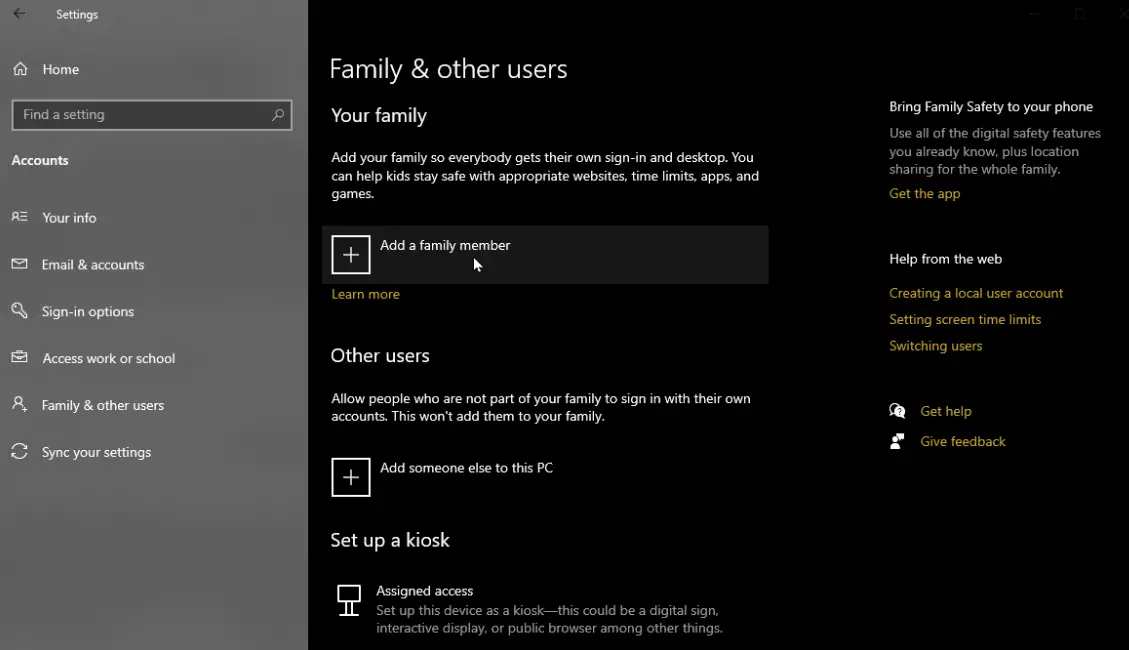
2. click Add someone else to this PC under the other people section. Select “I don’t have this person’s sign-in information.”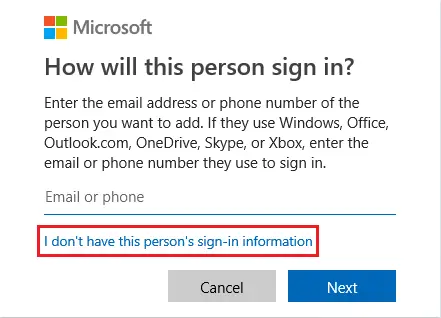
3. Now select “Add a user without a Microsoft account.”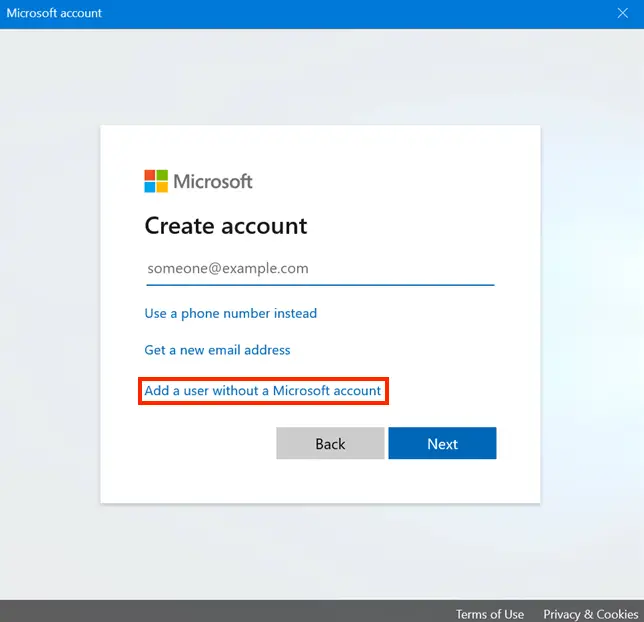
Give a name for your new user account, and last, click on Next to complete the procedure.
After creating the new user account, sign out of your current account and switch to the new one. Now check if the Windows critical works without causing any problems. If the Windows key starts working correctly now on a new account and the error Windows key not working doesn’t appear anymore, the software is causing trouble in your PC. Now, you need to move your files and folders to the new account and start using it as your main account.
Method #6 Perform a System File Checker Scan
The installed Windows 10 in your PC can sometimes become corrupt, which might prevent the working of specific features in your Windows 10 computer. To remove the error of the Windows key not working on your computer, you can perform an SFC (System File Checker) scan by following the given steps:
- Open Task Manager and navigate to File >> Run new task.
- Under the Create new task window, enter cmd and then check mark the box beside Create this task with administrative privileges. Under the Command Prompt window, type sfc/ scannow and hit Enter key.
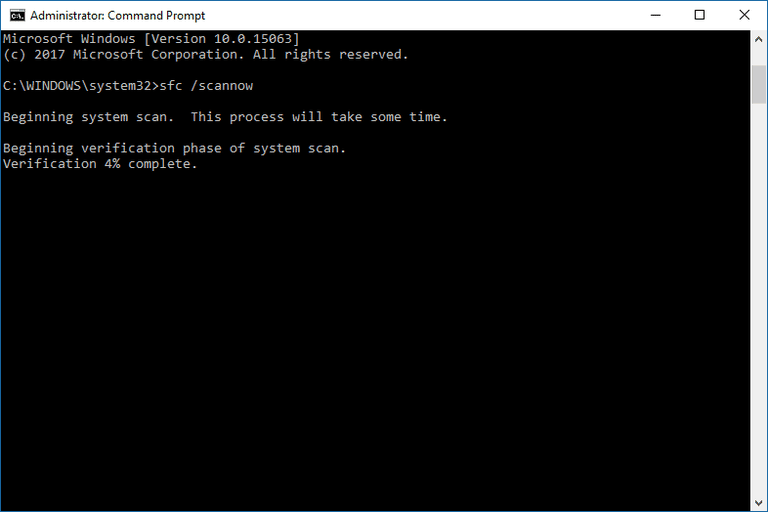 Wait for the scanning to get complete. It will check your Windows 10 installation. After the scanning is done, restart your computer.
Check Out: – 3 Ways to Fix GDI+ Window Preventing to Shutdown
After your PC restarts, check if the error Windows key not working is resolved. If the issue persists, open Command Prompt again and then run DISM /Online /Cleanup-Image /RestoreHealth command. Again check if the error is resolved.
Method #7 Uninstall Bad Keyboard Drivers
To remove the Windows key not working error, you need to uninstall the bad keyboard drivers to make space to reinstall the correct drivers for your keyboard. Follow the steps:
- First, right-click on the Start menu and choose Run or hold Ctrl + Shift + Esc keys together to open the task manager and then navigate to File > Run a new task.
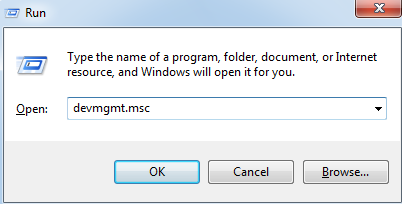
- Now enter devmgmt.msc and press Enter key to open the device manager window.
- Expand the keyboards section, right-click on the current keyboard drivers, and choose ‘Uninstall device.’
- Click on Yes or Uninstall in the warning message to confirm the removal of these faulty drivers.
- If you use a USB keyboard, unplug it and then plug again, or you can restart your PC. Windows will reinstall the correct drivers automatically. If there’s any USB port issue, you can fix it from here.
- Check if the Window key starts functioning now.
Method #8 Use Powershell Command
Sometimes we can solve the Windows key not working error by only using a Powershell command. Powershell is a powerful command-line tool which enables you to remove core Windows 10 components. With Powershell, you can do many things but be careful as carelessness can harm and damage your Windows 10 computer system. Follow the steps to open Powershell:
- First, Press Ctrl + Shift + Esc keys simultaneously on your keyboard to open Task Manager.
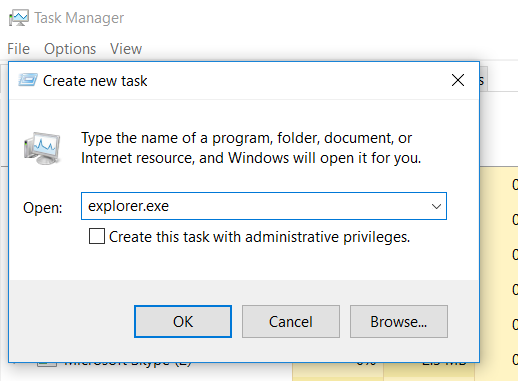
- Under the Task Manager window, navigate to File >> Run new task.
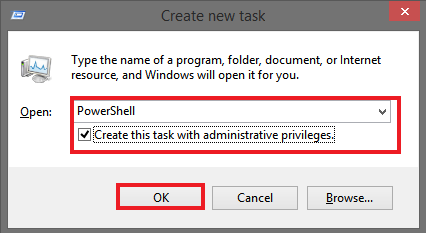
- Then go to PowerShell and checkmark “Create this task with administrative privileges.” Click on OK.
 Under the Powershell, type Get-AppXPackage –AllUsers | For each {Add-AppxPackage –DisableDevelopmentMode –Register “$($_.InstallLocation)AppXManifest.xml”}. Hit Enter key. After executing this command, the Windows key will start working again.
However, Powershell commands can cause unexpected results on your Windows 10 computer system, so it’s better to create a new System Restore point and use it to restore your Windows 10 if something goes wrong after using the Powershell commands.
Method #9 Restart Your Windows or File Explorer
File Explorer has control of your Windows user interface. You can remove the Windows key not working error by restarting Windows or File Explorer on your PC using this method. It will also clear any errors which prevent it from starting correctly. Follow the steps:
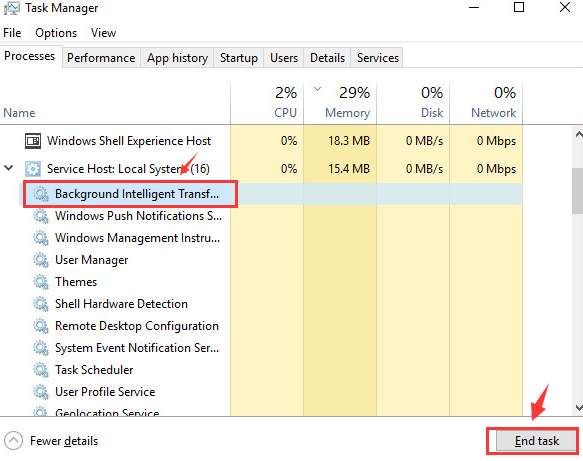
- First, simultaneously Press Ctrl + Alt + Del keys on your keyboard and open Task Manager.

- Select the Process tab, find Explorer in the windows, right-click on it, and choose the End task option.
- Now click on File, and then select Run new Task.
- Now type “explorer.exe” and hit Enter key.
 Check if the error Windows key not working is a problem solve or not.
Method #10
If the Filter keys turn on in your PC, it can cause different issues in your Windows 10 computer, such as the Windows key not working problem. The filter keys may ignore or slow down the repeated keystrokes, and it adjusts repeat rates. The Windows key can also get affected on certain keyboards due to the filter keys. Further, it might cause low memory issues in Windows. Follow the steps to turn off the filter keys on your PC:
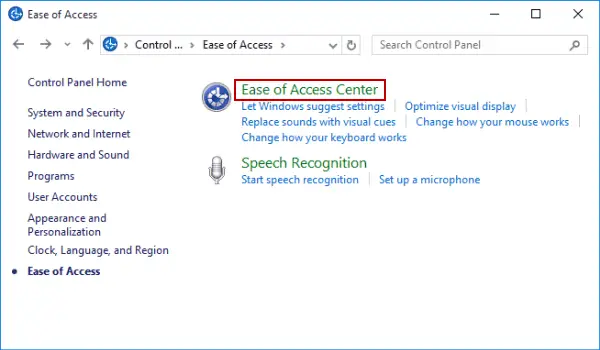
- Right-click on the Start menu and choose Settings. Then under the Settings page, scroll down and select Ease of Access.
- Now click on the keyboard tab located at the left side.
- Scroll down and look for filter keys and then turn them off.
FAQs
How can I fix my broken Windows key?
If the Windows key isn't working, try these fixes: Restart your computer to update the system settings. Check for any physical obstructions or debris in the area around the key. Your keyboard drivers can be updated in Driver Manager, Use the Windows Keyboard Troubleshooter. If none of these fixes work, consider trying a different keyboard or contacting a specialist.
How can I make the Windows key active?
If the operating system key is not functioning, activate it by: Look to see whether your keyboard has a physical key lock. Ensure the Windows key isn't disabled by gaming mode or other settings on your keyboard. Driver Manager is where you can update your keyboard drivers. If you're using third-party software, check the settings. The system requires a reboot for the modifications to take impact.
Why does the Windows key on my keyboard for Windows 11 not function?
For a variety of reasons, Windows 11 may not be able to use the Windows key. It can be a hardware flaw, software bug, keyboard setting, driver issue, or any number of other things. To try and fix the problem, you can update your drivers, check your keyboard settings, or restart your computer. It could be necessary to conduct additional research or seek technical support if the problem persists.
Why is my Windows keyboard locked?
There are numerous potential causes for a Windows keyboard to lock up. It is possible to activate the Num Lock, Caps Lock, or Scroll Lock keys, which will alter keyboard functionality. There may also be a physical lock switch on some keyboards. Sometimes software or driver issues could cause the keyboard to become unresponsive. Restart your computer after double-checking these components to resolve the issue.
Conclusion
So that’s it on how to fix the error Windows key not working in your Windows 10 computers. Hope the article will prove to be helpful for all the users who are receiving this particular error. But don’t forget that this issue might also occur due to any faulty hardware, an electric or mechanical problem on your keyboard that would require you to either replace or repair your keyboard. So if nothing works out for you, it’s better than taking the keyboard for a repair service.

Gravit Sinha: Founder of ValidEdge, a problem-solving website, driven by his lifelong passion for fixing issues.