Windows 10 100% Disk Usage in Task Manager is a prevalent issue. But don’t worry; we have 8 Ways to Fix Windows 10 100% Disk Usage in Task Manager. After following one of these ways, you can overcome this problem. In the Task Manager, under the Process and Performance tab, you can see the disk utilization as 100%. And also it creates a lagging and unresponsive system. The system starts freezing. The system event log also contains many events which have Event ID 129. It shows resets of the disk controller.
- Firstly, go to Power Options.
- Then go to Change plan settings -> Change advanced power settings.
- Afterward, choose High Performance from the drop-down list and Keep all other settings as default.
You need to Delete System Error Memory Dump Files for High Performing PC. Read more o find out How to Fix Windows 10 100% Disk Usage in Task Manager.

How to Fix Windows 10 100% Disk Usage in Task Manager
Below are a few ways to address the Windows 10 100% disk usage problem.
Method 1: Fix your StorAHCI.sys Driver
Some Advanced Host Controller Interface PCI-Express (AHCI PCIe) cause resets of the disk controller. It runs with inbox StorAHCI.sys driver. When Message Signaled Interrupt (MSI) mode enables, a firmware bug does not allow the Solid-state drive (SSD) to complete input/output. Hence, Windows tries to reset the device.
The first solution to Windows 10 100% disk usage lies in disabling MSI mode.
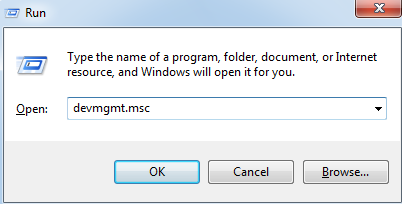
1. Firstly, press Windows + R keys simultaneously. It will open the Run dialog box.
2. Secondly, then type devmgmt .msc. Press Enter.
3. Find “Standard SATA AHCI Controller” under “IDE ATA/ATAPI Controllers.” Then right-click on it and select Properties.
4. Afterward, click Driver details under the Driver tab if you see storahci.sys, you are running the driver.
5. Then go to the Details tab. Select the Device instance path from Property drop-down menu. Copy the value starting from PCI\VEN.
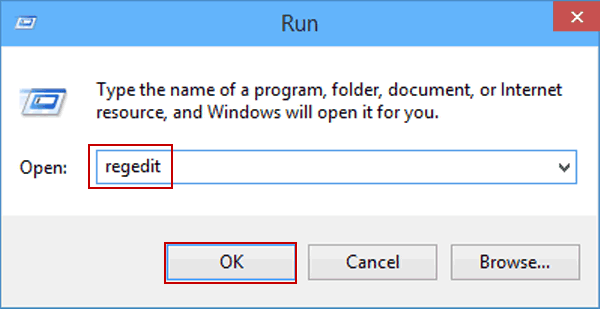
6. In the Run box, type regedit. It will open the Registry editor.
7. Then Navigate to “HKEY_LOCAL_MACHINE\System\CurrentControlSet\Enum\PCI\<AHCI Controller>\Device Parameters\Interrupt Management\MessageSignaledInterruptProperties”.
Here <AHCI Controller> refers to the value you copied in Step 5.
8. Finally, change the MSISupported key value from 1 to 0.
Restart your system. See if it works.
See Also: How To Fix Windows 10 Startup Menu Missing?
Method 2: Change Energy Options from Balanced to High Performance
Changing energy options can also help solve 100% disk usage in Windows 10.
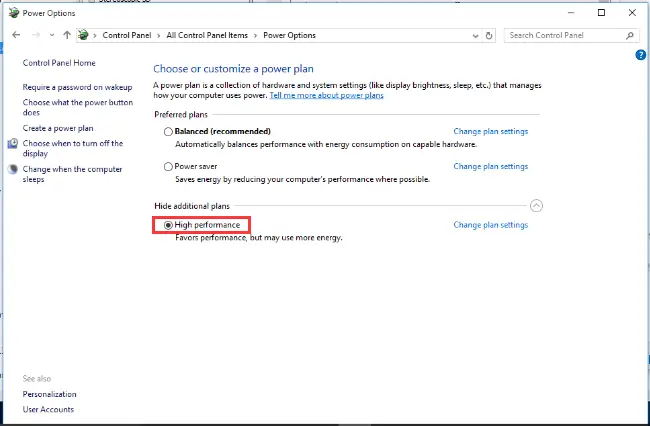
1. Firstly, go to Power Options.

2. Then go to Change plan settings -> Change advanced power settings

3. Afterward, Choose High Performance from the drop-down list and Keep all other settings as default.
For High Performing PC, You need to Delete System Error Memory Dump Files now.
See if it has solved the issue.
See Also: – 8 Ways to Fix Windows 10 Update Error Code 0x8024a105
Method 3: Disable Windows Search
Disabling Windows Search stops the indexing of all files. In addition, it may be causing the High Disk Usage Windows 10 problem. To check it, first, try temporarily disabling it. To temporarily disable Windows Search:
If you temporarily turn it off, Windows Search works again when you restart your system.
1. Firstly, press the Windows + X keys simultaneously. Then select Command Prompt (Admin).

2. In the Command Prompt window, type net.exe to stop the Windows search. Hit Enter.
Check if your disk usage improves. If it does, do not permanently disable it, following the steps below.
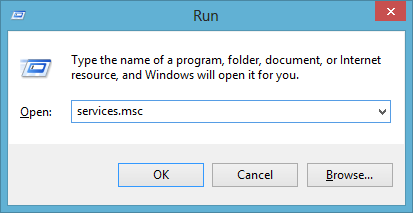
1. At First, press Windows + R keys simultaneously. It will open the Run dialog box.
2. Then type services .msc. Hit Enter.
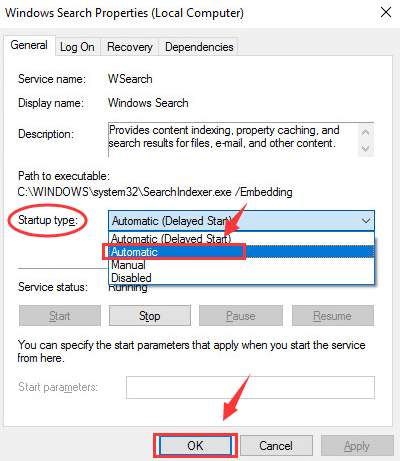
3. In the list shown, find Windows Search. Double-click on it to open Properties.
4. Change the Startup type option to Disabled. Click on Apply -> OK.
Check if this works for Windows 10 100% disk usage.
Method 4: Disable SuperFetch Service
SuperFetch helps to decrease the boot time. It also makes must-load programs work more efficiently. But it works as a potential for high disk usage in Windows 10.
1. At First, press the Windows + X keys simultaneously. Select Command Prompt (Admin).

2. In the Command Prompt window, type net.exe stop superfetch. Hit Enter.
3. Then wait for some time. Check if your computer performs better now.
Method 5: Reset Virtual Memory
Virtual memory is used when the RAM is insufficient to perform a task. Windows keeps switching files between the RAM and virtual memory. An unnecessary virtual memory can cause Windows 10 to 100% disk usage.
1. press the Windows + Pause/Break keys together and open the System information.
2. Secondly, then choose Advanced system settings from the left panel.
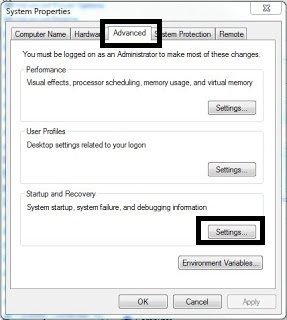
3. In the Advanced tab, click on Settings.
4. Again, in the Advanced tab, click on Change. It is in the Virtual memory section.
5. Ensure “Automatically manage paging file size for all drives” is unchecked.
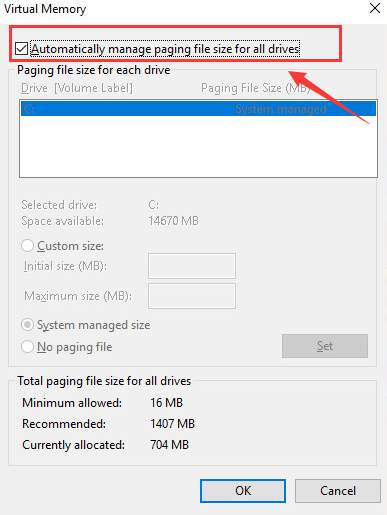
6. Highlight your system drive. Customize the initial and maximum size for your virtual memory.
7. Afterward, click on Set, then OK.
8. Now you need to clear all temporary files. Press the Windows + R keys simultaneously. It opens the Run dialog box. Type temp and press Enter.
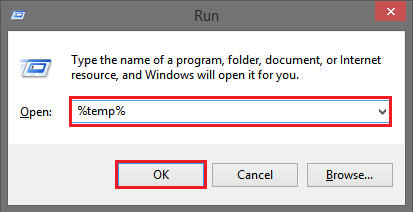
9. Finally, windows Explorer will open the Temp folder. Select all files within it and delete the theme.
Wait for a few minutes. Then see if the issue is fixed.
Method 6: Update your Device Drivers
The drivers help communicate between your system and all the installed applications and programs. And also,o these drivers should always be kept up-to-date. To see if they need to be updated, follow these steps:
1. First, right-click on My Computer.
2. Then select Properties from the drop-down menu.
3. Afterward, Choose Device Manager.

4. See through the devices given. Also, check for any that have a yellow exclamation mark on them.
5. Then right-click on any of these devices. Then choose Update Driver.
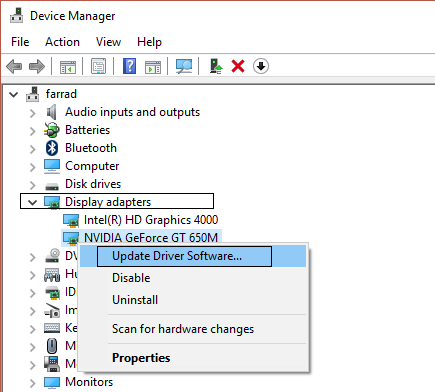
After the update is done, restart your PC. Finally, check if updating your drivers has solved the Windows 10 100% disk usage issue.
Method 7: Change Settings in Google Chrome and Skype
For some reason, a particular combination of settings in Chrome and Skype can cause Windows 10 to 100% disk usage.
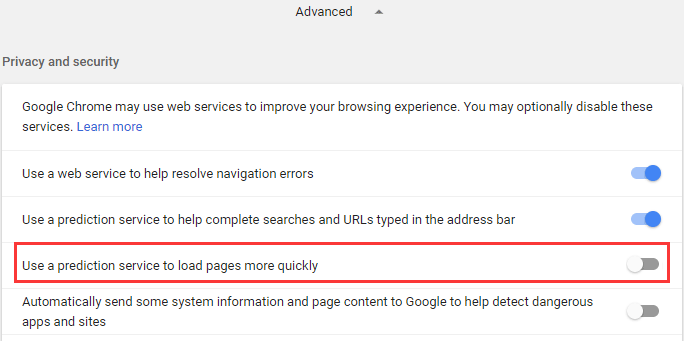
1. Firstly, go to Settings in the Google Chrome application.

2. Secondly, then scroll to the bottom of the page. Click on Advanced.
3. In the Privacy and Security category, check if Using a prediction service to load pages more quickly is turned off.
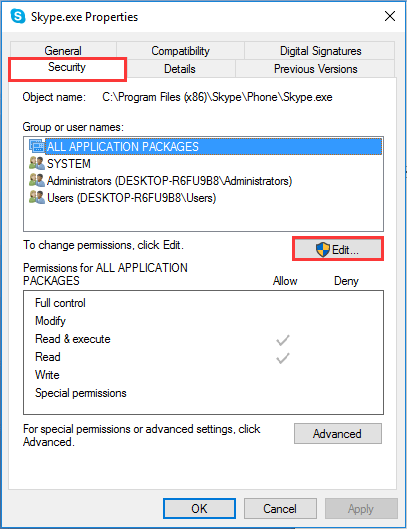
4. Skype should be quitted in the taskbar.
5. Afterward, open Windows Explorer. Navigate to “C:\Program Files (x86)\Skype\Phone\”.
6. Then right-click on Skype.exe, and choose Properties.
7. Then open the Security tab and select Edit.
8. Highlight ALL APPLICATION PACKAGES. Then check the Write box. Afterward, click on Apply -> OK and then OK again. Finally, save the changes.
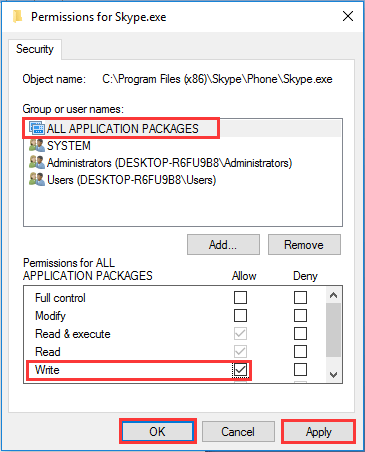
Check with the task manager if it has solved the issue.
Method 8: Perform a Clean Installation of Windows
It is the last method you should try. Before you proceed, you should also back up all your relevant documents, pictures, and other data. It is a time-consuming step. It will also erase everything from your hard drive. Above all, a clean installation will remove all the junk and prepare your computer for everyday usage.
See Also: – 10 Ways to Fix Steam Disk Write Error in Windows 10
FAQs
In Windows 10, how can I solve 100% disk usage?
You can attempt several options to fix the 100% disk usage issue in Windows 10. Disable resource-intensive processes, install the most recent drivers, tweak virtual memory settings, and run a disk cleanup before using the Windows Defender antivirus program to scan for malware. Disable starting applications and upgrade to an SSD. If issues continue, consult an expert or reinstall Windows.
What makes Windows 10's disk utilization 100 percent?
Windows 10's disk occupancy is close to 100% due to various factors, including foreground activities, spyware, or outdated drivers that produce excessive read/write routines. High disk use is frequently caused by software services like Windows Search and Superfetch, which harm the system's overall effectiveness. By identifying and addressing these issues, the issues may appear as though they were fixed.
Why is disk consumption at 100% when there are no processes active?
The Windows 10 operating system's disk utilization can reach 100% even when there are no accessible running processes because of background activities and services that aren't always visible in the Task Manager. The system's upkeep, upgrades, indexation, and background apps are among these duties. Understanding which processes are responsible for the high disk consumption, learn by checking the Resource Monitor.
Must I turn off Superfetch?
Disabling Superfetch, now known as ‘SysMain’ in more current iterations of Windows, may help reduce disk usage; however, specific outcomes may vary. For faster access, super fetch preloads frequently used programs into RAM. If your computer has an SSD, dropping it is likely not essential, but you can try it on HDDs or in circumstances where excessive disk use occurs to see if performance improved.
Conclusion
You can use these methods to address the high disk usage issue. Hopefully, either works for you.

Gravit Sinha: Founder of ValidEdge, a problem-solving website, driven by his lifelong passion for fixing issues.