The DNS Address Could Not BE Found error is caused when the Domain Name Server (DNS) cannot resolve the website’s IP address. When you visit a site, your browser contacts the DNS Server, but this DNS lookup can sometimes fail, resulting in this error. And you won’t be able to visit any website if this error is not resolved.
The “server DNS address could not be found” error message may be showing because of a malfunctioning router or modem. Your router or modem may get stuck because its memory is clogged up.

There are only a few troubleshooting steps that can be very helpful in resolving the error: DNS address could not be found, which occurs because the domain is unavailable or the browser can’t connect to the internet. Following these steps can be the best way to troubleshoot this issue and fix the error. But before you begin with them, there are a few prerequisites that you should fulfil.
See Also: {Solved} Fix DNS_Probe_Finished_Bad_Config Error {7 Ways}
How Do DNS Servers Continue Operating?
Knowing how DNS servers operate might help diagnose DNS issues. The website has a name and a phone number. Numbers or IP addresses connected to that domain name let the internet know where the website is. A DNS server’s job is to connect the name and the number.
These are some necessary things that you need before starting the troubleshooting on your server DNS address could not be found error.
- Make sure that your Browsers Caches and Cookies are clear from your computer.
- Clear all the browsing data you have in Google Chrome.
- Remove any unnecessary Google Chrome extensions. They might be the cause of this issue.
- Make sure that you allow proper connection to Chrome through Windows Firewall.
- Ensure that you have a stable internet connection on your computer.
- Make sure you have created a restore point just in case something fails.
 The browser contacts the closest DNS server to obtain the IP address of a website when its name is typed. Once the browser establishes a connection to the webpage, which is subsequently shown on your screen, the DNS server returns the IP address. The system’s background operations are not visible to end users.
The browser cannot obtain the IP address of the website if the DNS server is down; thus, it produces an error. Now that the information has circulated quickly, everyone knows the server is down.
How To Prevent DNS Not-Found Problems
Although we can’t completely prevent DNS difficulties, we can lessen their likelihood. If the user often connects to several networks or frequently travels, resetting or emptying the DNS cache may also be helpful.
- Ensure that all software, drivers, and hardware are current.
- Infrastructure should be maintained.
- Use network diagnostics to do speed tests and other operations.
- Once you’ve gotten in touch with us and an issue does arise, we have a three-step procedure that we adhere to.
Step 1. Using mobile device management (MDM) software, our IT specialists will investigate the problem and observe what you see.
Step 2. Our staff thoroughly investigates potential trouble spots like browser upgrades or router settings to reduce the time needed to fix the problem.
Step 3. We will cooperate with the ISP, DNS provider, or hardware suppliers until the DNS server is operational.
How To Fix DNS Address Could Not be Found
We have listed eight ways to fix the error.
Method 1: Editing the Windows Host file
- Press Windows Key + Q and a window will open; enter Notepad. Then right-click on it and select Run as administrator.
- Click on the File option and then select Open.
- Browse to the following location C:\Windows\System32\drivers\etc. Afterwards, from the file type list, select All Files. Then select the host’s file and open it.
- Afterwards, in Notepad, delete everything in the host’s file after the last # (hashtag) sign.
- Afterwards, navigate to file>>Save and Close Notepad. Finally, Restart your computer
See Also: 7 Ways to Fix Windows 10 Slow Shutdown Error
Method 2: Disable the Proxy Settings
Here are some steps to follow:
- First, press Windows Key + R, type “msconfig,” and click OK.
- Then go to the Boot tab and check the Safe Boot option.
- Afterwards, click Apply and then hit OK. Then restart your computer. After restarting your computer, press the Windows Key + R again and type inetcpl. CPL.
- Then click OK. This will open the Internet properties and then navigate to the Connections tab—afterwards, open LAN Settings.
- Then uncheck. Use a proxy server for your LAN option, and then click OK.
- Afterwards, open “msconfig” again and uncheck the Safe boot option. Now, click Apply and press OK.
- Finally, Restart your Computer.
See Also: 5 Ways to Fix Windows Has Detected an IP Address Conflict
Method 3: Using the Google DNS
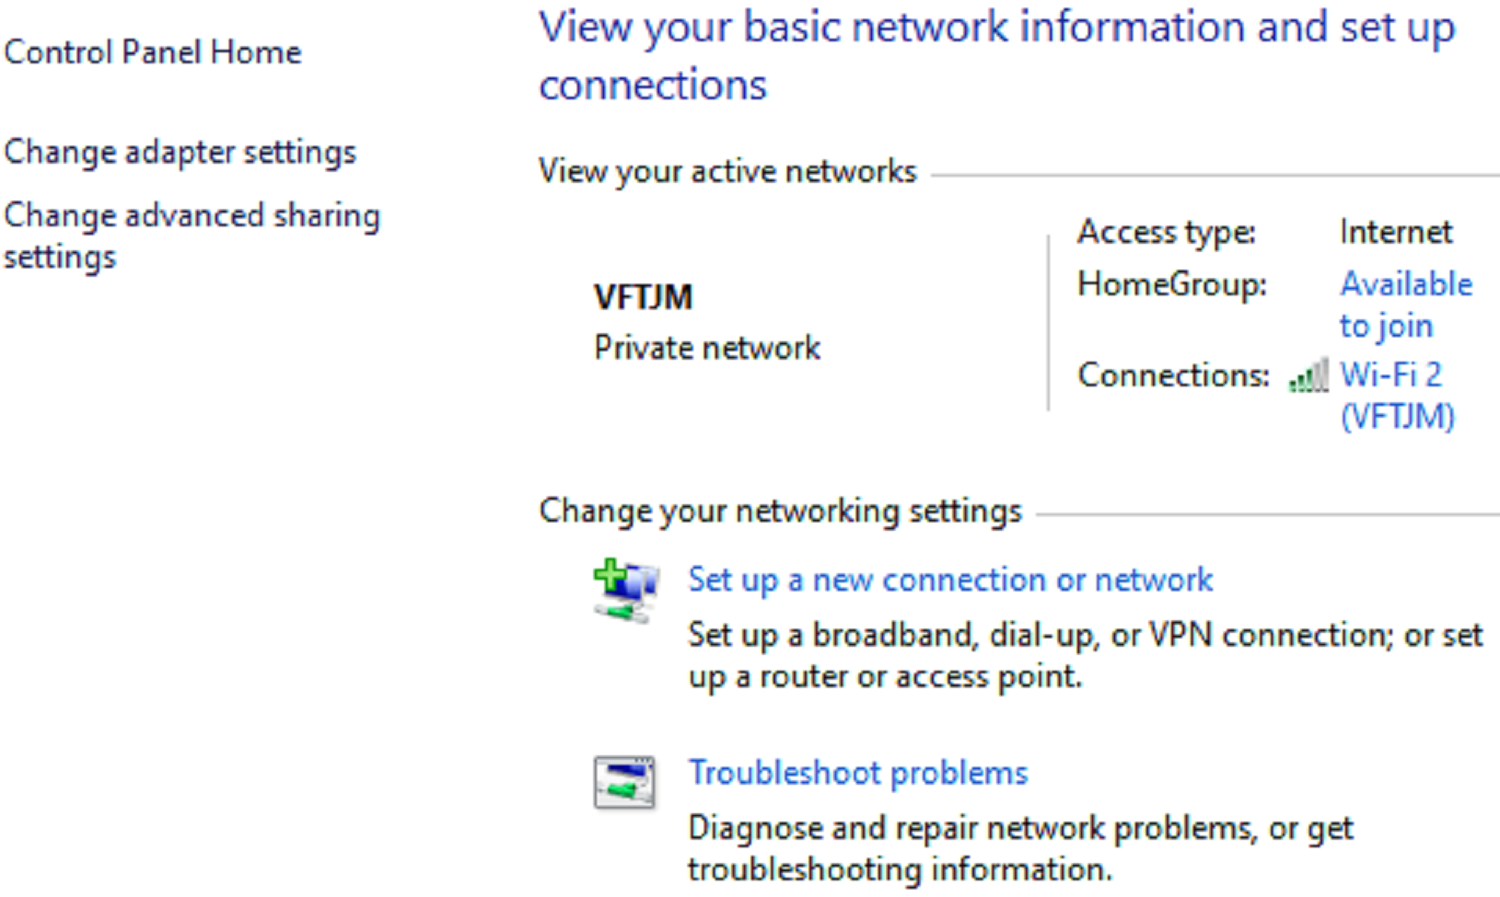
- First, open the Control Panel and click on the Network and Internet options. Then click on the Network and Sharing Center.
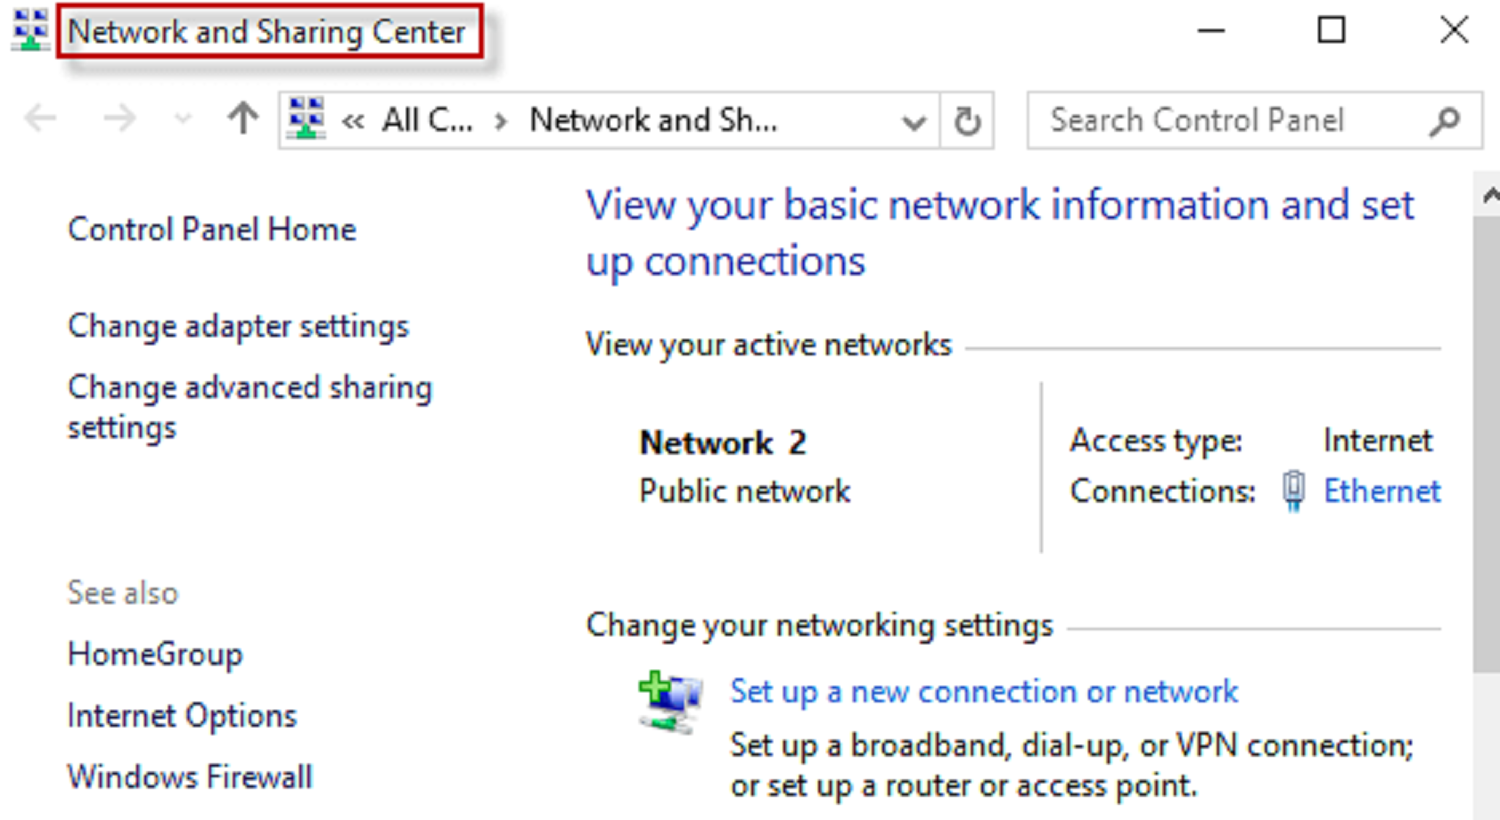
- And open the Change adapter settings option. Afterward, select your Wi-Fi or internet connection and then double-click on it and open Properties.
- Then select the Internet Protocol Version 4 (TCP/IPv4) and open Properties. Afterward, choose the Use the following DNS server addresses option and type in the following Values: Preferred DNS server: 8.8.8.8; Alternate DNS server: 8.8.4.4.
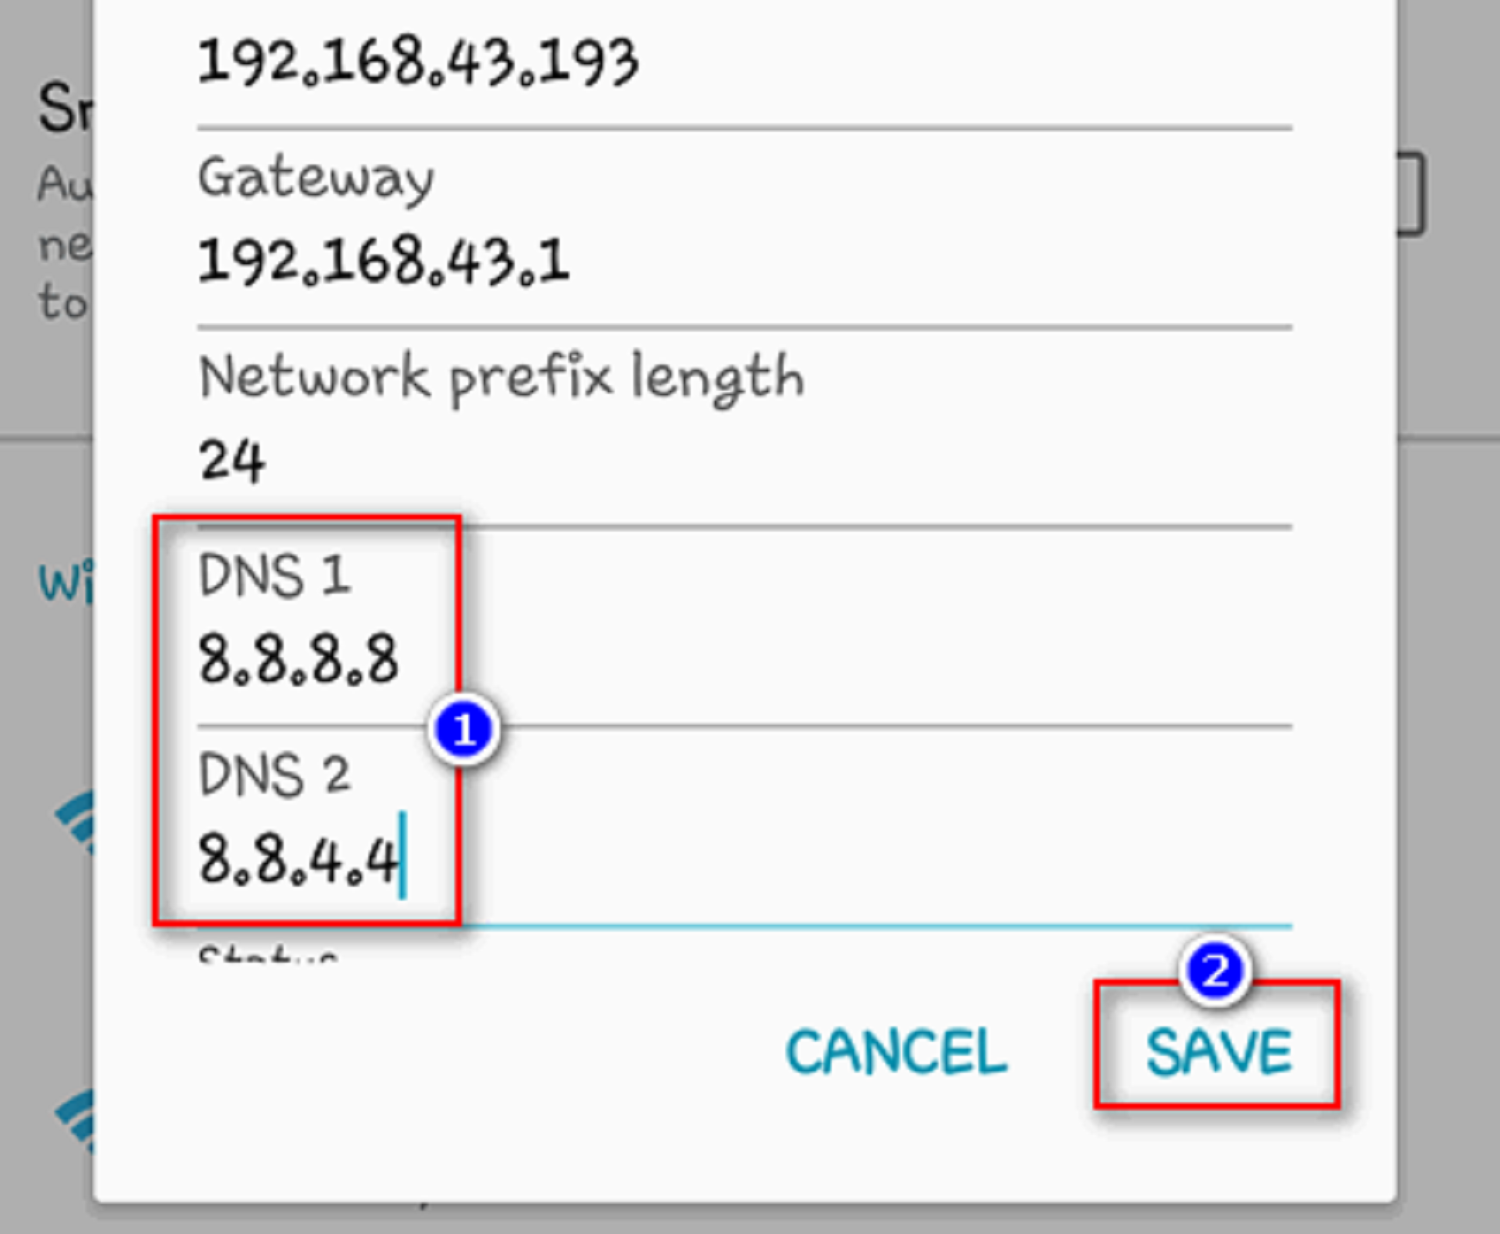
- Finally, close all the menu and settings.
Method 4: Clear the Internal DNS Cache
- First, open the Google Chrome browser. Then go into Incognito Mode. (Use CTRL+Shift+N).
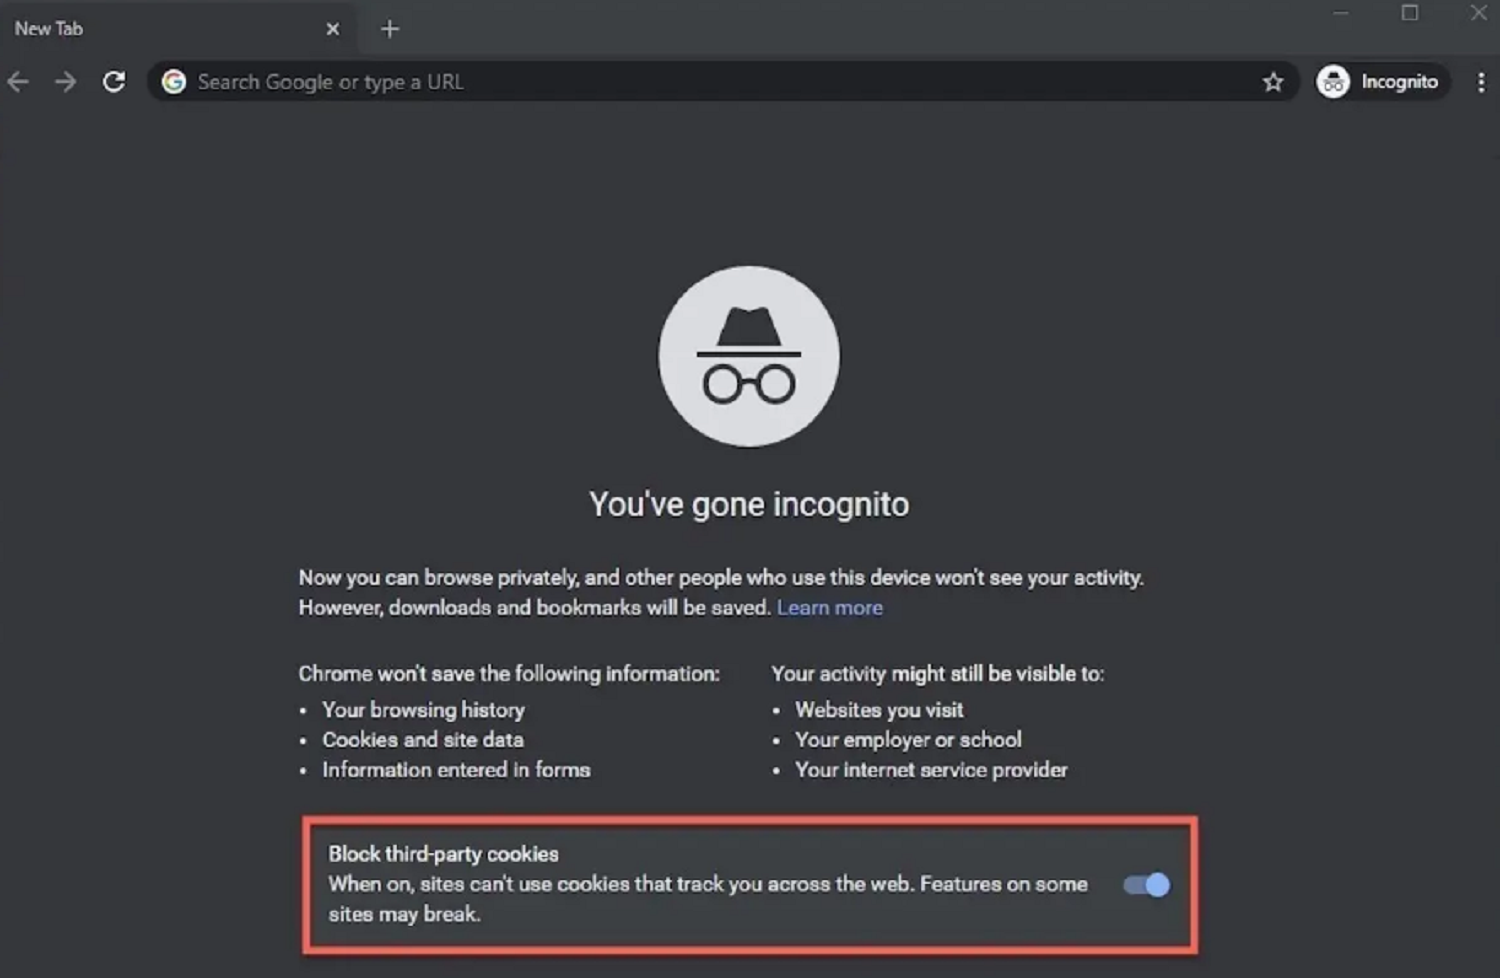
- Afterward, enter the following address in the address bar and then press enter: chrome://net-internals/#dns.
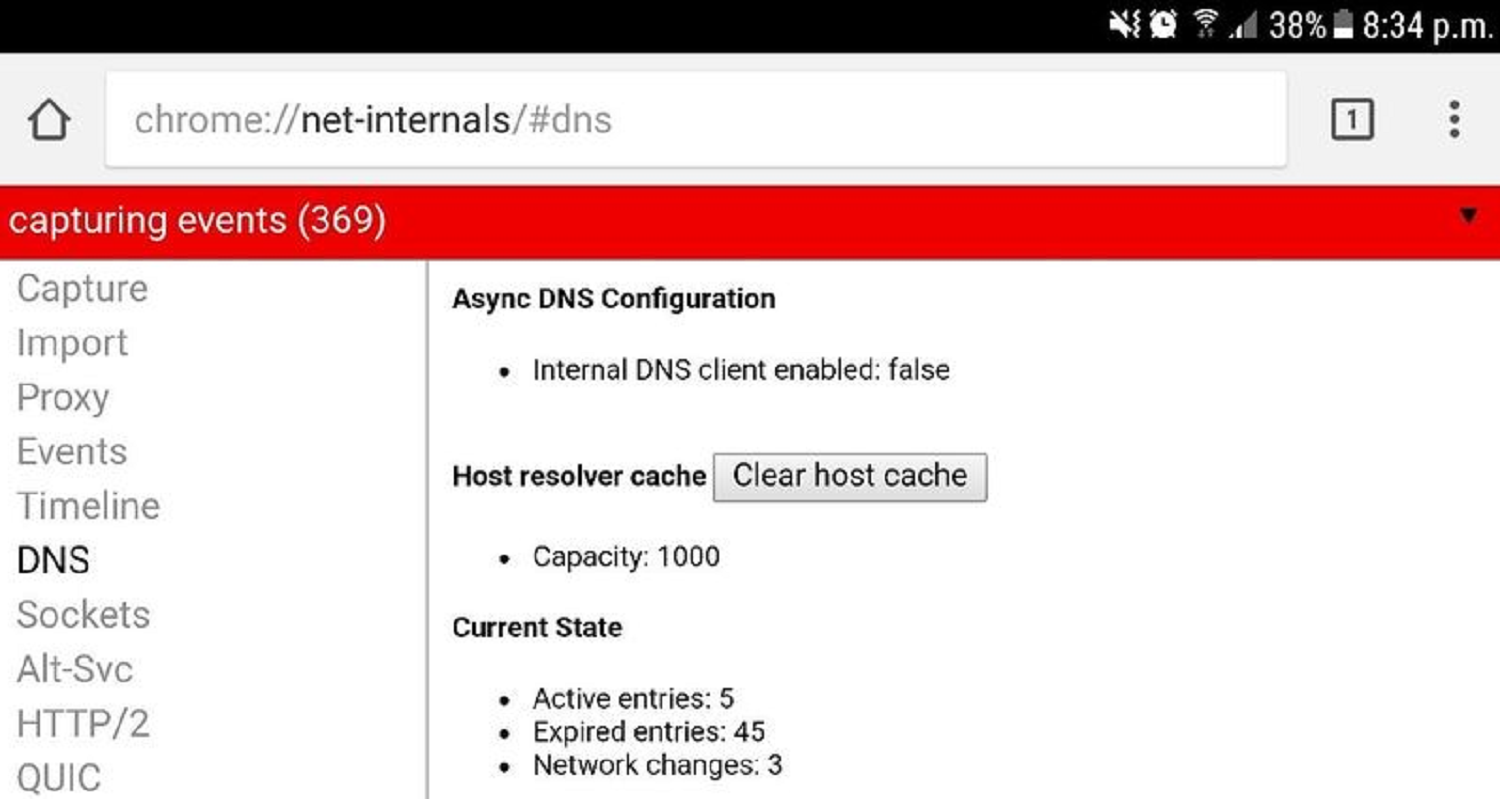
- Later, click the Clear host cache option and then restart your browser.
See Also: How to Fix Laptop Battery Plugged in Not Charging Error
Method 5: Flush the DNS and Reset your TCP/IP
Here are some steps to follow:
- First, Right-click on the Windows Button and then open the Command Prompt(Admin).
- Then type in the following commands and press enter after each one.
1. ipconfig /release
2. ipconfig /flushdns
3. ipconfig /renew - Afterward, open the Command Prompt (Admin) again and type the following commands, and then hit enter after each one:
ipconfig /flushdns
nbtstat –r
netsh int ip reset
netsh winsock reset
- Then reboot your computer to apply these changes. Flushing DNS is an effective method to resolve this issue.
Method 6: Resetting Your Internet Settings
- Press the Windows Key + R, type “inetcpl. cpl,” and click OK to open the Internet Properties.
- First, Under the Internet settings, go to the Advanced tab. Afterward, click the Reset button, and you can complete reset soon.
- Now, to reset settings in Google Chrome, open Chrome and go to Settings. Then click on the Show Advanced settings option.
- Then under the Reset settings section, click on Reset settings.
- Finally, Reboot your computer, which will help you if you cannot resolve the server’s DNS address.
Method 7: Using the Google Chrome Cleanup Tool
The Google Chrome Cleanup Tool helps scan and remove potentially harmful software that may cause the problem with your Chrome browser.
Also, the cleanup tool can solve many problems, such as browser crashes, an unusual startup of pages or toolbars, annoying ads you can’t get rid of, or other changes in your overall browsing experience.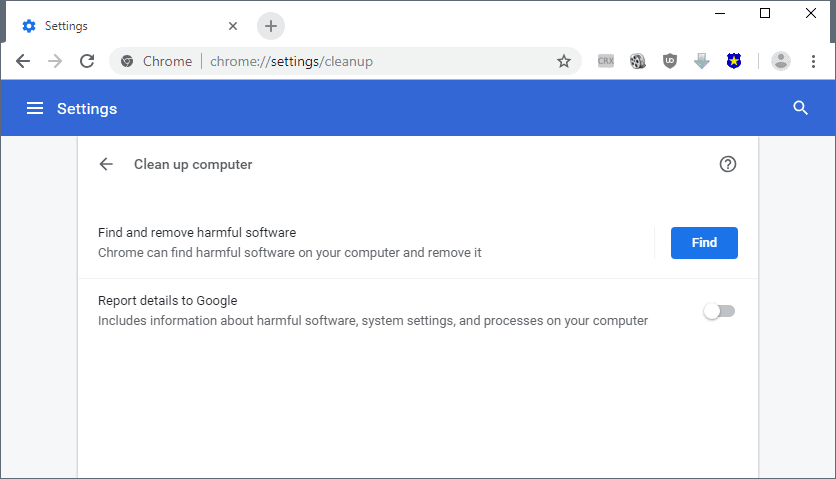
The Cleanup tool is a method that can help you fix the DNS address that can not be in error in your Google Chrome browser. You can download the original Google Chrome Cleanup Tool here.
Method 8: Reinstalling your Google Chrome Browser
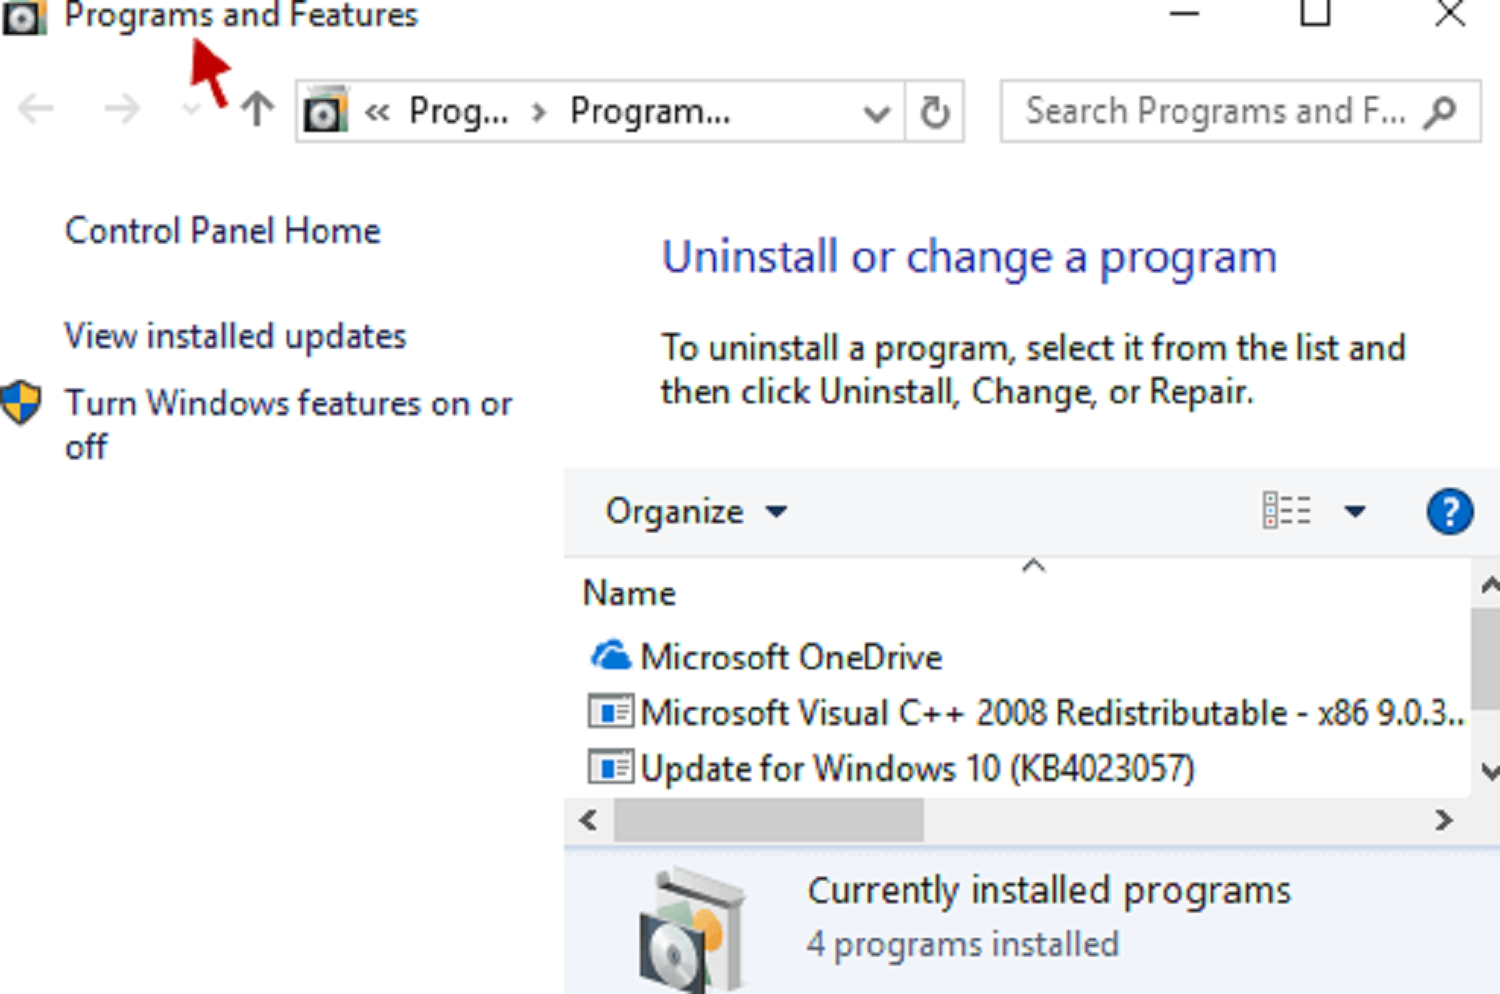
- First, press the Windows Key + X and then click on Control Panel.
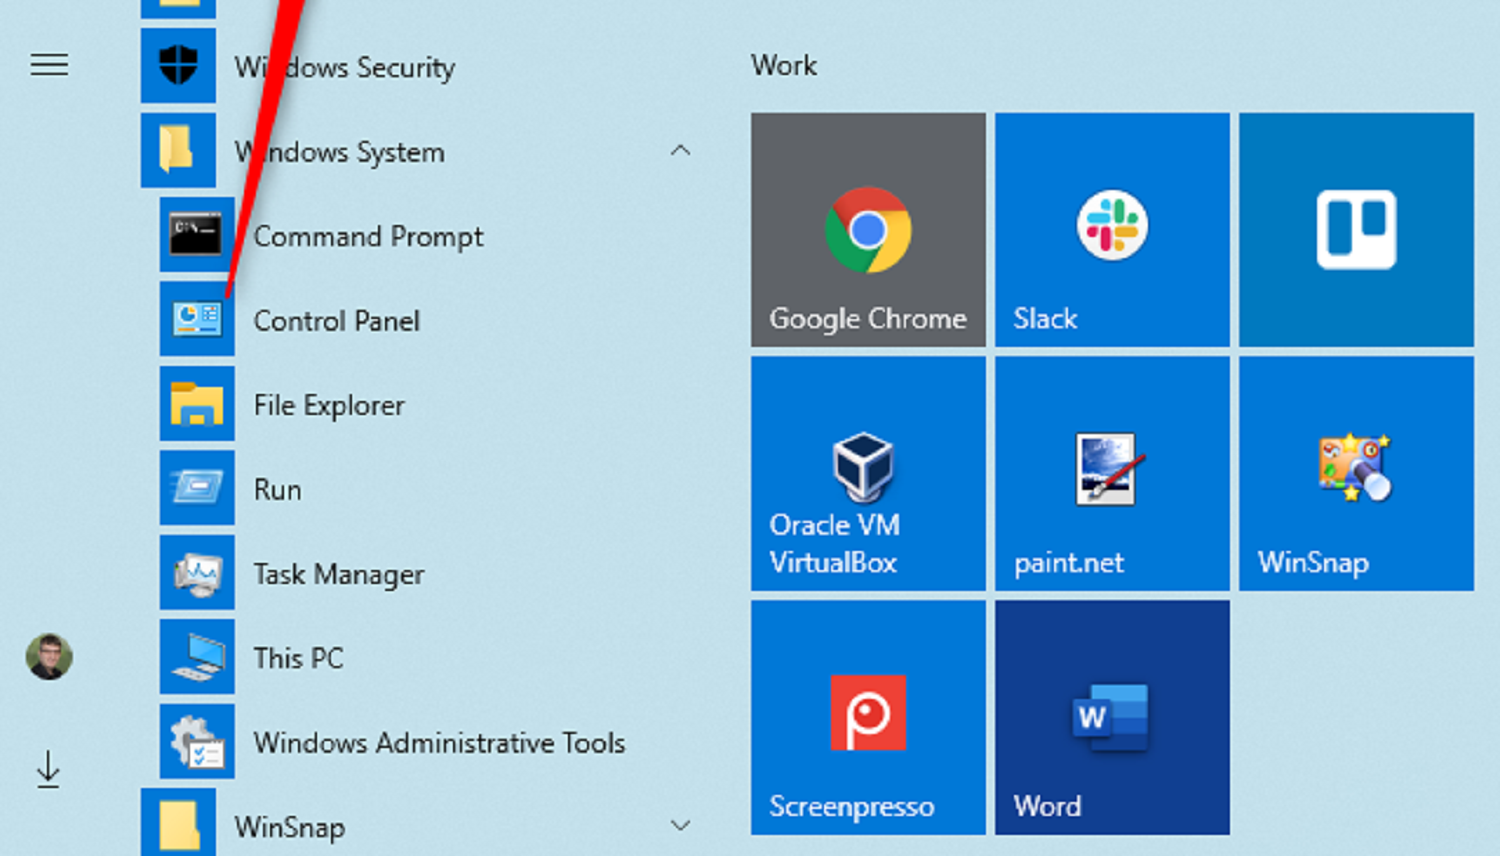
- Then click on the Uninstall a program option under the Programs section. Afterward, right-click on Google Chrome and then select Uninstall. Then, Navigate to C:\Users\%your_name%\AppData\Local\Google\ and delete everything in this directory.
- Furthermore, Reboot your computer to apply these changes. Now, open any other browser on your computer and go to this link to download Google Chrome.

- Download and install Google Chrome on your computer. You might also want to check whether your Wi-Fi doesn’t haven’t a Valid Configuration error.

- After the installation, restart your computer. Now, this should resolve the DNS address.
See Also: 3 Ways to Fix GDI+ Window Preventing Shutdown
FAQs
How can I resolve the DNS address can't be found?
Delete the cache in the browser. IP addresses and caching websites sometimes update. The request will be denied if the machine attempts to reach a website using an old IP address. By deleting the cache in the browser, the problem should be fixed.
Why do DNS not found errors occur?
A user's network or internet connection, improperly configured DNS settings, or an outdated browser is the main cause of DNS failures. They could also be connected to a momentary server failure that stops the DNS from functioning.
How do I configure my DNS?
Select Internet Protocol (TCP/IP) and then click Properties in Local Area Connection Properties. Click Enter the IP addresses of the preferred and alternative DNS servers in the Preferred DNS server and Alternate DNS server fields, respectively, using the DNS server addresses shown below. To add more DNS servers, select the Advanced option.
How can I check that the DNS address cannot be found in Windows 10 problems?
Indications of a DNS problem: Directly enter the IP address in numeric form into your browser. If the website loads, then DNS is the cause of your issue. A ping test performs by typing 'cmd' into the Windows Start Menu search box and choosing Open Command Prompt.
How can I get Google Chrome to get the server's DNS address?
You unable to access websites because Google Chrome's host cache fix or full—a few measures to resolve this straightforward problem. Then, click the Clear Host Cache button. After deleting the host cache, see if the 'DNS address can't be found' problem still manifests.
Conclusion
Always remember that, Follow all these steps carefully to avoid any mistakes. Also, go through the values thoroughly before entering them.
If done carefully, these are the best steps you can use to fix this error. Even a tiny mistake can harm your computer’s working or damage your files or software. So, we hope these methods have helped you resolve your issue.

Gravit Sinha: Founder of ValidEdge, a problem-solving website, driven by his lifelong passion for fixing issues.