While surfing the net, have you ever encountered DNS Server Not Responding Error on your Windows? The DNS server error restricts the user from accessing any website.
The DNS Server isn’t Responding Windows 10 Error can be caused due to an incorrect web address or nonexistence of the site, router error, or wrong configuration.

Read further to find out more.
See Also: 5 Ways To Fix Audio Services Not Responding In Windows 10
How to Fix DNS Server Not Responding Error in Windows
Below are listed the top 5 fixes or methods to solve the DNS Server Not Responding Error:
Method 1: Changing the DNS address manually
To solve the error, the user can manually enter the DNS Address. The steps to do so are listed below:
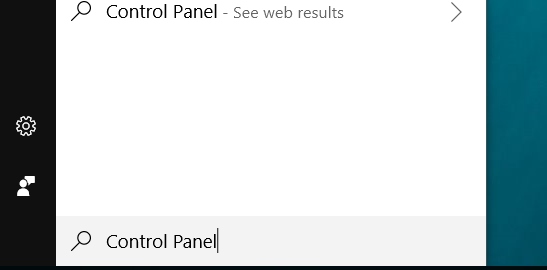
1. At First, go to Start Menu & type Control Panel in the search bar.
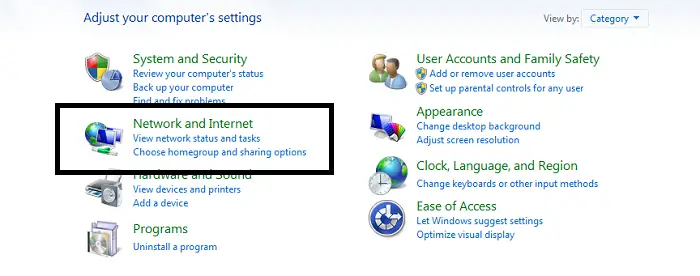
3. Search for the option Network and Internet present on All Control Items. Then click to open it.
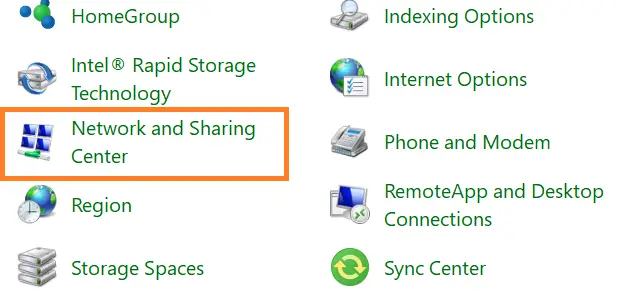
3. Afterward, navigate to Network and Sharing Center.
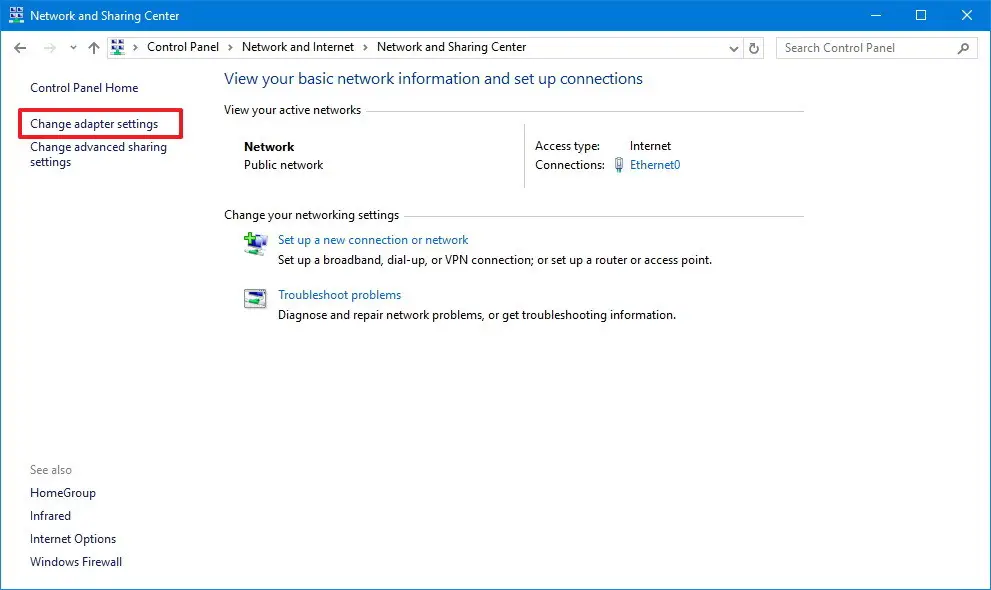
4. Then click on Change adapter settings on the left panel.
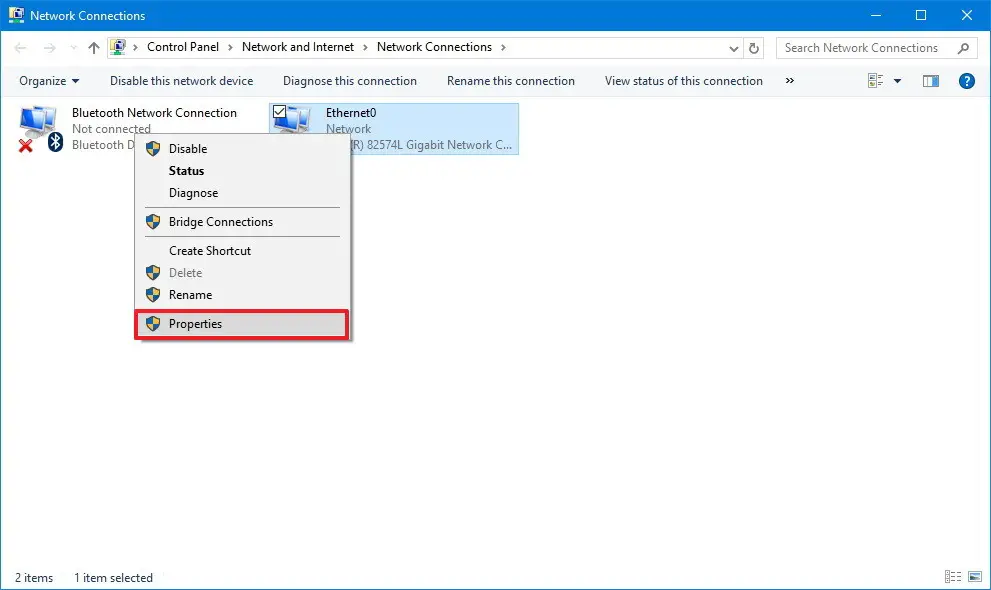
5. select the Network Adapters you are currently using from the available network adapters.
6. Then right-click on it and choose Properties.
7. Afterwards, click on Internet Protocol Version 4 (TCP/IPv4).
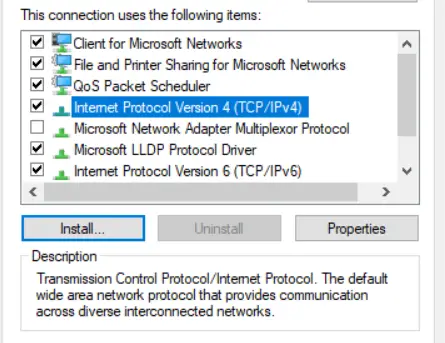
8. Then select the option Use the Following DNS server address.
9. Afterward, enter the Preferred DNS address: 208.67.222.222
10. Then enter the Alternative DNS address: 208.67.220.220
11. Check the box for Validate settings upon exit.

12. Then click OK and Close the window.
13. Enter the same address in your router configuration as well.
14. Finally, restart the System.
Now, again, try accessing the website displaying the DNS Server Not Responding Error. We expect it to resolve. If not, read further to explore other methods.
You may also like –
- 5 Ways to Fix DNS_Probe_Finished_NXDomain Error
- {Solved} Fix Unmountable Boot Volume (STOP: 0x000000ED)
- 6 Ways to Fix Wi-Fi Doesn’t have a Valid IP Configuration
- {Solved} Fix DNS_Probe_Finished_Bad_Config Error {7 Ways}
Method 2: Reset IP Using Command Prompt
If the problem continues, you only need to reset the IP address using Command Line. Follow the below-given instruction to accomplish the task:
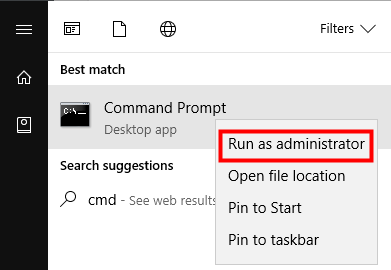
1. At First, go to Start Menu & type Command Prompt in the search bar.
2. Then select and Right Click on it.
3. Choose Run As Administrator to open Command Prompt with Elevated Privileges.
4. In the Command Prompt, type the following command and Press Enter.
ipconfig/all
5. Look for your Network Adapter & write down the Physical Address.

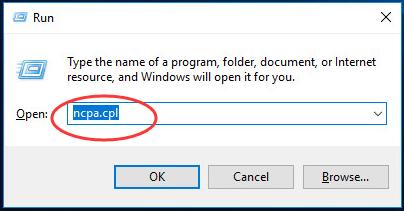
6. Afterward, open the Run dialog box by pressing Windows Key+R.
7. Press Enter “ncpa. cpl” in the search bar.
8. Right-click on your Network Adapter and select Properties. Then click on Configure.

9. Afterward, click on Advanced Tab & select Network Address.
10. Now select the radio button labeled as Value.
11. Then type in the physical address you noted in the text field.
12. Then click OK.
13. Reboot your System.
Once the System restarts, try re-accessing the website to check if the DNS Server Not Responding Error has been resolved.
See Also: 5 Ways to Fix Windows Update Error 0x80070002
Method 3: Use ipconfig Command Line Tool
Running a few commands related to IP configuration can solve the error efficiently. The steps below given are to be followed here –
1. At First, go to Start Menu.
2. Then, type Command Prompt in the search bar.
3. Afterward, select and Right Click on it.
4. Then, choose Run As Administrator to open Command Prompt with Elevated Privileges.

5. Then type the below-written command on the screen one by one and press Enter.
ipconfig /flushdns
ipconfig /registerdns
ipconfig /release
ipconfig /renew
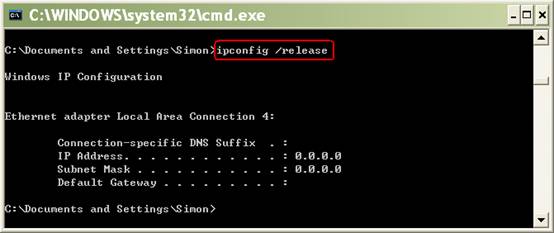
6. Finally, the commands will execute.
After the completion, try connecting the site again.
Fix: The webpage Might Be Temporarily Down, Or It May Have Moved Permanently To A New Web Address.
Method 4- Restart Your Modem or Router
The DNS Server Not Responding Error is caused at times due to an improper connection. Therefore it is suggested to reconnect your System. If you are using a modem or router, push the power button to turn it off and again on it after a gap of time. Try to make the connection again.
Don’t miss out –
- 10 Ways to Fix Critical Process Died Errors in Windows 10
- {Solved} Fix Program Can’t Start Because d3dx9_43.dll is Missing
- 6 Ways to Fix Ethernet Doesn’t Have a Valid IP Configuration
Method 5- Update Network Adapter Drivers
The network adapter drivers must be updated to avoid the DNS Server Not Responding Error kind of errors. To find the problematic drivers, one can download third-party software for device scanning:
1. ATt First, download and install the software Driver Easy.
2. Then run Driver Easy and put it to Scan.
3. It will scan all the drivers and display the result indicating the current status of problematic ones.

4. The one requiring an update can update by clicking the button.
5. Afterward, restart your System.
6. Try to re-access the website.
FAQS
What does 'DNS server not responding' mean?
The 'DNS server not responding' error means the computer cannot connect to the DNS server to resolve domain names into IP addresses.
How can I fix the 'DNS server not responding' error?
Try resetting the DNS settings, flushing the DNS cache, or restarting the DNS client service to fix the error.
Can my antivirus software cause this error?
Yes, your antivirus software can sometimes interfere with the DNS settings and cause this error. Try disabling it temporarily to see if it resolves the issue.
Can my router settings cause this error?
Your router settings can sometimes cause this error if the DNS settings are misconfigured. Try resetting your router to default settings or updating the firmware.
Why am I still seeing the error after resetting the DNS settings?
If the error persists after resetting the DNS settings, try clearing the browser cache or using a different browser to see if it resolves the issue.
Can a VPN cause this error?
Yes, a VPN can sometimes cause this error if it interferes with the DNS settings. Try disabling the VPN temporarily to see if it resolves the issue.
Conclusion
All in All, these were the five methods that can help you to solve the DNS Server Not Responding Error. I hope the article will be helpful for you or anyone who is suffering from the same error.
See Also: 7 Ways To Fix Microsoft Word Not Responding In Windows 10/8.1/8/7

Gravit Sinha: Founder of ValidEdge, a problem-solving website, driven by his lifelong passion for fixing issues.