Microsoft introduced the Runtime Broker Process (RuntimeBroker.exe) in Windows 8, and it is still going on in Windows 10. This process helps in managing the app permissions and ensures their satisfactory working. Unfortunately, it can throw a fit now and then, causing high CPU usage errors and intermittently usage of system memory, leading the system to curb. This article is about how to fix runtime broker high CPU usage errors.
If the Runtime Broker process takes up more than 15% of your CPU or RAM, Microsoft advises terminating the process immediately. This is because Runtime Broker is a system process that will restart automatically and function correctly after it’s terminated.

When the Universal Windows Apps (Windows Store apps, side-loaded apps, or OS apps) launch, it causes the Runtime Broker to activate. Windows Task Manager (Ctrl+Shift+Esc) can monitor the activation of the Runtime Broker. The high CPU usage with runtimebroker.exe often occurs when a faulty application attempts to exceed its resource and permission limits.
See Also: FIXED: Print Screen Not Working in Windows 10
Where to find Runtime Broker Information?
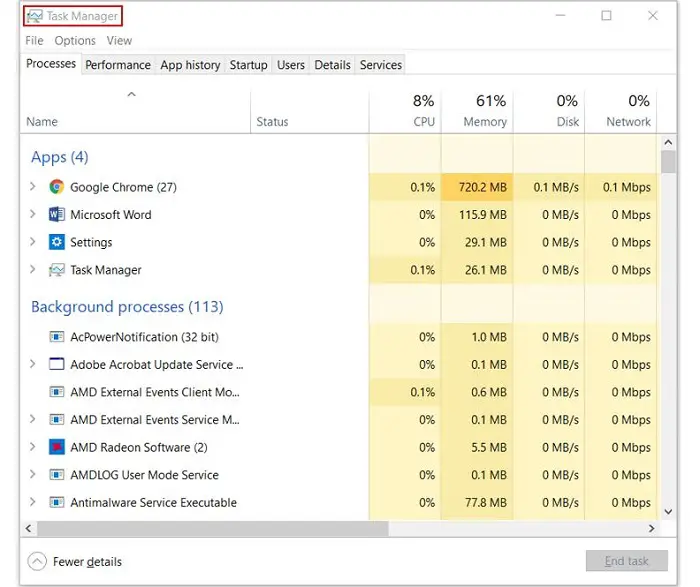
As is mentioned above Windows Task Manager can monitor Runtime Broker.
Therefore, under the process or detail section in Windows Task Manager, one can find the working state of the Runtime Broker.
See Also: 5 Ways to Fix Windows 10 Taskbar Frozen Error
How To Fix Runtime Broker From Causing High CPU Usage Errors?
Let us get started:
Fix 1: The Quick And Temporary Fix.
This fix works if only the RAM usage is relatively high and the functioning of your system is not adequate. The malfunctioning of an app can be the root cause of this situation. These steps are required to fix the runtime broker from a high CPU usage error.
If the Runtime Broker uses more than 15% of the memory, it is advisable to end the process for better system functioning. To do so, follow these steps:
- Using the shortcut Ctrl+Shift+Esc, open the Windows Task Manager.
- Under the processes section, right-click on Runtime Broker.

- A dialogue box will appear; select End Task.
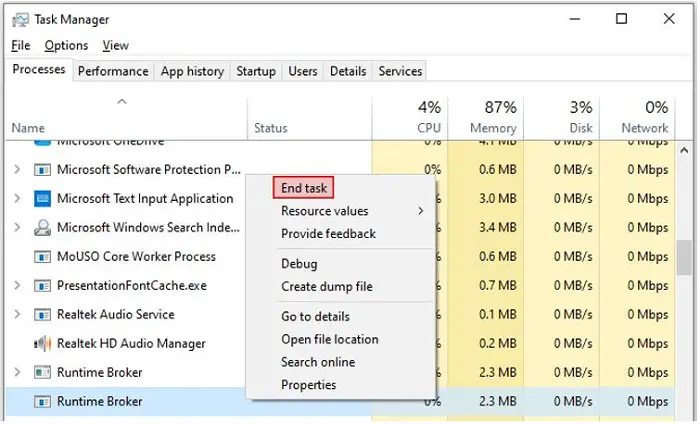
- Restart the PC for proper functioning.

Note: This is a momentary solution; Runtime Broker will launch again when the Universal Windows Application starts. Also, learn how to solve Applemobiledeviceservice.Exe High CPU by clicking here!
Fix 2: Disable Get Tips And Tricks And Suggestions.
All the features in Windows 8 or above, which the Universal Windows Application does acquire, prompt the Runtime Broker process execution.
This framework is the fundamental cause of why the Runtime Broker process caused high CPU usage errors when the user started no Windows applications.
Disabling the tips and tricks suggestion of the application from the settings windows can fix the problem. To do so, follow these steps:
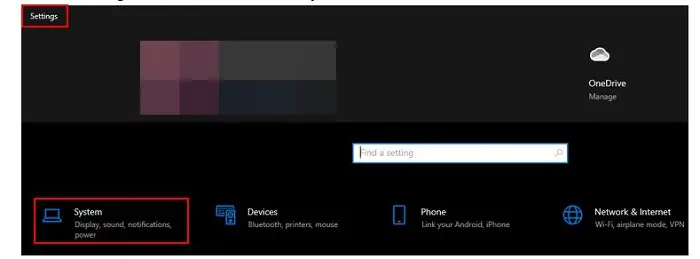
- Click on the Windows icon, and a context menu will appear. Select the Settings.

- In the Settings windows, select the System.
- From the left pane of the System Windows, you will be able to access Notification & Actions.
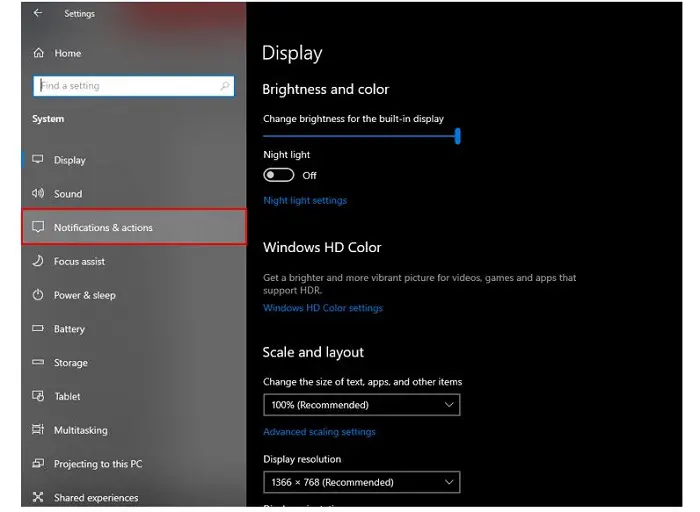
- From the current windows, disable “Get tips, tricks, and suggestions as you use Windows.”
 See Also: {Solved} 10 Ways to Fix Windows Key Not Working on Windows 10
Fix 3: Looking For A Malfunctioning Application.
A high load on the memory disk caused by the Runtime Broker can lack the PC’s performance. The malfunctioning of an application might cause this scenario. To restrict that, to fix the runtime broker from high CPU usage error, follow these steps:
- If the malfunctioned application is unnecessary, try uninstalling it and thus removing the issue permanently.

- If the malfunctioned application is necessary, try to look for the updates and download it. Restart your PC and look for the issue again.
- If the above steps don’t resolve the issue, try reinstalling the application and restarting your PC.
Fix 4: Decrease The Number Of Applications Running In The Background.
Applications running in the background can slow down the computer because they will continue functioning even if not in the foreground. To prevent such situations, follow these steps:
- To open the Settings window, press Windows+I.

- In the Settings window, select the Privacy option.

- From the left pane of the Privacy windows, select the Background Apps.

Now, you can toggle any application that might affect your system performance or which are unnecessary. By doing so, the application would no longer be able to send any notifications.
See Also: How To Change Priority In Task Manager- Windows 10
Fix 5: By Changing The Windows Spotlight To The Pictures
Windows Spotlight might cause your PC to work slowly due to its background activities. You can toggle this function via these steps:
- Open the Settings Window (Windows+I).
- Click on the Personalization option.
- From the left pane on the Personalization window, select the Lock Screen option.
- Now, switch the Windows Spotlight option to the Picture option.
See Also – How To Fix: Avastsvc.exe High CPU Usage
Fix 6: By Disabling The P2P Update Functionality.
Receiving and downloading updates without notice can cause a massive load on the memory disk. This might help in fixing runtime broker high cpu usage error.
Since in our PC, various applications can work efficiently without any updates. So to prevent such unnecessary updates, follow the below-mentioned steps:
- Open the Settings windows with short-cut Windows+I.
- Now select the Update & Security option from the Settings window.
- Select the Advanced Options from the current windows.
- Directly from the Advanced Options windows, toggle the options off according to your necessity.
Fix 7: To Check Runtime Broker As A Legitimate Windows Processor.
It is necessary to check whether the Runtime Broker runs as software or a virus.
The primary key to doing so is to find the location of the RuntimeBoxer.exe. Follow the below-mentioned steps:
- Open the Task Manager (Ctrl+Shift+Esc).
- Under the Processes section, spot the Runtime Broker process.
- Right-click on that option and select the “Open file location” via the dialogue box.

After opening the file location, the address should be similar to c:\windows\system32\.
See Also: {Solved} 7 Ways to Fix Intel Delayed Launcher Error
FAQs
Should I disable the runtime broker?
Answer- The runtime broker only takes up a little space, so stopping it is unnecessary. However, if it misbehaves, try to restrict it by clicking End Task on the Task Manager.
What happens if I end the runtime broker?
Answer- The Runtime broker extension activates when a new app is launched. If you terminate the Runtime broker, it will close all currently open apps.
How do I reduce runtime, broker?
Answer- To reduce Runtime Broker's resource usage, ensure Windows is updated. Go to Settings > System > Notifications & Actions, and remove apps' ability to show notifications. It can lower the load on Runtime Broker, which manages app permissions, without affecting core functionality
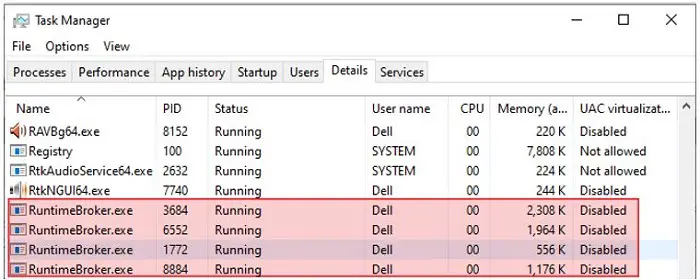
Why do I have four runtime brokers running?
Answer- Windows uses multiple Runtime Broker processes for efficiency and security. Each process manages permissions and ensures apps don't access unnecessary resources. Having various instances is normal and helps distribute the workload, enhancing system stability and preventing a single point of failure.
Conclusion
So, to sum up, Runtime Broker acts as a middleman. We should remember that Runtime Broker doesn’t cause any high CPU usage or load on the memory disk; it is the malfunctioned applications or the notification system utilizing it.
Rebooting your system could also be considered to tackle the problem of high CPU storage errors.
How to reboot: Save all the necessary work< Restart your PC.
This classic troubleshooting process can help to clear out all the temporary files and can resolve the issue.

Gravit Sinha: Founder of ValidEdge, a problem-solving website, driven by his lifelong passion for fixing issues.