In this tech-based world, people use many Android apps on their systems, and to do so, people use an emulator or HDMI cable. One of the most used Android emulators is the Bluestacks engine. As helpful as it is, sometimes it can constantly show the annoying issue of the Bluestacks engine won’t start. The best solutions to resolve this problem are provided in this guide.
To fix this issues, Change Graphics Mode to DirectX, Turn off Antivirus Software Temporarily and Reinstall the BlueStacks.

BlueStacks is a popular Android emulator, but sometimes Bluestacks refuses to open. This can be a hurdle in your way. We’ll show you how to fix the Bluestacks Engine Won’t Start issue and provide a step-by-step guide you can easily follow.
Why Does Bluestack Error Pop Up on the Screen?
This blunder message makes its appearance post the BlueStacks update. Many clients began seeing this mistake when they refreshed the BlueStacks to the fresher adaptation. Along these lines, the assumed reason for this blunder is a bug in the update.
BlueStacks often default to OpenGL as its default graphics option but can be manually fixed by switching it to DirectX. Reinstall BlueStacks and see if it works, or switch to an earlier version of Windows or enable virtualization to repair the Bluestacks Engine Won’t Start Problem.
Try to restart your PC or the Engine. When one faces this error, they cannot start the Engine and play Android games on their PC.
For individual clients, this may occur after the Windows update too. Once more, it focuses on a bug in the Windows or BlueStacks update. In uncommon cases, the issue can be brought about by inappropriate settings and handicapped virtualization innovation.
13 Ways to Fix Bluestacks Engine Won’t Start
Try these 13 methods to fix the issue:
Method #1 Turn Off the Antivirus
Try turning off the antivirus application, particularly when you have Avast. There is usually a disabling choice. Right-click the antivirus symbol from the framework plate and select the alternative Disable.
Disable the application briefly and check if BlueStacks work in that period. If it works fine, at that point, the issue is primarily a result of the security application. Changing to an alternate security application will anticipate these issues later on.
See Also:
Method #2 Change the Capacity of the RAM
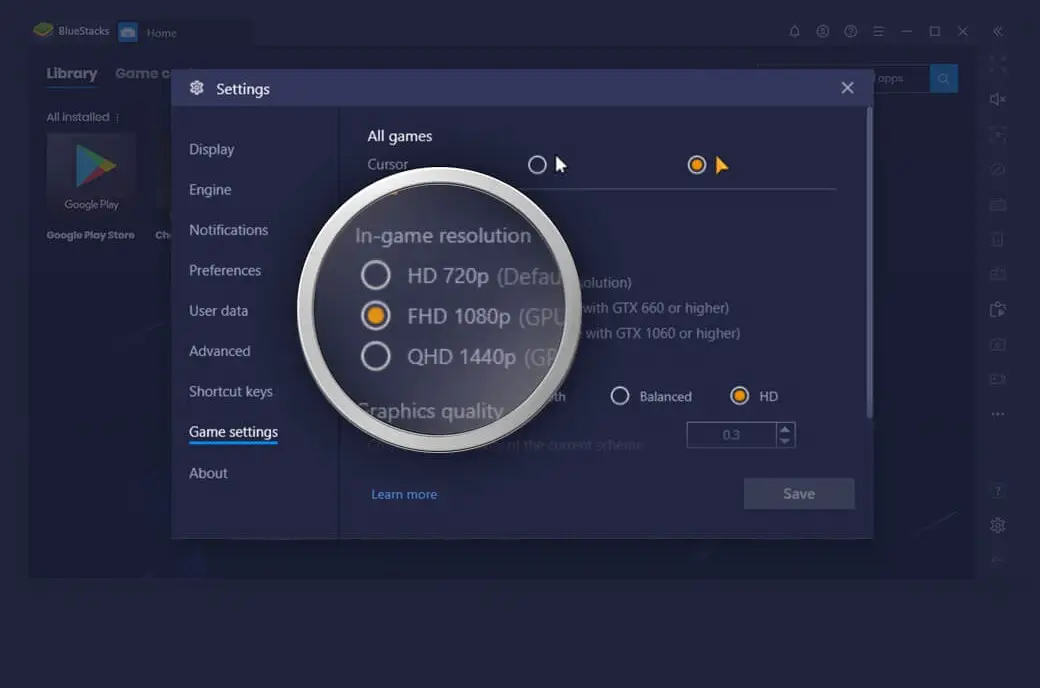
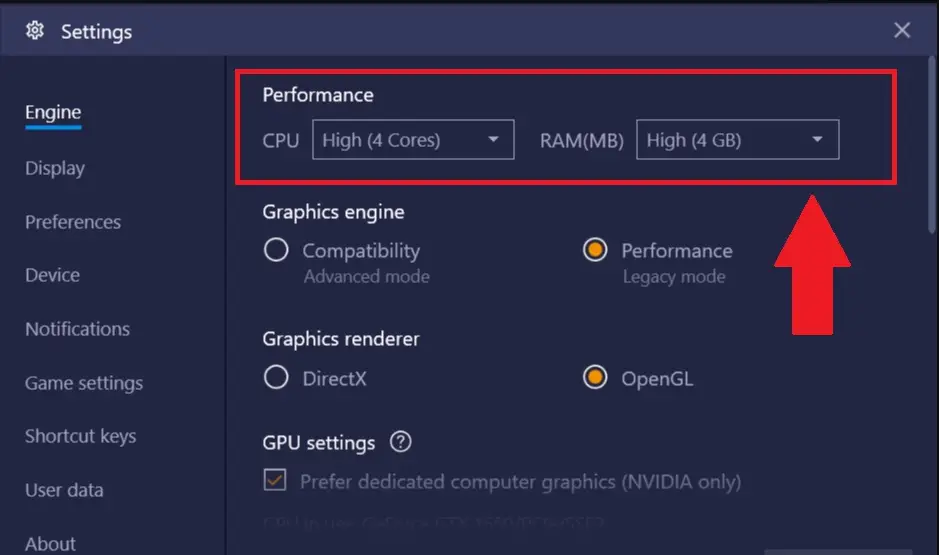
In the Engine settings of BlueStacks, a choice of utilizing OpenGL or DirectX is there. As a matter of course, BlueStacks will use OpenGL, and this choice will be chosen. Switching to DirectX and rebooting, more often than not, illuminates this issue. Follow the steps given below to change to DirectX;
- In BlueStacks, Click on Options from the tools in the top right corner. A downward arrow represents it. Click on Settings, followed by the Engine on the left panel.
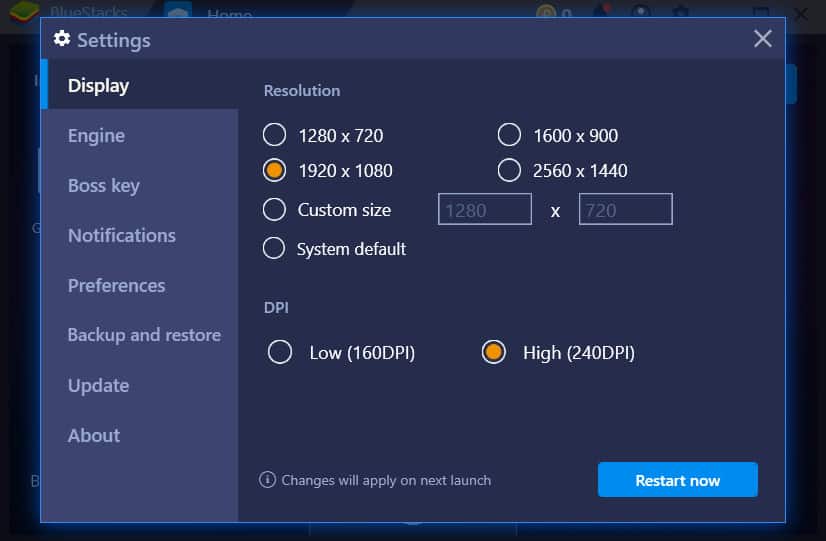
- Here, the user has to hit the keyboard on DirectX. Finish by restarting the system
Method #3 Enable the Virtualisation
Ensuring that the virtualization is empowered on your PC additionally helps settle this issue. Many clients tackled the problem by diverting the Virtualization choice from the BIOS.
Virtualization, on the off chance that you don’t have the foggiest idea, fundamentally gives Intel equipment a lift while virtualizing and helps BlueStacks run smoother and quicker. Be that as it may, before you empower the Virtualization innovation, allows first check whether your framework bolsters this innovation or not.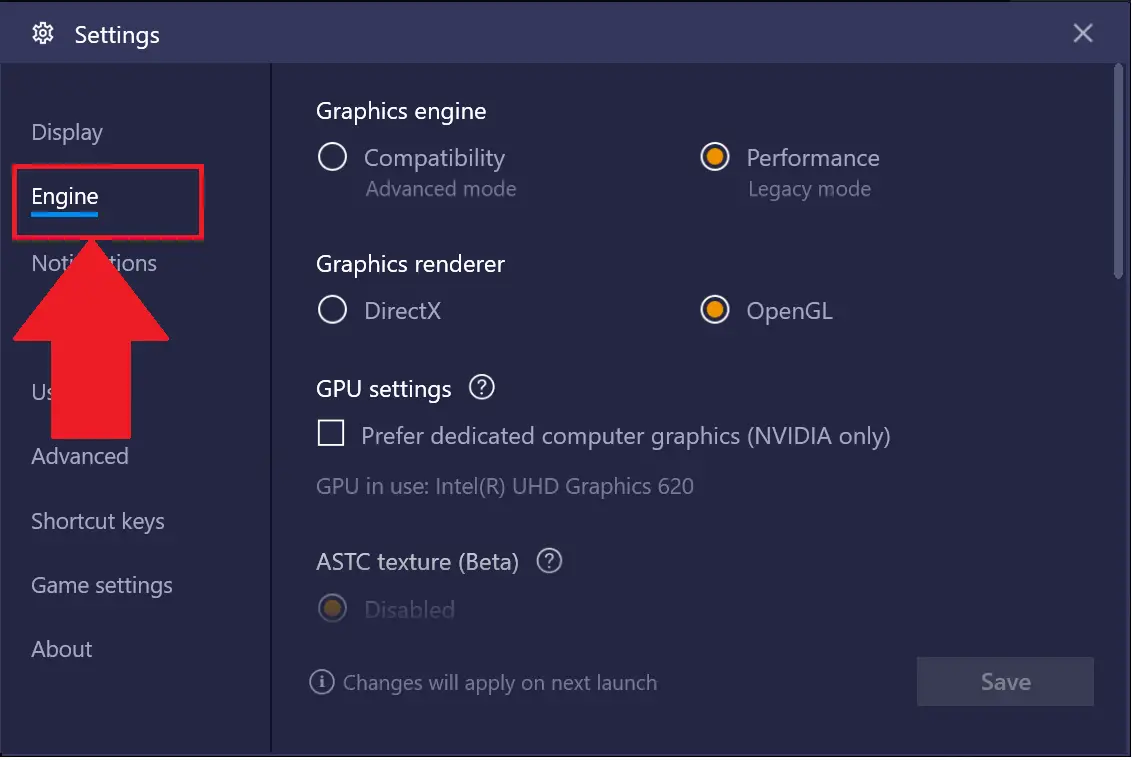
Here are the means for checking whether the Virtualization Technology is accessible. There are various methods for testing the accessibility relying upon your processor. If you have an Intel processor, at that point, adhere to the guidelines in that segment.
Then again, if the user has an AMD processor, then avoid the Intel area, go to the AMD segment, and adhere to the guidance given there.
Method #4 Try Repair Tool
If none of the Methods has settled, the Bluestacks Engine Won’t Start the issue for you. Then it is suggested to utilize the Reimage Repair Tool.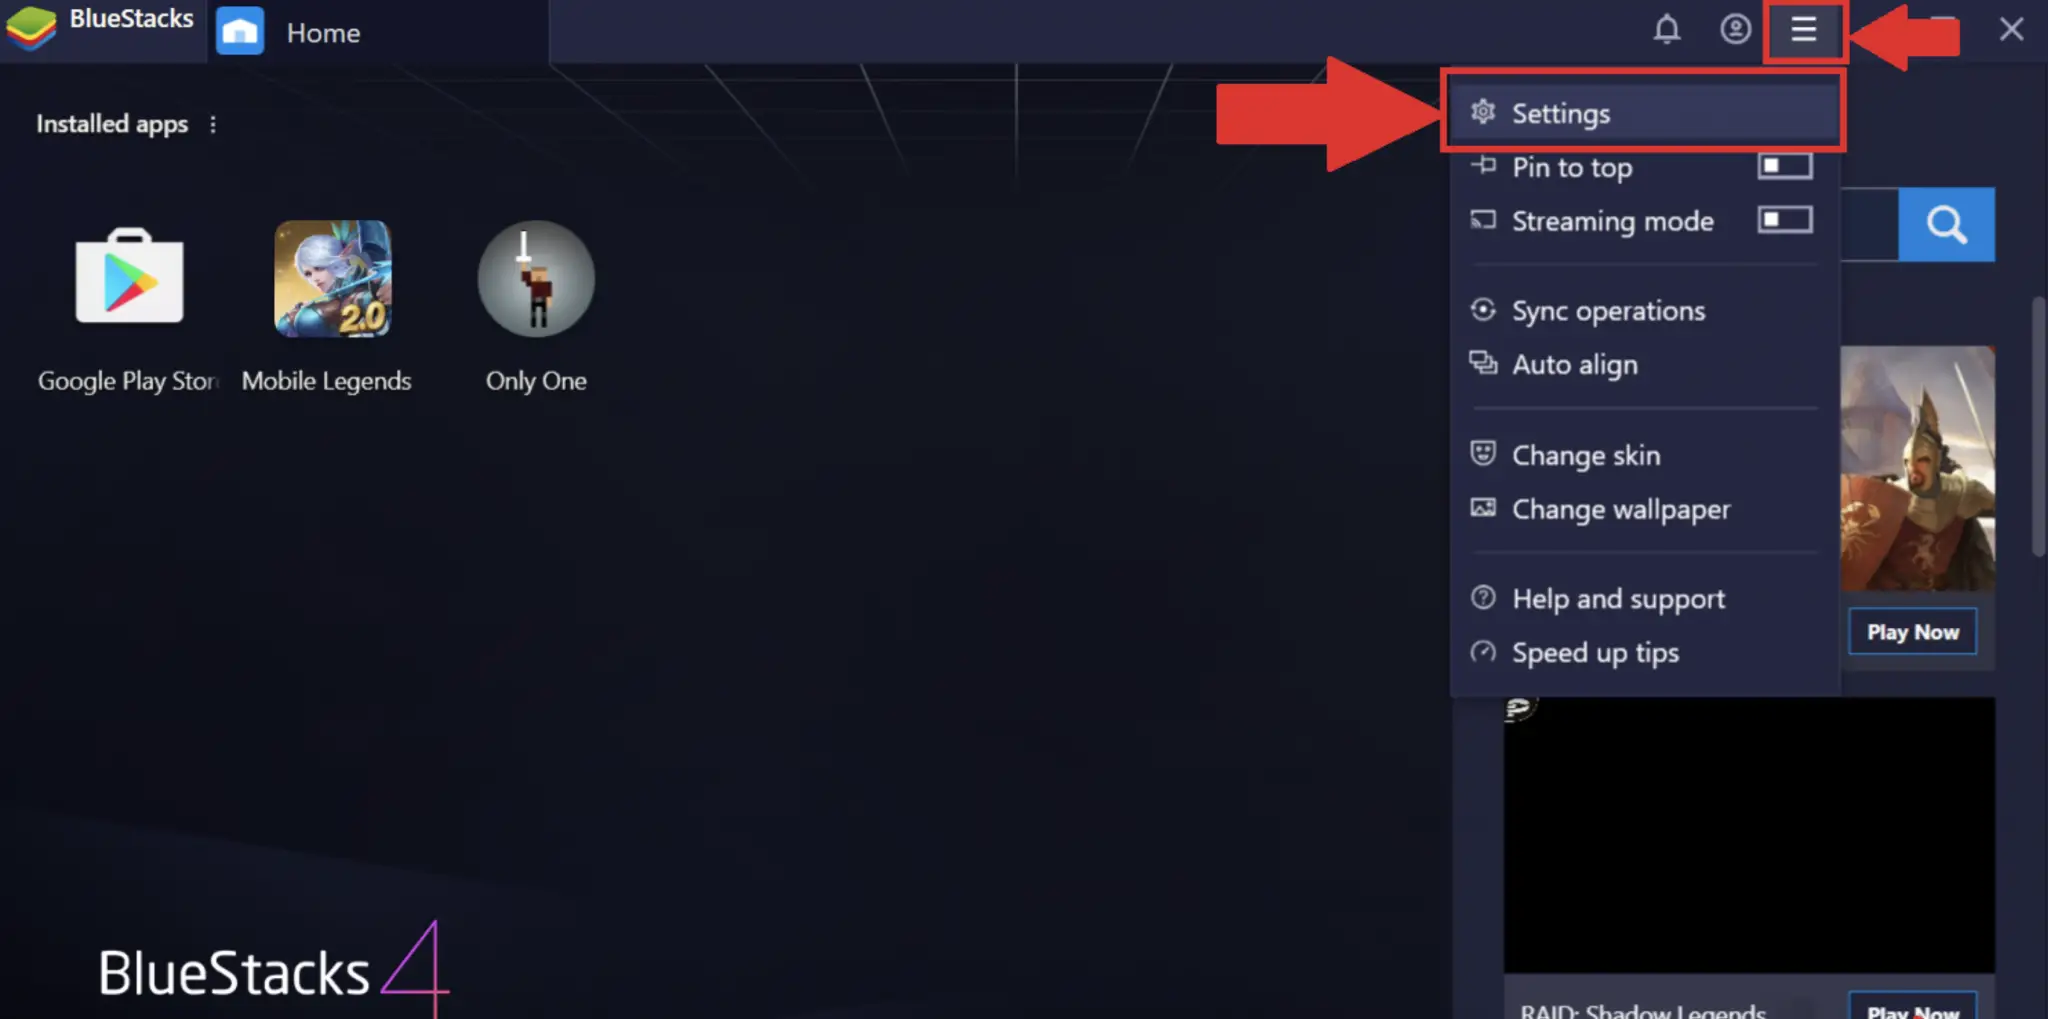
Can examine the archives to revive all the missing documents. This finds out the root of where the issue might have started. Reimage will likewise improve your framework for the most effective execution.
Method #5 Delete Everything and Reinstall
Uninstalling and reinstalling the BlueStacks also settle the Bluestacks Engine Won’t Start issue. Along these lines, here are the means for uninstalling and reinstalling the BlueStacks.
- Click on Windows key+ Start typing %temp% and hit Enter. Hold the CTRL key along with Key A (CTRL + A).
- Now click on delete on the keyboard and verify any extra prompts. All the contents of the temp folder will be deleted soon. Save the file before deleting it. You can download the BlueStacks uninstaller from various sources available on the internet.

- After downloading the file, open the uninstaller and click Yes to confirm the permissions. Hit Ok after the process is finished. After this, install the BlueStacks and download the updated version of BlueStacks from the internet.
- Click on Windows key+ R, type MSConfig, and hit Now in the Boot tab. Check for the option of Safe Boot and click on the Minimal option under the Safe Boot. Click on Ok.
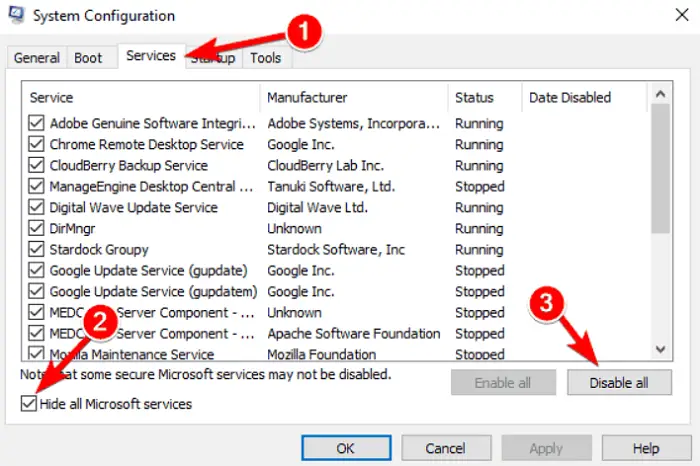
- Restart the Windows once the screen asks you to do so. So now you are in safe mode and can go to the location where the BlueStacks is downloaded. Run the installer and Install the BlueStacks on the device. Do remember to turn off the Safe Mode once the installation is done.
- Once again, click on Windows Key + R, type Hit Enter, click on the Boot tab, and carefully uncheck the Safe option Boot in the Boot options, followed by Ok. Restart Windows again, which leads your device to its normal mode. Do check whether the BlueStacks software is working correctly on the machine.
See Also:
{Solved} How to Fix Service Registration is Missing or Corrupt
7 Ways to Fix Windows 10 Slow Shutdown Error
Method #6 Install the Best Version of Windows
If you began encountering the issue after a Windows update, the problem is with the most recent Windows assembly. In this situation, the leading choice for you is to return to the past form and sit tight for the Windows update that doesn’t cause this issue.
There is a certain time limit (10 days) in which you can return to the past form after a Windows update. In this way, remember that this choice won’t generally be accessible. Below given are the steps for reverting to the previous build;
Click on Windows key+ I and go to Update & Security. In the left pane, click on Recovery and click on the Get Started button, which is there in the Go back to an earlier build. So if this option is greyed out, it can’t be reverted. Just follow the steps presented on the screen one by one and click the Get Started button.
Method #7 Restart the Engine
BlueStacks is an Android platform that allows you to run Android games and applications on your PC or Mac. Sometimes, when beginning the BlueStacks, you will see a blunder message showing that the Engine couldn’t be launched.
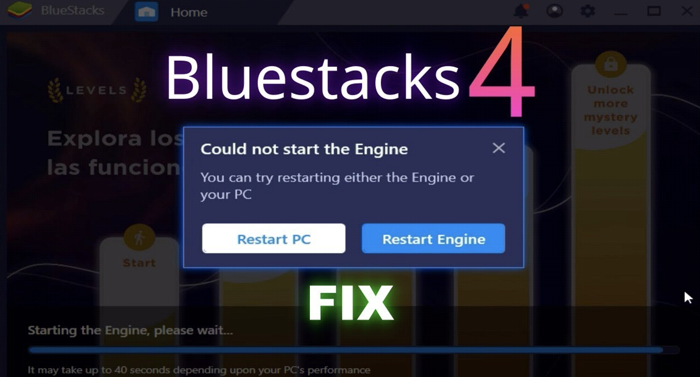
The user can either try and restart the Engine from the blunder exchange or reboot the PC and attempt again. These alternatives, for the most part, don’t resolve the issue and shield you from utilizing the BlueStacks.
Method #8 Reboot the Device
A great deal of the time, refreshing Windows will settle this issue. You should check for Windows reports on your PC and introduce the most recent accessible updates.

After fresh Windows, restart your PC and dispatch your game to check whether the issue is settled.
Method #9 Try altering the security properties.
The default security settings might be causing the issue too. To verify and fix this,
- Go to the Bluestacks installation directory, open it and enter HD-StartLauncher. Right-tap on it and open the properties. Under the Security tab, tap on Edit.
- Allow full control option should be turned on in the permissions section. Apply the changes and leave.
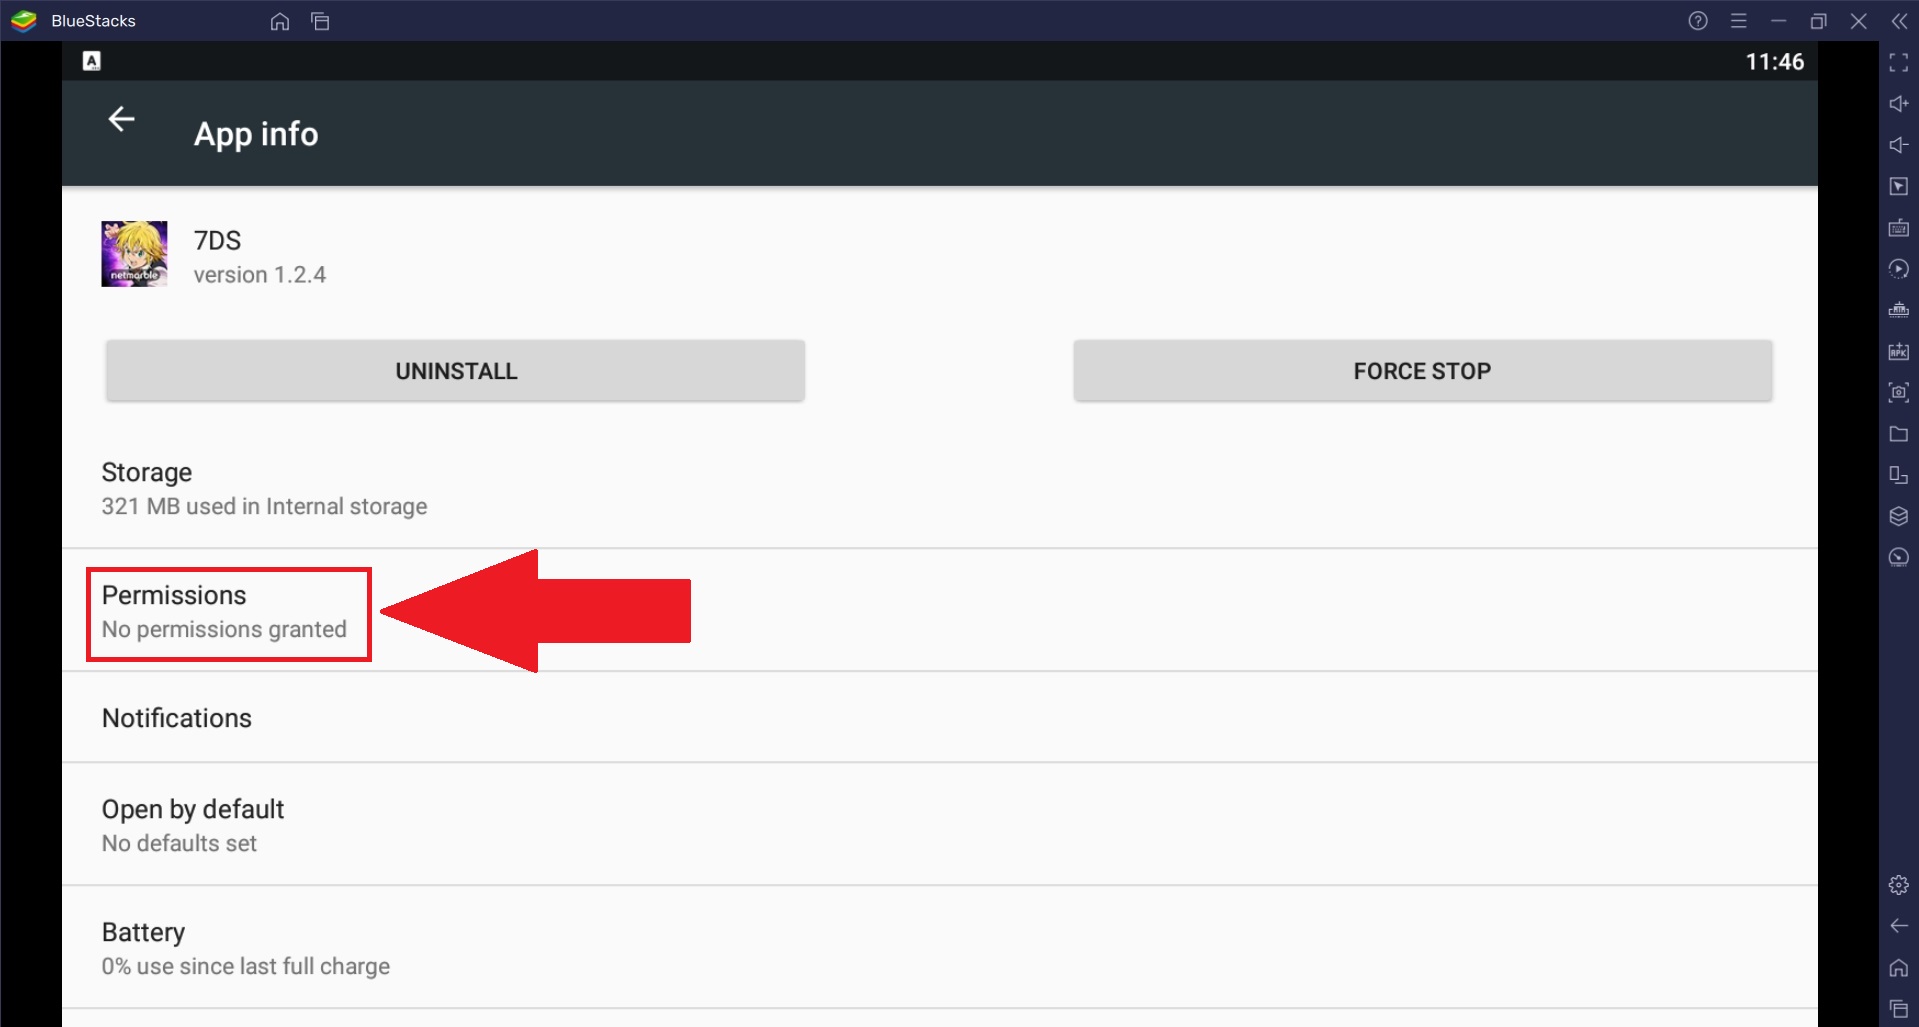
This will allow you to run the emulator under your control and remove the Bluestacks engine not starting error.
Method #10 The Graphics is Not Supporting
This BlueStacks 3 couldn’t turn over the motor issue on Windows 10/8/7 shows up when you attempt to run BlueStacks 3 application. It may result from the reality that the PC doesn’t bolster the BlueStacks 3.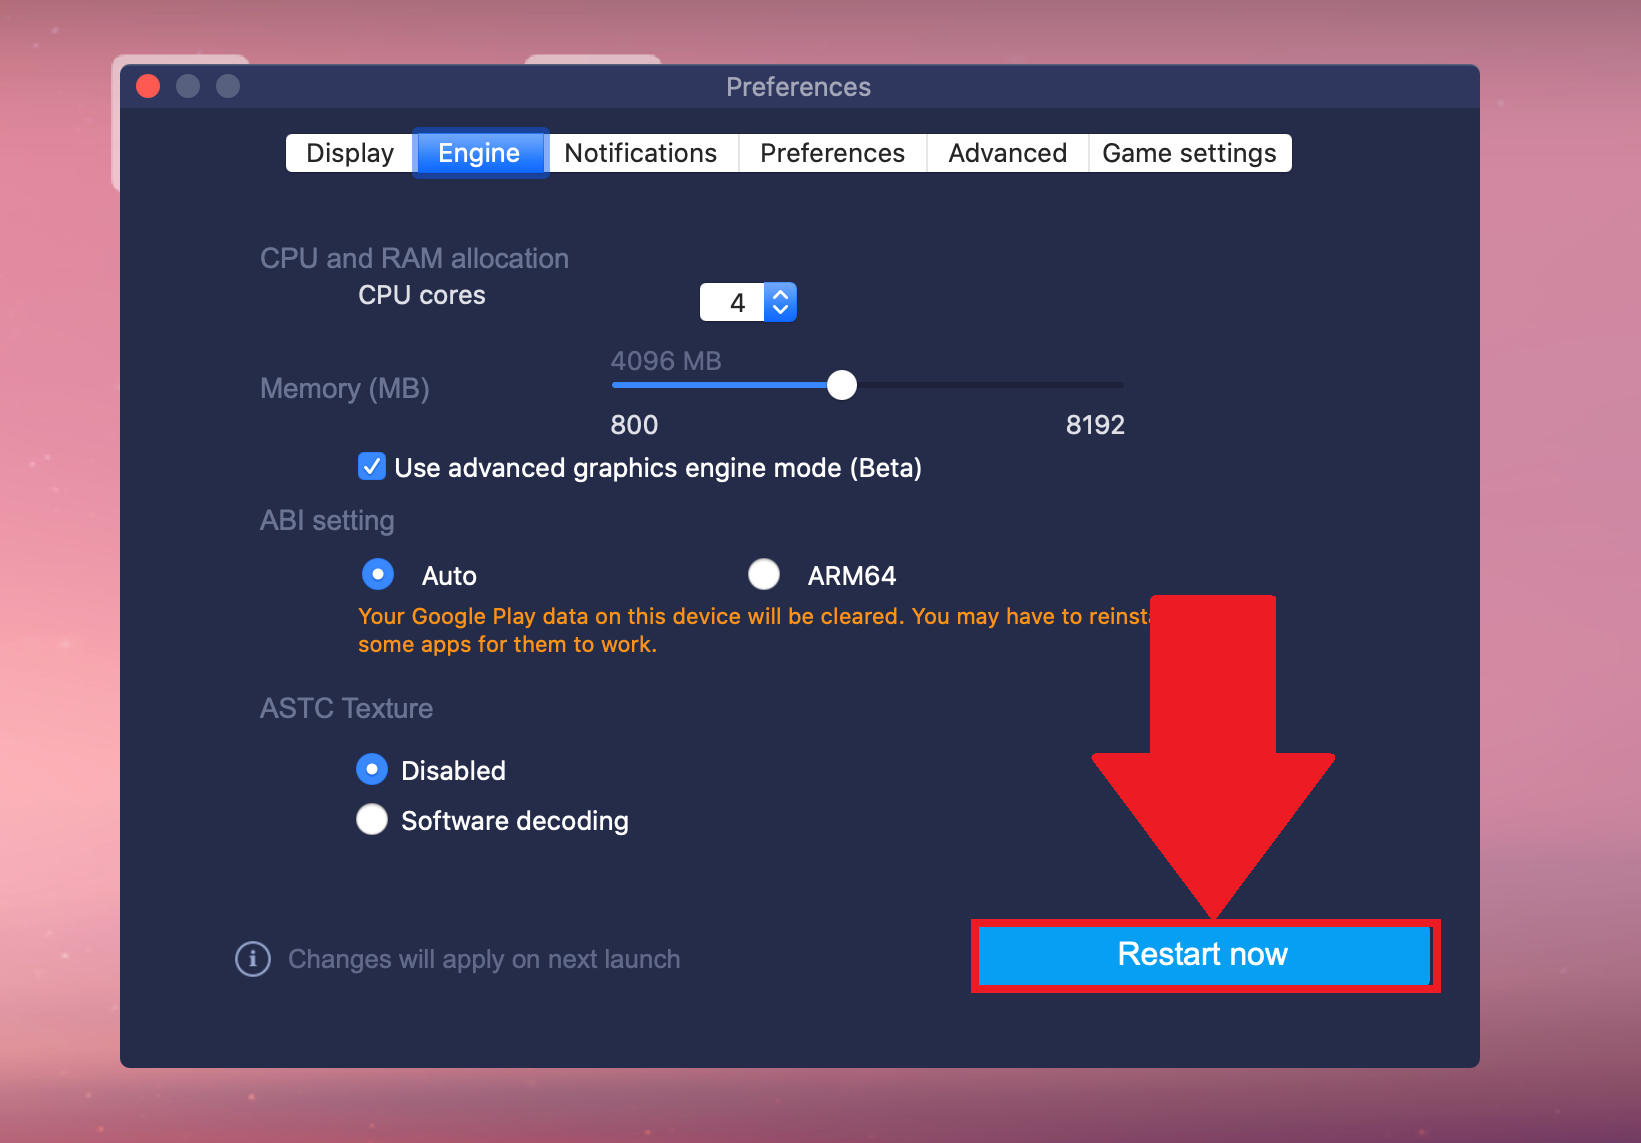
BlueStacks 3 will offer you to Restart the PC or Restart Engine to fix BlueStacks 3 motor not turning over the issue. In any case, this may comprehend the item until the end.
Method #11 Run the app in compatibility mode
If you use Microsoft, you are familiar with running an application in safe mode if it creates problems. We will do the same for the Bluestacks engine. To turn this mode on,
- Look for “Bluestacks engine” and right-click on it on your desktop. Open “Properties” and look for the “compatibility” tab.
- Tap on “run this program in compatibility mode.” Click on “ok” and “Apply.” If a window pops up, press “run the compatibility troubleshooter” and click “Yes.”
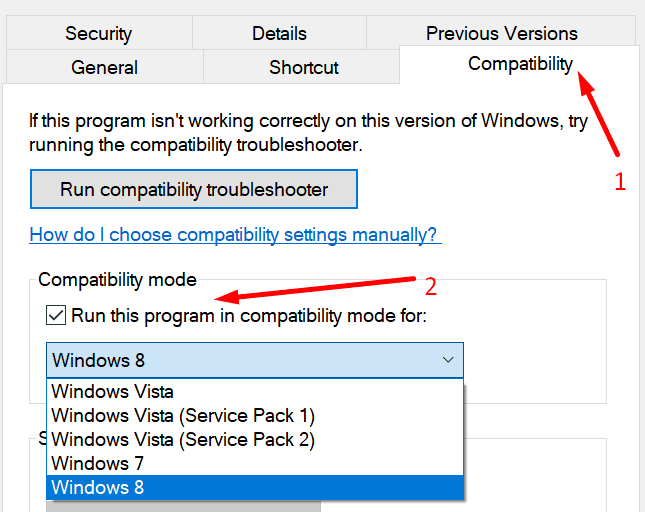
By doing so, Windows will automatically find the best-suited mode for the emulator. Now check for the Bluestacks engine won’t start error.
Method #12 Install an older version
If the latest version gives you issues, try returning to the older versions. To do so, ensure that you remove the latest one completely and then only download the emulator again; otherwise, a conflict will arise.

To download or install, visit the official website. Now run it and check if they cannot start the Bluestacks error persists.
Method #13 Take Help from the Internet
If nothing helps and the user cannot resolve the Bluestacks Engine Won’t Start issue by following the above-given methods, then try taking help from the internet or social media websites.
Navigate to the official websites depending upon your device or connect to pages offering advice by connecting to social media portals.
See Also: Methods To Fix “Bluestacks Failed To Load Channels” Issue
FAQs
Is Bluestacks engine good for my PC?
In this tech-based world, people use many Android apps on their system, and to do so, people use an emulator. One of the most used Android emulators is the Bluestacks engine. As valuable as it is, sometimes it can constantly show the annoying issue of the Bluestacks engine won't start.
How to resolve Bluestacks stuck on initializing?
To fix the issue, try to remove and stop all background processes and then try to disable the net and restart the app. Now start the emulator and try to see if it works.
Conclusion
There are reports from the BlueStacks clients that they experienced an issue when they open the BlueStacks application. Rather than indicating game and application symbols on the home screen of BlueStacks, they see a warning saying BlueStacks 3 couldn’t turn over the motor. Bluestacks Engine Won’t Start issue occurs on Windows 10, 8, or even 7.
With assistance from this guide, we hope you can resolve the frustrating Bluestacks engine won’t start. Use your favourite apps now that you’ve dealt with all emulator issues. Happy working!
See also: Digital Output Device (HDMI) Missing on Windows 10? Easily Fix It!

Gravit Sinha: Founder of ValidEdge, a problem-solving website, driven by his lifelong passion for fixing issues.