Headphones not working in Windows 10 are a frequent error due to the operating system’s non-identification of a particular pair of headphones. Another likely reason for headphones not working is as you have updated to a new, latest operating system, a default may have tainted your PC settings, and because of this, you are facing problems.“With great power comes great responsibility.”- Winston Churchill. Winston Churchill rightly quoted that greater power seeks greater responsibility which can be utilized by efficient management and proper strategy formation cum implementation. The tech giant Microsoft Limited recently released their latest and so-called most innovative and versatile personal operating system, Windows 10.

Windows 10 has taken the International IT Sector and Markets by storm with new features such as Game Booster, Branch Cache, and Windows Go To. However, sometimes the computer doesn’t recognize the headphone. Set Headphones as the default device and update the audio driver to fix this issue. Change the Realtek HD Audio Manager settings and uninstall the IDT audio device.
Errors and Lags followed a panic that arose when the corporation did not listen to the issues. One of the most sought issues, i.e., headphones not working in Windows 10, which people are hunting throughout the web, is discussed in detail throughout the article. Try these solutions precisely and share your opinion and feedback in the comment section that helps our page become more user-friendly and dedicated to our viewers.
See Also: Bluetooth Not Detecting Devices On Windows 10
How to Fix Headphones Not Working in Windows 10
Below is the compilation of solutions that can fix the problems mentioned above:
Method 1: Update Sound Drivers
In the majority of the cases, the issue of the computer not recognizing headphones arises due to the non-updating of sound drivers.
The drivers are not updated and are incompatible with the headphones plugged. Hence, the dilemma arises. It can be solved by following the steps mentioned below:
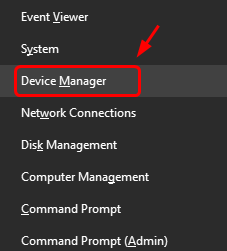
- Click the Start button, type Device Manager, and select the result displayed.
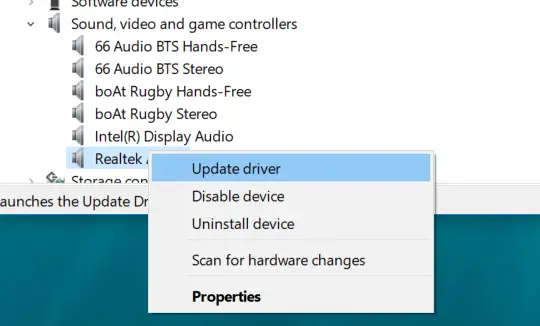
- Then expand Sound Icon from options and right-click on it and select Update Drivers.
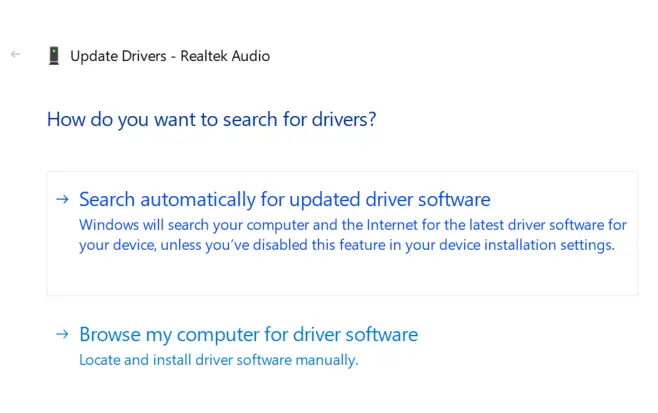
- Afterward, select Search automatically for the updated driver software option.
Method 2: Setting Headphones as a Default Playback Device
The problem further continues many times as the headphone will not mark as a default playback device. It is an unconventional trick but has proved to be a wonder for many when audio services do not work. To apply the above changes, follow the steps below:
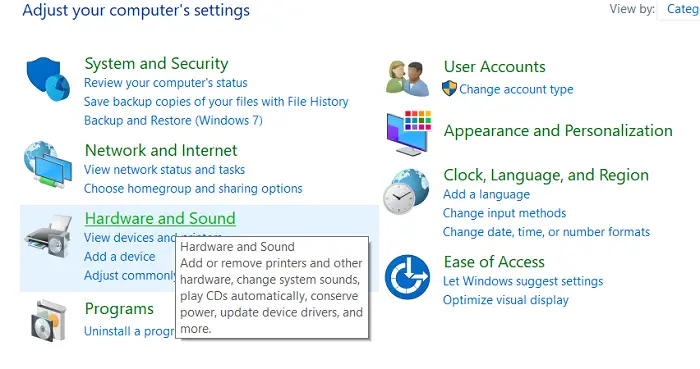
- First of all, tap the Start button and Open the Control Panel.
- Then click on Alternative Hardware and Sound and then go for Sound.
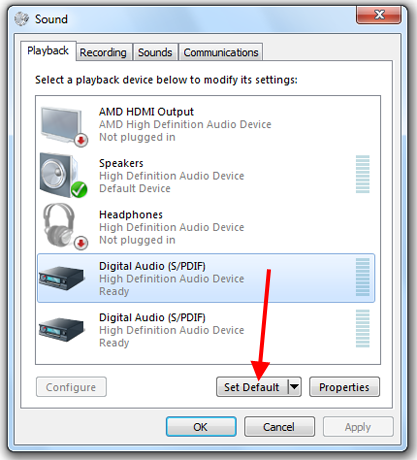
- Under the Playback tab, click right in the window and select Show Disabled Devices.
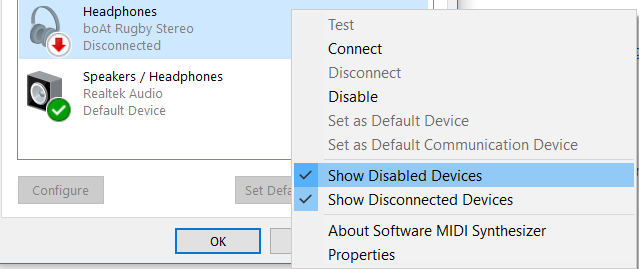
- Afterward, a list of headphones will flash, and right-click on the required headphone device settings and select Enable. Finally, go for Set as Default and click the Apply option.
NOTE: – This method is least practiced for headphones not working, but it proves highly advantageous and reliable. Hope this will resolve the headphones not detected Windows 10 problem.
Also Read: –
- Guide to Fix Err Connection Timed Out Error in Chrome
- 5 Ways To Fix GWXUX Has Stopped Working Error
- 7 Ways to Fix Microsoft Visual C++ Runtime Library Error
- {Solved} Application has been Blocked from Accessing Graphics Hardware
Method 3: Immobilize Front Panel Jack Detection
Another familiar issue for which headphones do not function properly and efficiently in Windows 10 is the immobilization of front panel jack recognition. Or it could be the 0xc00d36c4 error while playing music.
While troubleshooting the malfunctioning headphones, this method is the first choice of many users. To implement the following setting, follow the steps listed below:
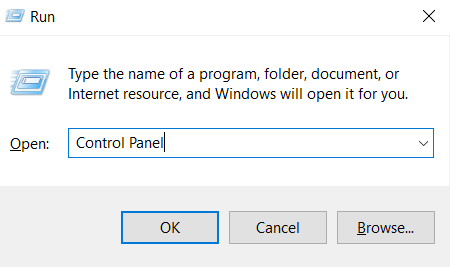
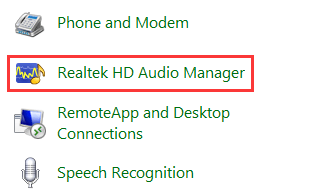
- First of all, open Run by pressing Windows Key+R together.

- Then type Control Panel, and you will be directed to the control panel.
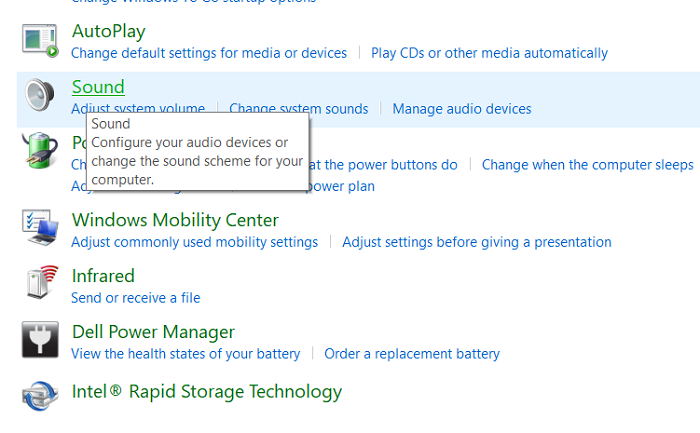
- Afterward, go to Hardware and Sound option.
- Then click on Realtek HD Audio Manager.
- Now, Click on Disable Front Jack Panel Detection under the Connector settings.
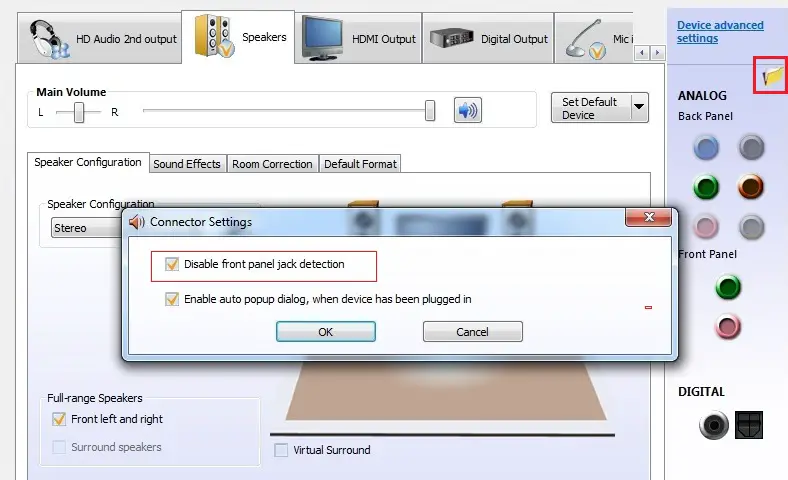
REMARK: – This method is helpful for Windows 10 headphones not working, only for systems with Realtek HD Audio Manager used for proper operations.
Method 4: Rebooting Your PC
This method may prove wonders if the above ways do not bear fruit for headphones not working on Windows 10. It is more of an all-purpose step rather than a specified difficulty.
See also: 5 Ways To Fix Headphones Not Working In Windows 10
Rebooting gravely solves every problem, which will give the troubleshooter a hard time. But it won’t work if your PC randomly restarts. However, follow the procedure mentioned below:
- Open Start Menu by pressing the Windows button from the keyboard. Then click or Tap on the Power Button.

- At last, choose Restart.
OR
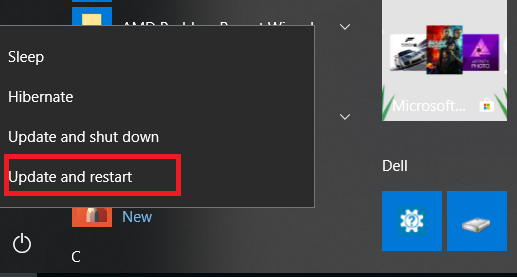
This method is somewhat faster when we compare it to the above method:
- First of all, press the Windows Key+X together. Then a power user menu is visible.
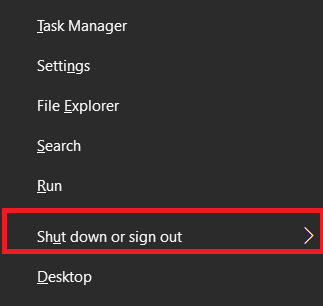
- In the ShutDown and Sign Out menu, scroll down and tap on Restart. Now this will solve Windows 10 not recognizing headphones issue.

Check Out: –
- {Solved} Application has been Blocked from Accessing Graphics Hardware
- 7 Ways to Fix Steam Download Stopping and Restarting Error
- {Solved} 5 Ways to Fix Windows Update Error 80244019
Method 5: Restore Your PC System
Inspired by the famous saying, ‘Never lose hope, as miracles happen every day,’ this method seriously may give you Goosebumps as all of the above-mentioned complicated methods didn’t work, and suddenly this micro step gave you the desired product.
Indeed, if one door closes, a hundred new doors open to mandating your desired results. Put your hands on these steps to obtain your required outcome:
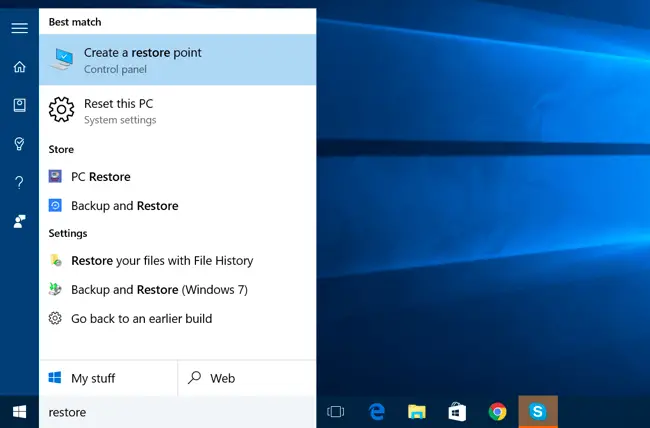
- Click on the Start button and type the keyword restore point or restore in the black space.
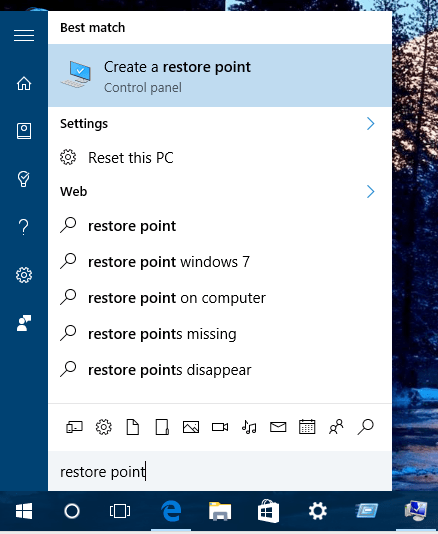
- Afterward, click on the option Create a Restore Point.
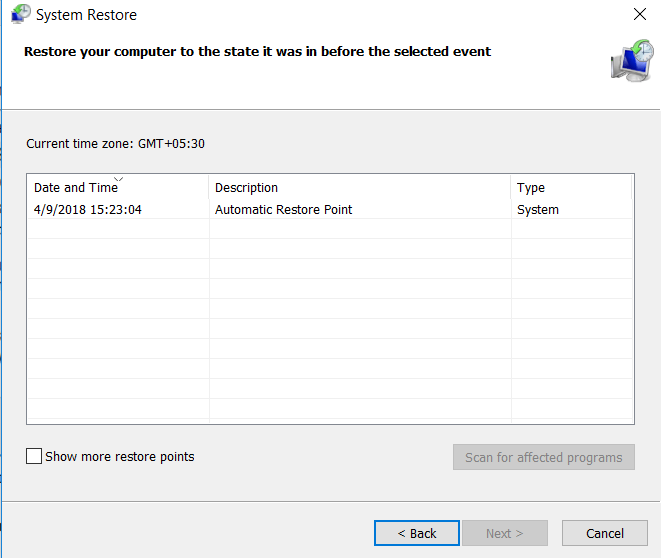
- Now, just click on the System Restore option under the System Protection tab.

- Choose the Restore Point created recently & follow the steps accordingly.
At last, complete the installation and enjoy music and sound from your headphone. It would surely fix the laptop headphone jack not working Windows 10.
NOTE: – We recommend backing up your data before performing a system restore.
See Also: –
FAQS
Why is there no sound coming from my headphones?
Volume settings can cause the lack of sound from headphones set too low, muted audio, audio balance issues, or faulty headphone drivers.
Why is there distorted or poor sound quality in my headphones?
The distorted or poor sound quality in headphones can result from damaged cables, loose connections, audio driver issues. Or incompatible audio settings.
How can I fix headphones that only work on one side?
To fix headphones that only work on one side, check the audio cable for damage, ensure a secure connection, test the headphones on different devices. Or consider replacing the headphones if the issue persists.
Why are my wireless headphones not connecting to my device?
Wireless headphones may fail to connect due to low battery levels, Bluetooth pairing issues, interference from other devices. Or outdated firmware on the headphones.
Conclusion
Hence, this was a list of numerous ways to fix headphones not working in Windows 10 in a reliable operating system Windows 10. When you buy a new pair of headphones after waiting for nearly a week or half to be delivered, and the moment it is unable to function correctly, there is an assortment of feelings of anger, anguish, and ambush.
But we understand your dilemmas and are always ready to satisfy our clients and members in all possible ways and feasible methods.
As you know, Windows 10 has a massive list of errors and flaws for which we provide reliable solutions. Do Like, Follow, and Share our page if you like our services offered, and we assure you of the latest content in unswerving time. Looking forward to your response in the comments section.

Gravit Sinha: Founder of ValidEdge, a problem-solving website, driven by his lifelong passion for fixing issues.