PS4 is a part of life for many casual and household party gamers, as well as game cafes and professional competitions, for a long time now due to its relatively good performance and support to feature most popular game titles. Imagine, on a lovely weekend, you have gathered a few friends at your home and want to host a fun play-off, and suddenly hell breaks down.


It is not a manufacturing defect in your PS4 or any heartbreaking situation. With some tweaks and a few minutes of trial, you can get your PS4 up and running with internet access! Configure the PS4 network settings. Enable UPnP for your router. If the above network settings don’t work, you can try to. Make your PS4 the DMZ server.
Your PS4 can’t connect to the internet! It gives the generic and typical PS4 NAT Type Failed Error! So, what possible solutions can you try in such a situation? Let’s take a look at the possible ways to fix it.
See also: How to Connect an External HDD to a PS4
What Is PS4 NAT Type?
NAT or Network Address Translation converts a public IP address to a Private IP address. It secures the Public IP address and conceals the internal IP address. Then divides one single IP to several clients but with different port numbers. It takes place by making different packets. The public IP address converts to a private one whenever the packet is dispatched. This conversion takes place at the NAT address table at the NAT device. There are 3 types of NAT based on network settings; let us look at those:
NAT TYPE 1- OPEN
This open network system has zero interference from the firewalls, but it comes with various security threats.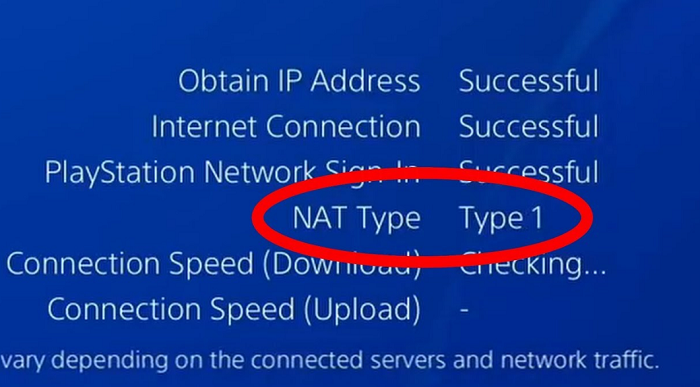 The system and Network are connected directly. It is highly recommended for PS4.
NAT TYPE 2 – MODERATE
It has similar features to type 1 but has better security features and prevents it from any breach. You can play games effectively without any interference.
NAT TYPE 3- STRICT
It is the leading cause behind the error PS4 NAT Type failed as it entirely restricts the Network and is dominated by a firewall.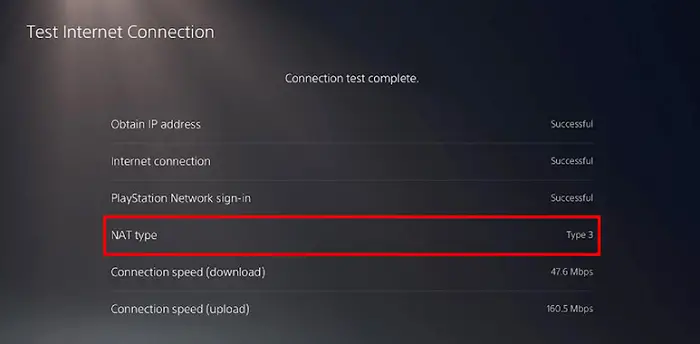 To avoid any errors during playing, you should choose Type 1 or Type 2
Connecting PS4 And Router Via Ethernet Cable
Connecting PS4 and router using an Ethernet cable is the most secure way. The Ethernet cable nullifies all the weak signal issues and ensures proper and stable connection through the router.
It alters all the security glitches and ensures secure network connectivity. Here are the steps to do the same:
- Disconnect the wireless connection between the PS4 and router and connect the router with an Ethernet cable.
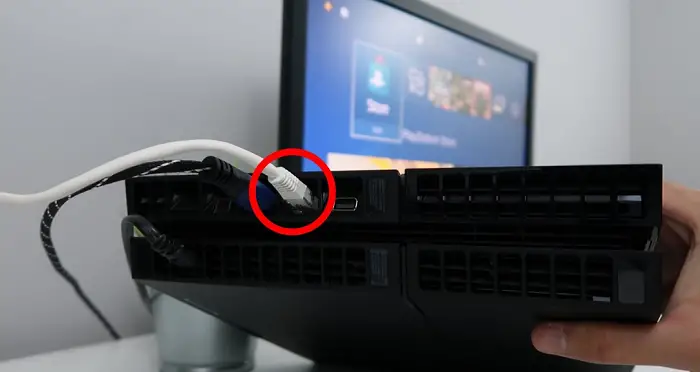
- Connect the PS4 to the ethernet cable of the router. Insert the cable and connect the PS4 console to the router’s wireless Network.
Check whether it is connected or not. Once connected, remove the ethernet cable. After removing, recheck the connection.
Connecting PS4 And Router By Disabling IPV6
At times the router starts to use IPV6 type of connectivity to connect PS4 and servers. This setting can cause PS4 NAT issues, and you can settle those by practicing the following steps;
- Launch the browser and search for the IP address. With the IP address, open the router login page.

- Enter username and password on the login page ( look at the router to find the same)
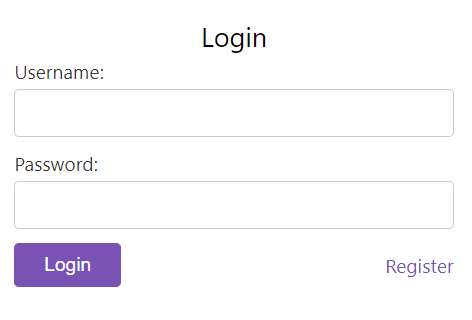
- After successfully logging in, search for the IPV6 setting and disable it. Change the settings to IPV4. This process will solve your NAT problems on PS4.
4 Ways To Fix PS4 NAT Type Failed
In this article, we will discuss the most common and useful fixes to the problem PS4 NAT Type failure and how to resolve the network connection issue. Follow our guide to fix the issue and keep on gaming!
Method 1# Configure Manually the PS4 Network Settings
Suppose a problem exists in PS4’s network settings, giving the notorious PS4 NAT Type Failed error and refusing the internet connection. In that case, you can consider manually configuring the Network settings of PS4. It is not rocket science and does not need the mind of a Network Scientist to do it.
Follow these simple steps
You will be good to go! One catch here, you will need a Computer (or a laptop) connected to the same Wireless or Ethernet Network as the PS4.
Fix: Unidentified Network No Internet Access in Windows
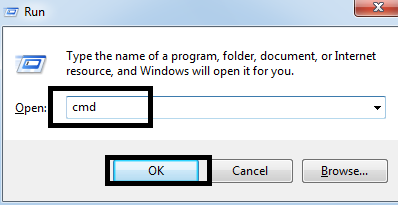
- Open the command prompt in the case of a Windows machine by using the critical combination Windows + R and then typing “cmd” in the text box without quotes, followed by clicking on Run…
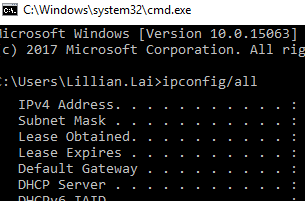
- In the command prompt that pops up, type “ipconfig /all” without quotes and press the enter key. Go through the details of all networks your computer is connected to and remember which one the PS4 is on, with its details.
- Now go to the main screen of PS4, and then choose settings. Open the subcategory Network and choose the option Set Up Internet Connection

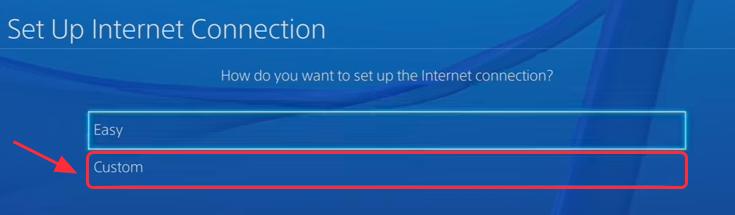
- In the consequent screens, choose Wi-Fi / LAN according to your connection type and then Custom.
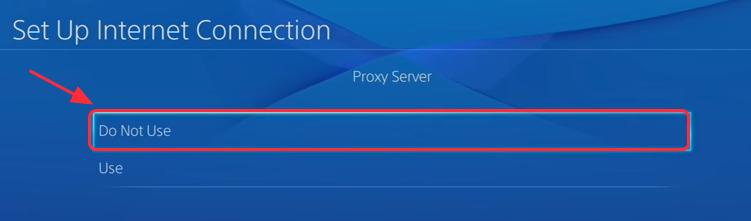
- Choose Do Not Use on Proxy Server configuration screen if you need not use a proxy.
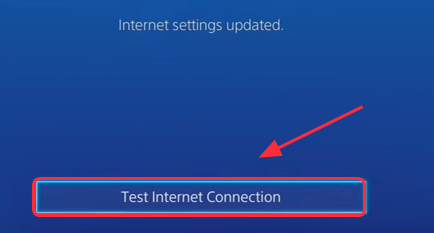
- After entering the correct details, we found in Step 2, save the settings and test the internet.
If you still get the same error PS4 NAT Type Failed, there may be something else wrong in your setup. Try our other fixes to resolve it.
You may also like –
- {Solved} Fix atikmpag.sys Blue Screen of Death (BSOD) Error
- {Solved} Fix api-ms-win-crt-runtime-l1-1-0.dll is Missing
- 11 Ways to Fix Err_Connection_Reset Error in Google Chrome
Method 2# Enable UPnP or Universal Plug n Play on your Router
The universal plug-play option on your Router allows devices to connect and automatically configure without requiring any special configuration. And is recommended for devices like PS4. To enable it,
On a device connected to the same Router as the PS4, go to the Router’s configuration webpage, which you can find listed on the box or label of Router.
In the settings, find the UPnP or Universal Plug and Play for all devices option and enable it.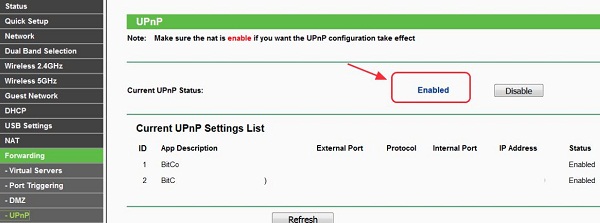
Different routers will have different interfaces for settings, but this option is found in most routers in Advanced Settings or Advanced Setup. Save the settings now.
Power off your PS4 and Router, then power them both on.
See if that resolved the error PS4 NAT Type Failed.
Method 3# Using your PS4 as the DMZ or De-Materialized Zone Server
The DMZ or De-Materialized Zone is the small network or subnetwork which acts as a bridge to connect the internal network to an untrusted network, in other words, out the network, to the internet.
To enable internet access on the PS4 and eliminate the PS4 NAT type Fail Error, we will configure the PS4 as a DMZ server.
To do this,
- Go to the main screen on the PS4. Go to Settings and then Network. Note the IP address mentioned in the details when selecting View Connection Status.

- Go to the Router’s configuration page using a browser on any device, such as a laptop, desktop, or mobile connected to the same network as the PS4. It should have an address something like 192.168.1.1, which is generally on the label on the back of the Router or the box the Router came in. Log in to the page using the necessary details. The default ID and password also should be on the list where other information like the serial number of the Router is on print or along with the host address.

- Navigate to the DMZ menu from the Router in its settings. It should be present in the port-forwarding or NAT settings of the Router.
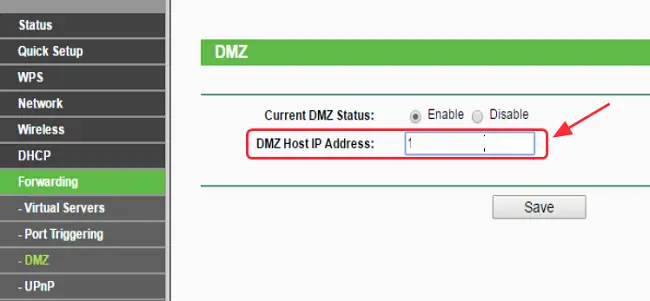 Enter the IP address of the PS4 we found in Step 1, and save the settings.Reboot the Router and PS4 to see if they resolved the issue with the PS4 NAT Type Failed.
Method 4# Using Port Forwarding on Your Network
When the network packets (Single unit containers on the network carrying source, destination address, and the information being sent) pass through the Router. The Router uses the devices’ port number and internal IP address to identify which packet came from where uniquely. And which packet should be let pass through it?
Sony, the makers of PS4, have provided us with the ports it needs for a successful connection. So, we can forward only those ports. Here is how you should be able to enable port forwarding on your Router:
- On any device such as mobile or laptop, or desktop connected to the same network as the PS4, visit the Router’s homepage in a browser like Chrome or Firefox.
- Log in using the credentials for the Router and navigate the settings page to the Port Forwarding page, generally found in Advanced Setup or Advanced Settings.
- Before adding the ports, you should ensure that the Name and IP address has been assigned to the PS4 on the network.
- Now add the following ports to the port forwarding table on your Router:
80(TCP), 443(TCP), 3478(TCP and UDP), 3479(TCP and UDP), 3480(TCP). - Now save the settings and shut down both the Router and the PS4. Now power them on and see if the issue still persists.
Also, Check: ERR_CACHE_MISS In Google Chrome
FAQs
How do I fix my NAT-type failure?
You can fix your NAT type error by trying the following methods, turning on the UPnP again, Manually resetting the PS4 settings, Checking for a stable internet connection, Editing the router’s configuration, etc.
What is the issue in NAT type 3 on PS4?
Any restriction or blockage on the Network might prevent communication between the console and the Network. It can occur because o the changes in the router settings, or it is not compatible with the console.
What is a PS4 voice chat NAT type error?
This error occurs when the internet is not rightly connected to the gaming console, and you cannot chat. You receive a pop message like ps4 cannot chat due to nat type on your screen in case of an error.
How to change the NAT type on a PC?
You can do so by visiting the start menu. Go to the control panel and search for Network & Internet. Click on Network and sharing center and select change advanced sharing settings. Select Turn on network discovery and then save changes. You are all set to go.
Conclusion
Using these 5 fixes for PS4 NAT Type Failed, you should now be able to get an internet connection on your PS4 and update the game data, play online, and much more. Hope you found this helpful article. Happy gaming!
See also: How To Fix- PS4 Error SU-42118-6 [4 Ways]

Gravit Sinha: Founder of ValidEdge, a problem-solving website, driven by his lifelong passion for fixing issues.