Whenever you switch on your PC, the saved Wi-Fi connects automatically; however, Windows 10 users face the problem of not connecting automatically. In the article, you will learn about the fixes for Windows 10 won’t automatically connect to WiFi.
The reason for this problem could either be a normal glitch in your system or a system upgrade. In the other scenario, the Wi-Fi adapter settings have changed to off to save power. Click on the WiFi icon in the taskbar. Select your WiFi network from the list of available networks, check the ‘Connect automatically’ box, and click ‘Connect’.

If the method mentioned above did not help, don’t worry! We have more methods mentioned below. Happy Reading!
See Also:
- Fix Windows Could Not Automatically Detect This Network’s Proxy Settings
- 9 Methods On How To Clear Cache In Windows 10 Using Run
Methods To Fix Windows 10 Won’t Automatically Connect To WiFi
We have brought you various methods to fix the Windows 10 won’t automatically connect to WiFi problem. Read this article. If you want to fix cannot see the wifi on Windows 10.
Reconnect Your Wi-Fi
This method should be for those whose system has a simple bug to fix when Windows 10 doesn’t connect to Wi-Fi.
- On your system, click on the Wi-Fi icon from the taskbar to open the available network list.
- Now, you need to click on the Network and Internet Settings option.
- You need to choose Manage Wi-Fi Settings under the Wireless Network Connection section.

- You need to click on the name of your wireless network and then choose the Forget option.
- Now, you need to restart your PC, which will fix any simple bugs in your network connectivity.
- Now repeat step 1 and select your Wi-Fi network from the list.
- While connecting to your Wi-Fi, checkmark the Connect Automatically option and then hit the Connect option.

- After you enter the required details to connect to Wi-Fi, it will refresh itself to connect automatically whenever you restart or shut down your system.
Wi-Fi Adapter Settings
You need to change and turn off the Wi-Fi adapter settings if your PC doesn’t recognize the Wi-Fi after a system upgrade in Windows 10. Use this method if your Windows 10 won’t automatically connect to WiFi, and you need to do that manually.
- Open the Device Manager from the menu by right-clicking on the Start button.
- Now, you need to right-click on the Network Adapters section and expand it.
- Now, from the list of Wi-Fi adapters, find your computer’s adapter and right-click on it to open the Properties section.

- In that window, head to the Power Management tab where you need to Uncheck the Allow this computer to turn off this device to save power option and click on the Ok button.
Now, after you apply these changes to the Wi-Fi adapter settings, your Wi-Fi should connect automatically when your system restarts, wakes up from sleep, or shuts down.
See Also: 6 Ways To Fix Wi-Fi Doesn’t Have A Valid IP Configuration
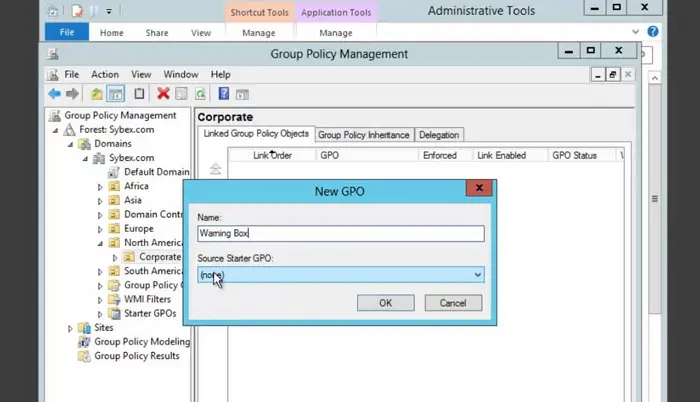
Create Group Policy
To overcome the issue of Wi-Fi not connecting automatically on your Windows 10, you can try to edit or create a group policy via the registry editor.
- Right-click the Windows icon or press Windows + R to open the Run window.
- In the text field, type regedit and press enter button.

- Now you need to navigate or follow the path mentioned below: HKLM\Software\Policies\Microsoft\Windows\WcmSvc\
- If the Group Policy subkey doesn’t exist with WcmSvc highlighted, you need to create one.
- To do so, right-click on WcmSvc, select the New Key Option, and name it Group Policy.
- Click on the key you created, and right-click New DWORD (32-bit) from the right pane.
- Doing this will create a value to name fMinimizeConnections and select the OK option.
When you complete and create the Group policy, you need to reboot your system and then check the automatic Wi-Fi connection.
Network Troubleshooter
Before you try any other method to fix your Windows 10 won’t automatically connect to WiFi problem, you run the Network Troubleshooter. This Windows Troubleshooter checks for software issues and analyses the Wi-Fi hardware. Also, it will access the Microsoft servers to check the internet connectivity so that it can be fixed.
As soon as it is done checking, it will inform you and fix any discrepancies automatically. Follow these simple steps to troubleshoot and understand how to connect to Wi-Fi in Windows 10 to fix any bugs that it finds.
- Simply, you need to right-click on your Wi-Fi icon on the taskbar to choose the Troubleshoot Problems option.

- It will now start the process of Windows troubleshooting, and you need to wait until it finishes.
Wi-Fi Direct Virtual Adapter
Wi-Fi Direct Virtual Adapter is a portable hotspot installed on your PC that supports the sharing of your internet. Disabling this function might solve the issue where your Windows 10 won’t automatically connect to wifi as, by default, it is enabled.
- Right-click the Windows icon or press Windows + R to open the Run window.
- In the text field, type devmgmt.msc and press enter button.
- The Device Manager window will open up where you need to click on the View and then Show Hidden Devices options.
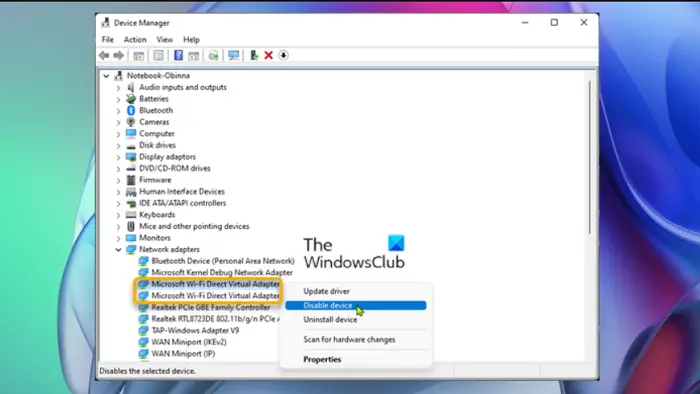
- You must expand the Network adapter category and navigate for Microsoft Wi-Fi Direct Virtual Adapter.
- On that option, you need to right-click to choose Disable device.
You need to restart your PC now to check if your Wi-Fi is connected automatically or not. This method should also work with older devices where the adapter setting is enabled but isn’t supported.
You will also observe that after applying these changes to the settings, you can use your mobile hotspot feature in Windows 10. If disabling this doesn’t make any difference, you can enable it again by following the same steps.
See Also: Fix Windows Could Not Automatically Detect Network’s Proxy Settings
FAQs
What is the reason that I need to reconnect Wi-Fi again?
The reason that you have to reconnect your Wi-FI every time could be that Bluetooth is interfering. You can try turning off the BlueTooth to check if you still need to do the same or if it is fine. If it helps, either you need to stop using your BlueTooth or switch to 5Ghz bandwidth.
Can I connect to Wi-Fi before logging in to Windows?
Yes, you can connect to the Wi-Fi even before you log in to Windows. From the taskbar or in the right-bottom corner, you can choose the preferred network to connect to the internet. After doing this, you can log in to Windows.
How can I instruct Windows to connect Wi-Fi automatically?
You can tell Windows to connect saved Wi-FI automatically whenever you open your PC. Simply, you need to click on your Wi-Fi, and a new window will appear on the screen. From there, choose the Wireless properties option and select Start this connection automatically under the Connection tab.
Conclusion
All the methods we discussed to solve the Windows 10 won’t automatically connect to WiFi problem will work for you. You must try one after the other if a method doesn’t solve the internet connectivity issue in the first attempt. It is essential to keep the pointers in mind while implementing these methods, as stated.
These mysterious errors or issues are not as mysterious as it seem. The computer is designed in a way that it does a few things on its own when it is heavily loaded or attacked by a virus. We can solve most of these problems independently with the help of the internet and people who provide solutions to such issues.
See Also: Problem With Wireless Adapter Or Access Point? Fix It Right Away!

Gravit Sinha: Founder of ValidEdge, a problem-solving website, driven by his lifelong passion for fixing issues.